
Update 3.43.0
We’re excited to announce version 3.43.0 of the web and mobile apps, with tons of new features and capabilities!
Please see the full release notes for version 3.43.0 below:
Web App 3.43.0
Equipment Forms
You can now pre-configure forms for equipment profiles. This makes it much easier to submit forms for equipment and also enables unique form workflows for different types of equipment.
When a form mapping is set up for an equipment profile, users can quickly trigger and submit a form with a new shortcut when viewing the equipment profile.
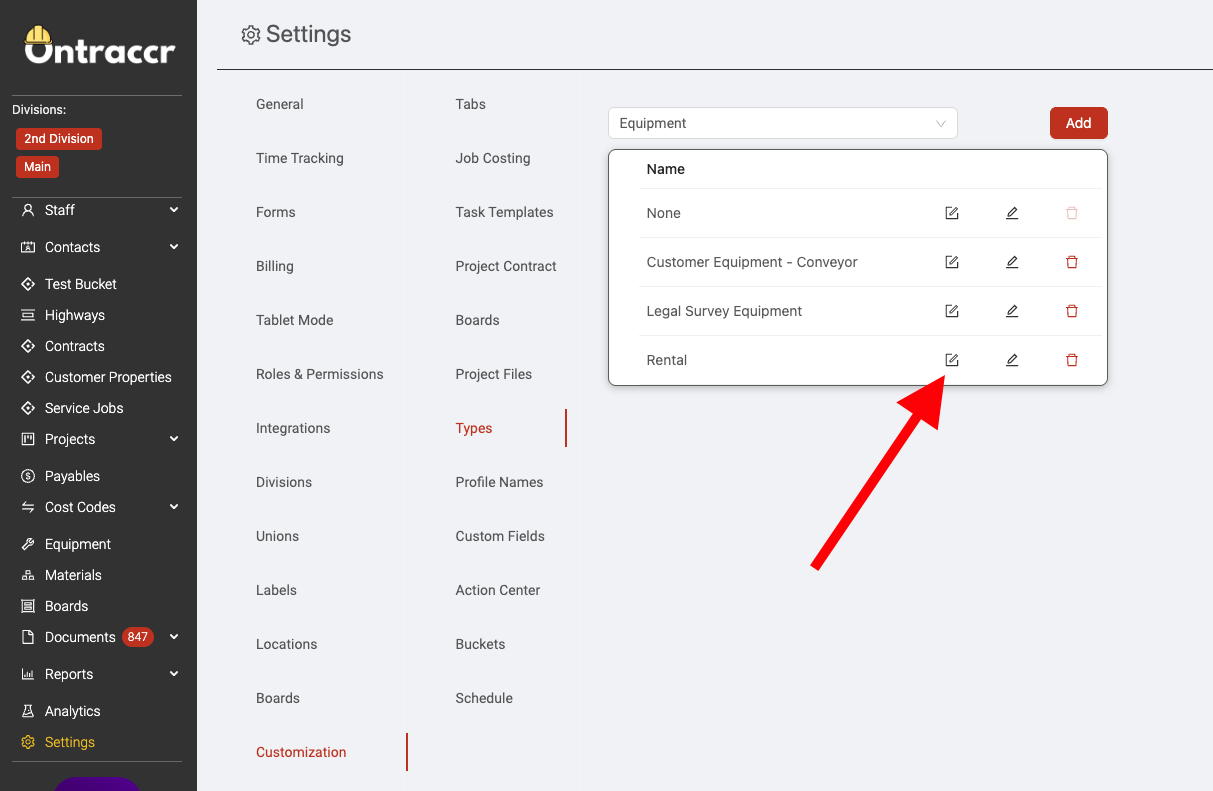
To configure form mappings for equipment profiles, go to the Settings > Customization > Types page and select 'Equipment' as the profile type in the dropdown at the top of the page.
Click the 'Form' icon next to the specific equipment type you'd like to create the form mapping for.
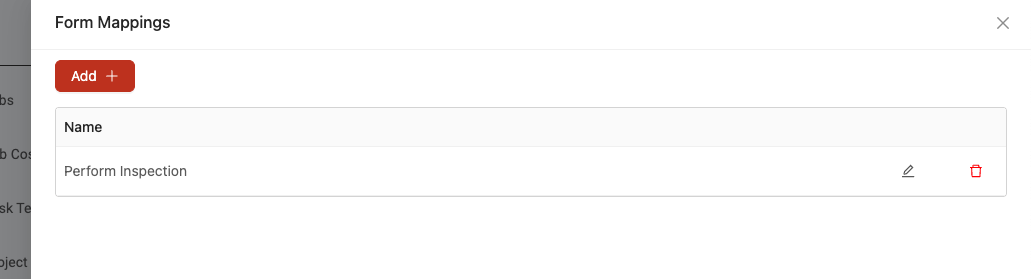
This will open up the form mappings slider. You can configure as many form mappings as needed for any equipment type. Click 'Add' to create a new form mapping. Next to each saved form mapping, you can also click the 'Edit' icon to edit an existing form mapping or the 'Delete' icon to delete an existing form mapping.
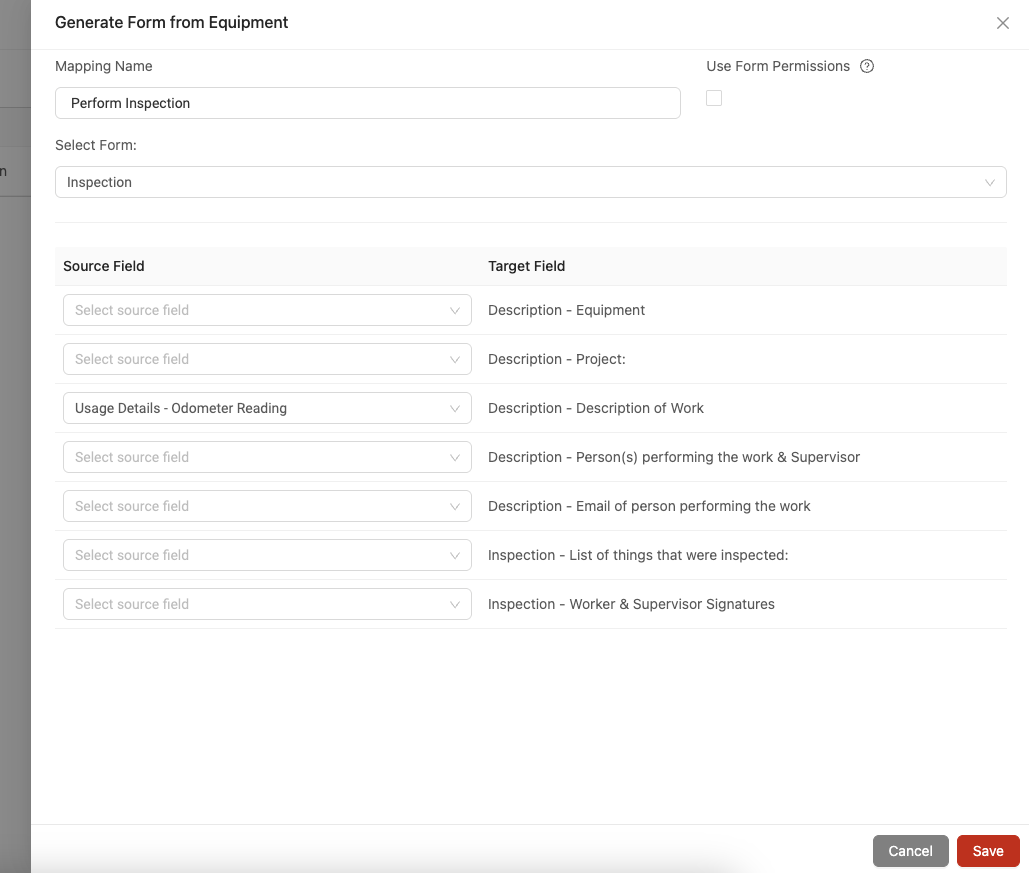
When configuring a form mapping for the equipment profile, give the form mapping a name in the Mapping Name field, this is how the form mapping profile will be identified when triggering the form from an equipment profile. Select the form you'd like to map using the 'Select Form' drop-down.
From here, map information from the equipment profile (the 'source' fields) into the fields of the form (the 'target' fields). This will automatically transfer the information from the equipment profile into the form when triggering the form. Once finished, click 'Save' in the slider to save the form mapping for the equipment profile. Note: if the form template contains an Equipment-based 'choose one or more' field (dropdown), it will pre-fill automatically with the name of the equipment that the form was initiated for.
To trigger an equipment form, click the new 'Form' icon when viewing the equipment profile. After clicking the form icon to generate a form, a slider will pop up with two drop-down options which ask you which form you'd like to generate. Here you can either select to generate a new form manually (Select Form) or pick from a saved form mapping for the equipment (Select Form Mapping).
The 'Select Form Mapping' drop-down option allows you to generate any form using a pre-configured form mapping. Click into this to select from any of the saved form mappings you'd like to use.
Once you select the form mapping, the slider will show you the pre-configured field mappings from the form mapping profile. This still gives you a chance to edit any of the mappings before clicking 'Continue' to begin completing the form.

Manual Shared Forms
Manual forms can now be shared amongst a group of users, making it easy for multiple people to collaborate on the same form before submitting it.
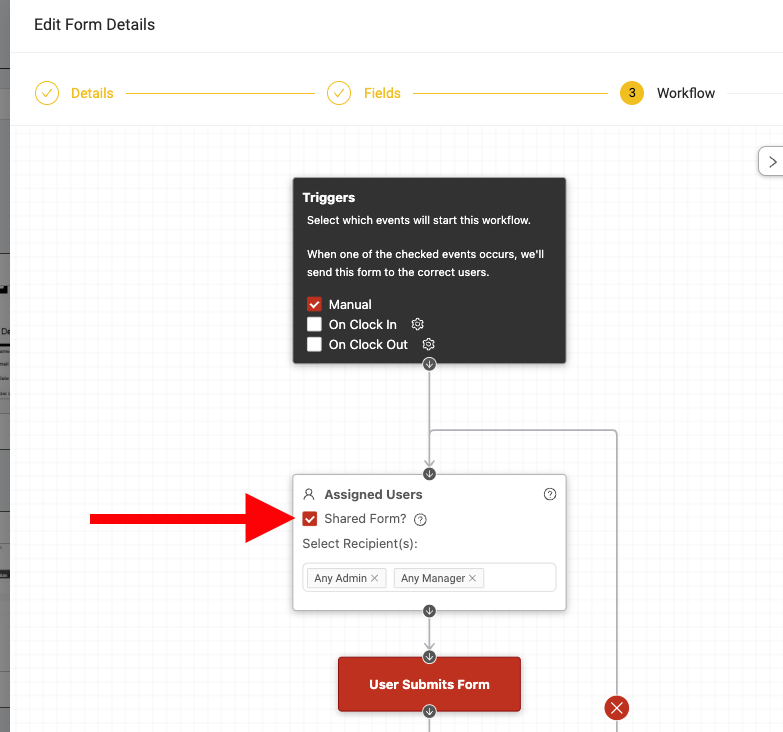
To enable a manual form to be shared, simply click to enable the 'Shared Form' checkbox within the 'Assigned Users' step of the form template's workflow. When a manual form is configured to be shared, the form will be shared to all of the Assigned Users the moment any user opens the manual form and saves it as a draft. The draft will then immediately be available for all Assigned Users in their 'Assigned' forms page just like any other form drafts. The moment the form is submitted by any user, it will be removed from everyone's 'Assigned' forms page.
Expanded Use of GPS Coordinates
Ontraccr now offers even more ways to use GPS coordinates, making project locations much more flexible throughout the experience.
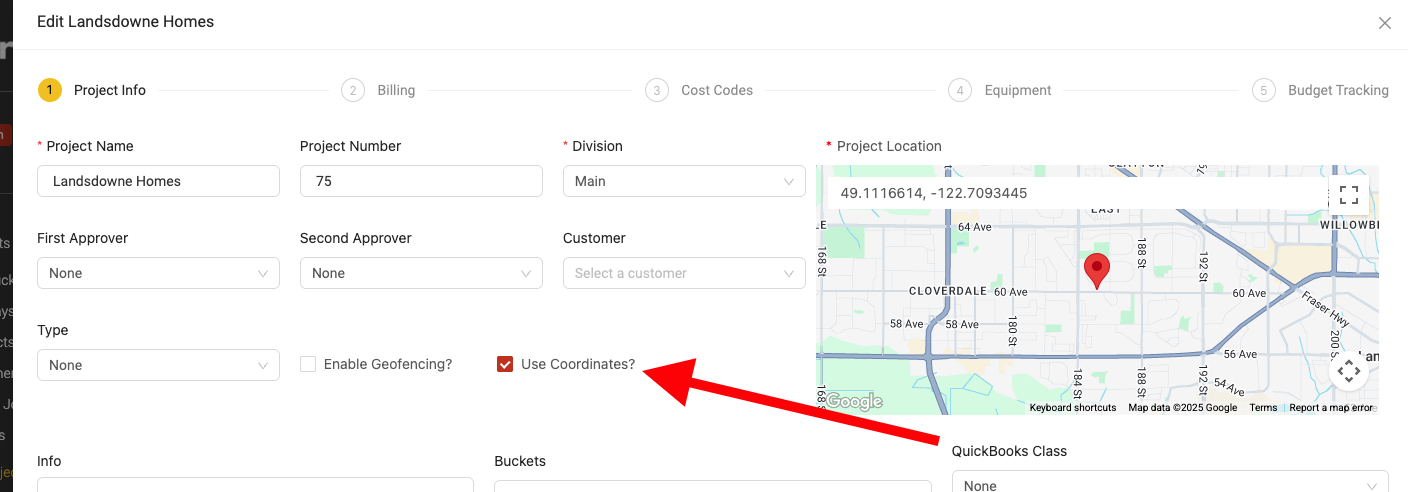
Project addresses now support GPS coordinates
When configuring the address of a project profile, you can now add GPS coordinates by clicking to enable the 'Use Coordinates?' checkbox as shown below. Once the checkbox is enabled, simply type or paste the GPS coordinates into the address bar and hit the enter/return key on your keyboard to register the coordinates in the map. After a GPS pin has been added into the map widget, you can also click and drag the PIN to move it to a new location on the map to use more precise coordinates.
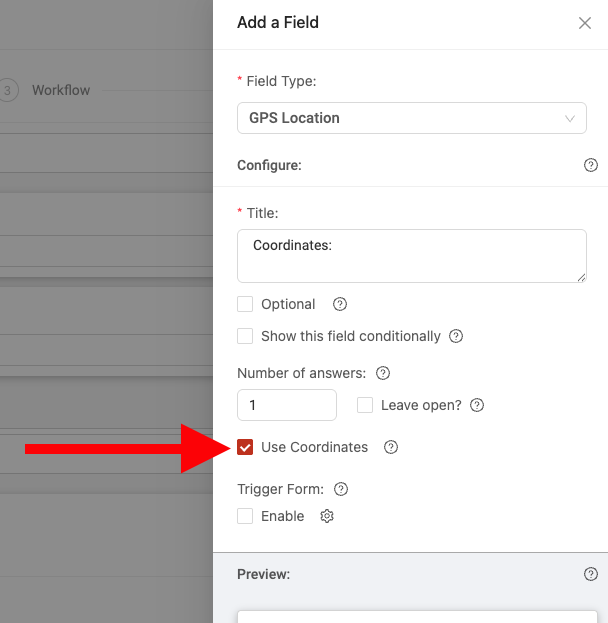
'GPS Location' field now supports live, draggable GPS coordinates
The 'GPS Location' field can now also accept GPS coordinates whenever users are entering a location. To enable GPS coordinates, simply click to enable the 'Use Coordinates' checkbox when configuring the 'GPS Location' field in your template.
New Time Entry Table Field Configuration Options
'Time Entry' Table fields now have many more options to automate and simplify data input as much as possible.
Preloading of Start & End Times
The Time Entry table can now be configured to pre-fill start and end times for everyone added into the table.
To set this up, start by adding 'Date/Time' fields into your template for the start and/or end times as needed (it's best to hide the date field for each).
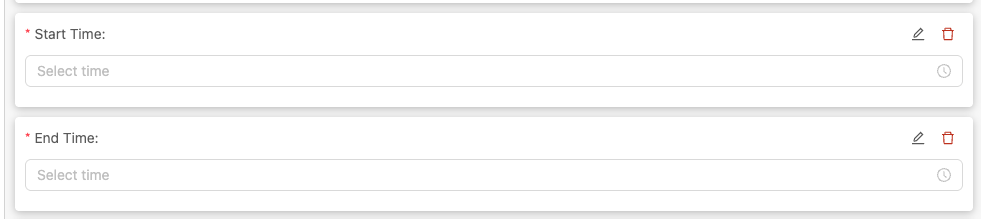
Next, to link the fields for start and/or end times when configuring the Time Entry table field, simply click into the new 'Preload Start Time' and/or 'Preload End Time' dropdown field(s) to select from the fields you've added for start/end time in each.
Column Renaming
We've also made it possible to rename any of the columns in the Time Entry table field so that your company can use your own naming conventions for all the different fields.
To rename a column, simply click into the editable text box for the column name and start typing your custom name for the column. Whenever you apply a custom name to a column, the app will still show you what the system default name is for the column to help you reference this moving forward when viewing the data in other parts of the Ontraccr experience. For example, even though the time entry table uses 'Activity Code' as a custom column name, the platform may still use the system default name ('Cost Code') in others parts of the software, so it's important to always be aware of the system default name for that reason.
Link Equipment Hours to User Hours
The Time Entry table field can also now be configured to pre-fill equipment hours into an 'Equipment' table field based on the hours entered for the 'Assigned User' of that equipment profile. This is useful, for example, if the piece of equipment should always match the hours worked by the user.
To configure this, you must do so in the 'Equipment' table field within the form template. Simply link the equipment table field to the time entry table field by selecting the time entry table field in the 'Link Equipment Table to Time Entry Table' dropdown field as shown below.

'Update Equipment' Workflow Step
Form workflows can now update equipment profiles using a brand new workflow step called 'Update Equipment'.
In this first version of the workflow step, the form workflow can transfer an equipment profile from one location/project to another when someone submits the form. This can be used to track the current whereabouts of the equipment profile and it will also check the equipment out of the previous location and into the new location for time tracking purposes.
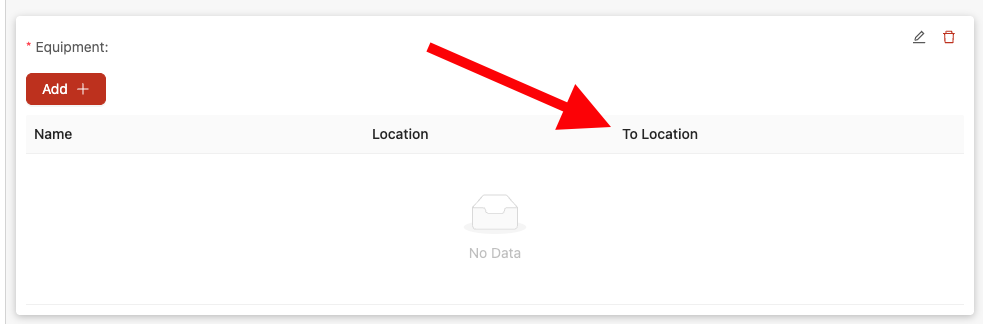
In order to use the 'Update Equipment' step in your workflow, you must first add the new 'To Location' column into your form's 'Equipment' table field. This is what the user will fill in during the form submission to transfer the location of the equipment profile.
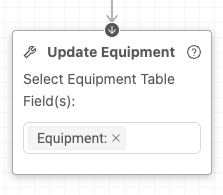
Once this column is added into the Equipment table field of your form, you can then proceed to the form's workflow and add the 'Update Equipment' step. When configuring the workflow step, link it to the Equipment table field by selecting the field within the 'Select Equipment Table Field(s)' dropdown option in the workflow step as shown below.
'Unassigned Shifts' Slider for Field Schedule
We've added a new way to queue up and organize your unassigned shifts in the Scheduling > Field Schedule page: introducing the unassigned shifts slider!
Within the unassigned shifts slider, you can create any custom categories for your unassigned shifts to keep them organized easily.
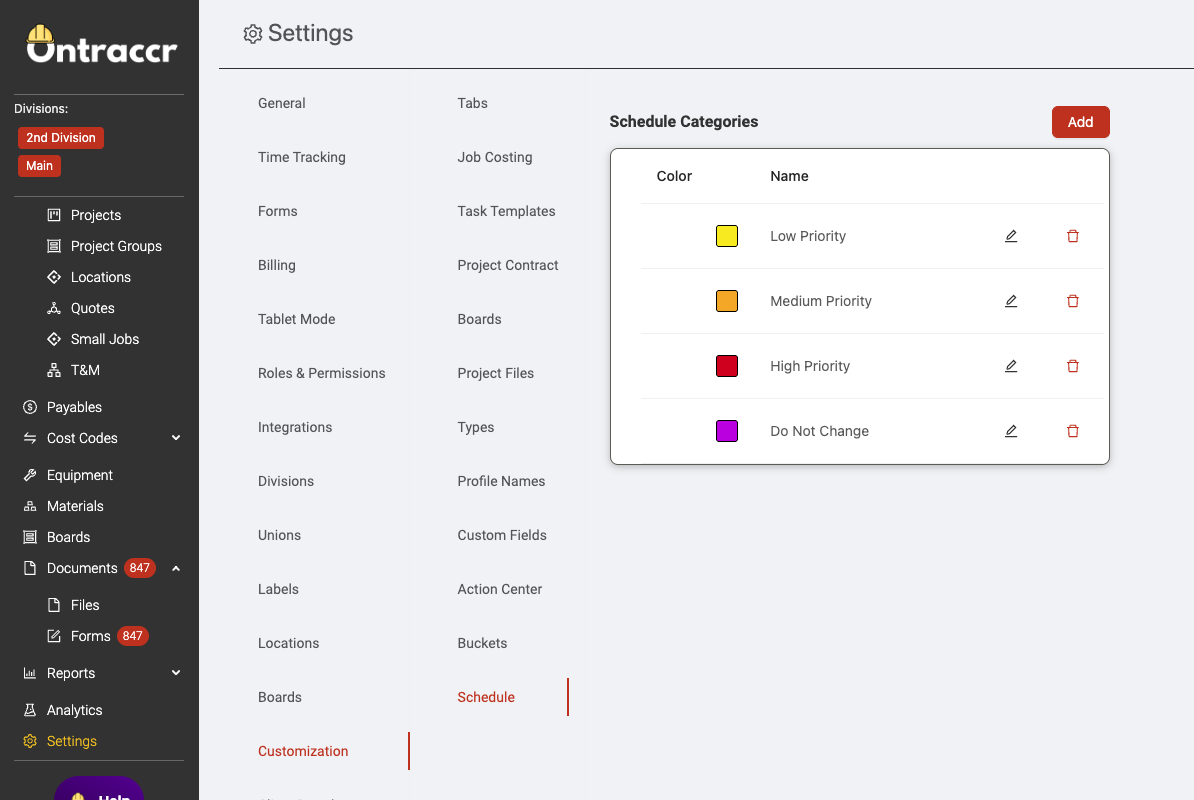
To create custom categories for the unassigned shifts slider, simply navigate to the Settings > Customization > Schedule page. Click 'Add' to create a new shift category, give it a name and assign an optional colour to it. Click 'Edit' or 'Delete' next to any of the existing categories in this page as well.
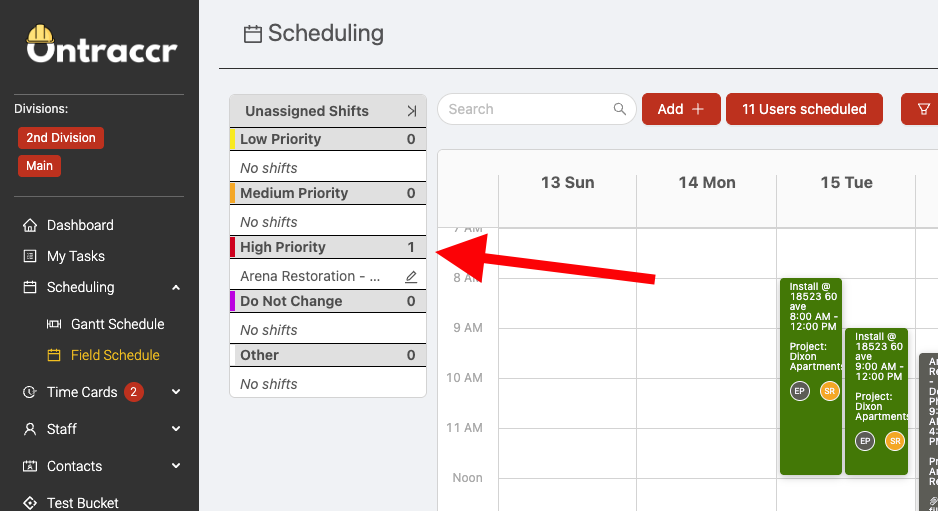
When using the unassigned shifts slider in the Field Schedule, click the 'Edit' icon next to any of the unassigned shifts to open the normal shift slider to edit the shift details and/or assign users.
You can also drag and drop the shift into any of the custom shift categories.

New 'Dispatch' Workflow Step Options for Shift Tables
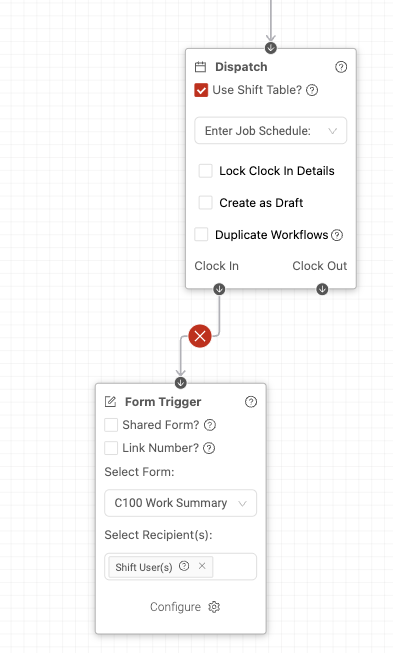
The 'Dispatch' workflow step has been updated to offer more options for shift tables within forms. Now, when linking the 'Dispatch' step to a 'Shifts' table field in your form, you can configure both 'On Clock In' and 'On Clock Out' connections of the workflow step to trigger events whenever users clock in and/or out of any of the shifts in the shifts table.
And since the shift table can have multiple shifts configured, you can also configure the 'Dispatch' step to trigger the 'On Clock In' or 'On Clock Out' workflow events for each individual shift in the table or trigger the events once whenever a user clocks in to any of the shifts in the table. If you want the triggered events to trigger for each individual shift in the shifts table, click to enable the 'Duplicate Workflows' checkbox in the Dispatch workflow step. Otherwise, if you only want the triggered events to trigger for a single shift in the shifts table, leave this unchecked.
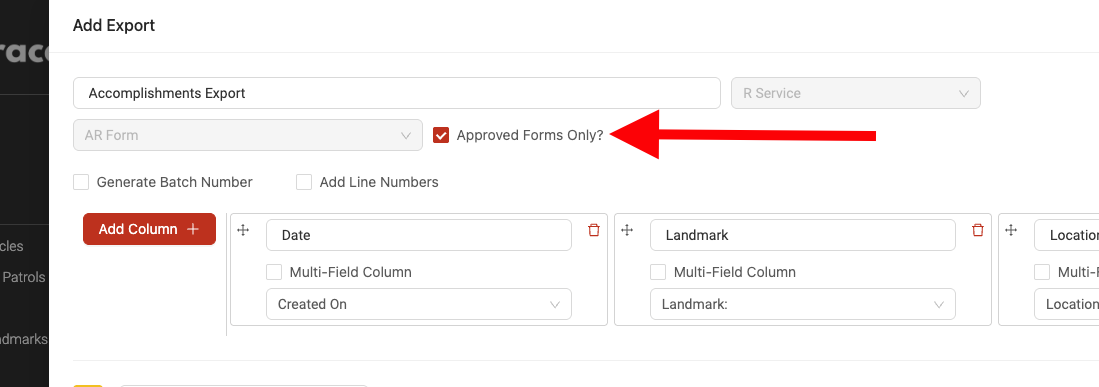
Form Exports For Approved Forms Only
Form exports can now be configured to only export data for approved forms.
To configure this in your form export template, simply click the new 'Approved Forms Only?' checkbox when configuring your form export template.
Web App Improvements & Fixes
- We've now added the ability to re-distribute time after it has been initially distributed. To re-distribute time for a previously distributed time entry, simply click the 'redistribute' button next to the time entry in the Time Cards pages. If the web app detects that the time entry came from a previous distribution, it will open up the previous distribution, making it easier to redistribute the entire set of time entries again.
- We've added new options for GPS coordinates in custom exports. You can now select individual options for latitude and longitude in individual columns as well as a combined format.
- We've added a detail slider to the 'Number of submissions' and 'Number of cards' analytics reports, so you can now click into any of the data points in the charts for these two reports to see details of where the data was sourced from (form submissions or board cards). This makes it much easier to drill-down into the data!
- We've added a new ‘Group Recipients Together’ checkbox to the 'Send an Email' workflow step. This controls whether you'd like the email thread to be sent individually to each of the recipients or if you'd like the email to be sent to a single thread with all recipients grouped together.
- We've changed the way the in-form triggers work. Now, forms triggered by specific fields in a parent form can submit the triggered forms instantly.
- The equipment page can now be filtered by which project the equipment is currently or was previously located at.
- You can now add buckets for equipment profiles.
- We've unlocked the folder permissions for the high-level automatically-generated 'Projects' folder, making it easier to control permissions for the entire set of project folders.
- Form exports now support data from repeated form sections.
- We've added Office Phone Number, Mobile Phone Number, Fax Phone Number, and Website fields to the list of available attribute options for customer profiles when configuring the 'Attribute' field.
- There's a new 'Manage Own Teams' role permission to control whether user roles can only edit and manage their own team profiles as opposed to all of the team profiles across the company account.
- 'Shifts' table fields can now be mapped to 'Time Entry' table fields across the platform.
- We've made some changes to the 'Material' table field as follows:
- The 'Total Labour Cost' column has been renamed to 'Total Labour Price'.
- The calculation of the 'Material Total' column has been updated to exclude the labour price.
- Added a new 'Total Labour Cost' column which accurately displays labour costs.
- We've added options for 'before' or 'after' a due date to the task creation workflow automation within board workflows.
Mobile App 3.43.0
Equipment Forms
You can now pre-configure forms for equipment profiles. This makes it much easier to submit forms for equipment and also enables unique form workflows for different types of equipment.
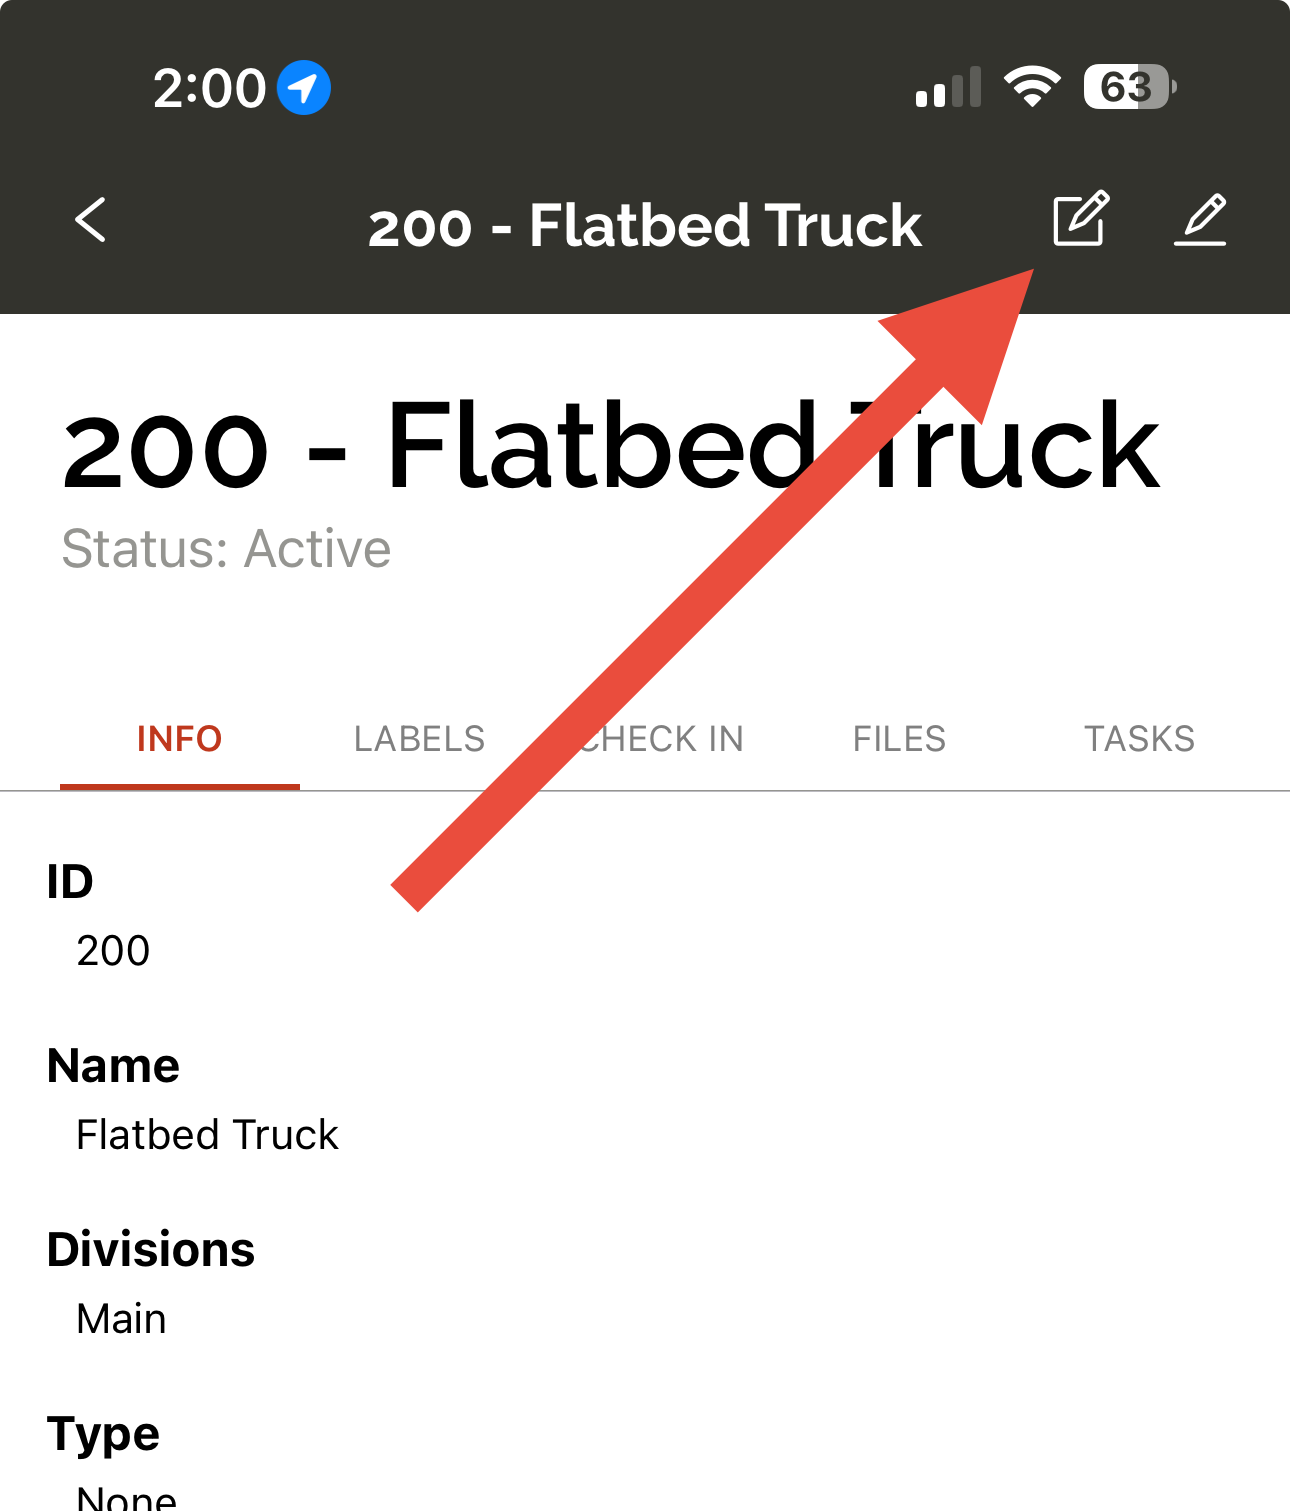
When a form mapping is set up for an equipment profile, users can quickly trigger and submit a form with a new shortcut when viewing the equipment profile.
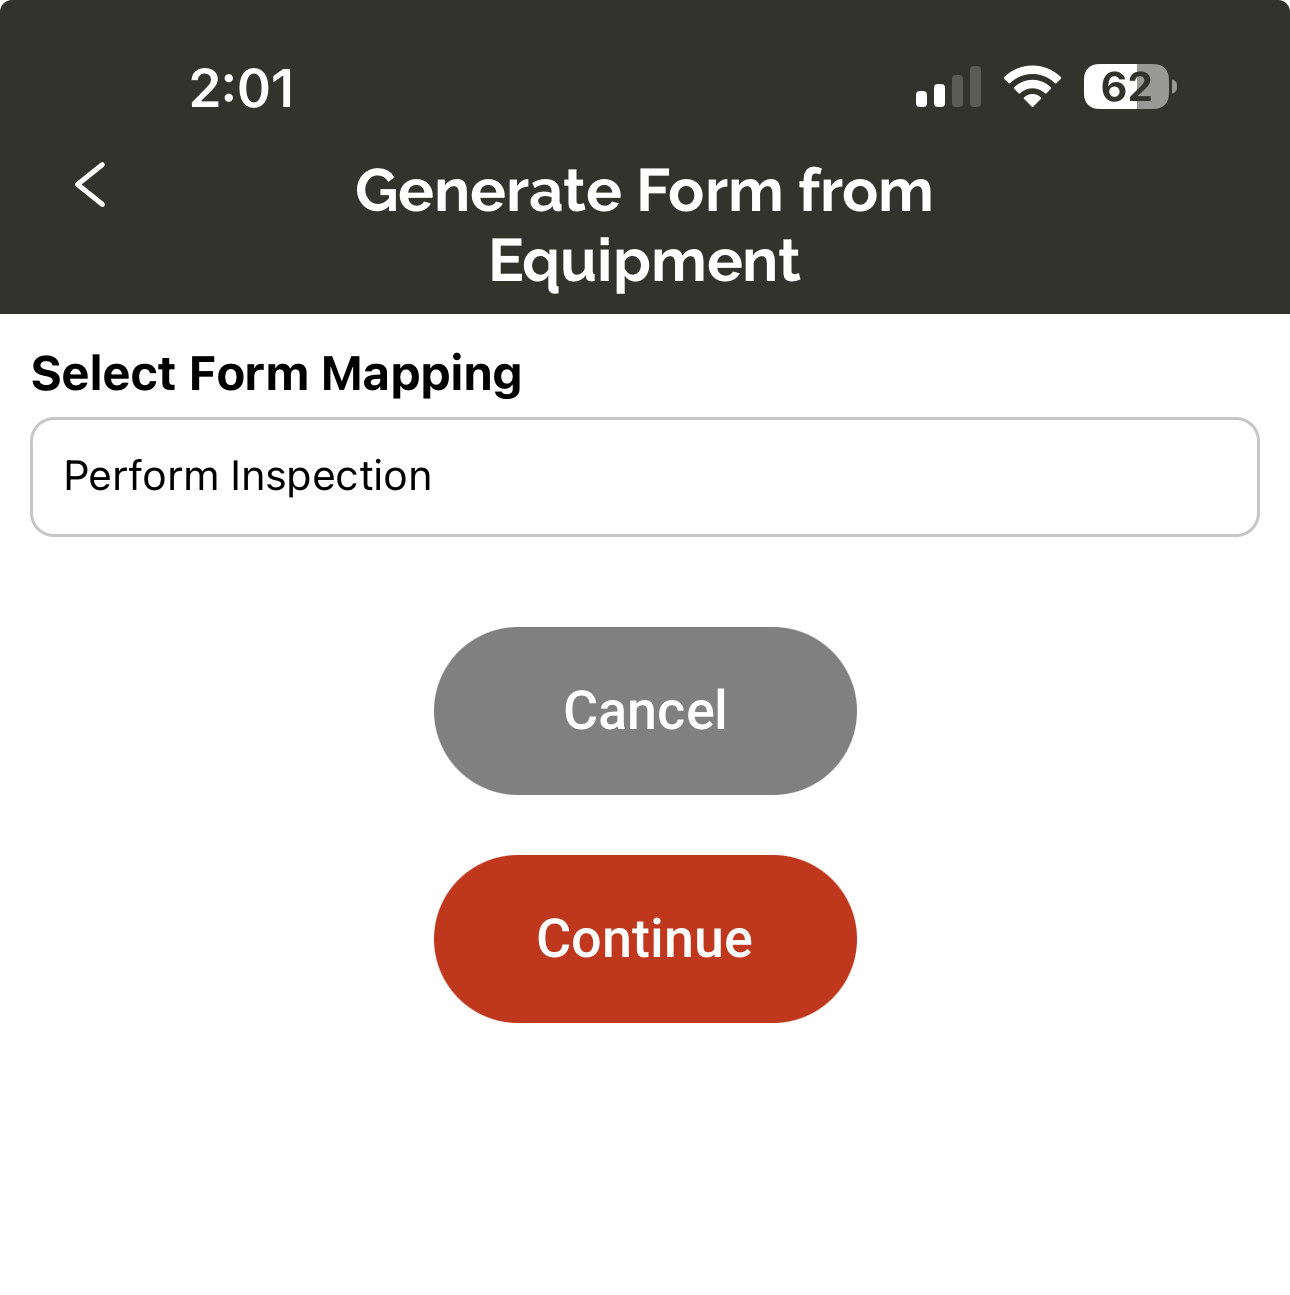
To trigger an equipment form, tap the new 'Form' icon when viewing the equipment profile. After clicking the form icon to generate a form, a slider will pop up where you can pick from a saved form mapping for the equipment (Select Form Mapping). Select the form mapping and tap 'Continue' to proceed to completing and submitting the form.
Mobile App Improvements & Fixes
- Fixed an issue where attachments sometimes wouldn't save in a form draft properly.
- We've changed the way the in-form triggers work. Now, forms triggered by specific fields in a parent form can submit the triggered forms instantly.