
Update 3.24.0
We’re excited to announce version 3.24.0 of the web and mobile apps.
Please see the full release notes for version 3.24.0 below:
Web App 3.24.0
New 'Update Form' and 'Create Board Card' Workflow Steps
'Update Form' Workflow Step
The new 'Update Form' workflow step can be used to update an existing form when submitting another form. For example, let's say you want to update a larger work order (the 'parent' form) by submitting a smaller time & material form, you can use the 'Update Form' step in the smaller form's workflow to go and update the data in the larger work order form.
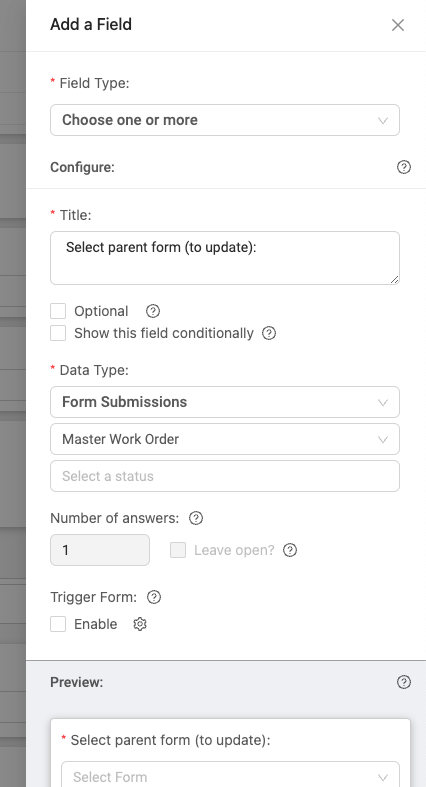
To add the 'Update Form' step into a workflow, you must first add a 'choose one or more' field to the form's workflow with a 'Form Submissions' data type. This allows the user to select which form they'd like to update when submitting the form. Select which specific form template the form can update, and you can even select specific statuses that the form must be in (for example, perhaps they should only update work orders that are 'in progress' instead of 'completed').
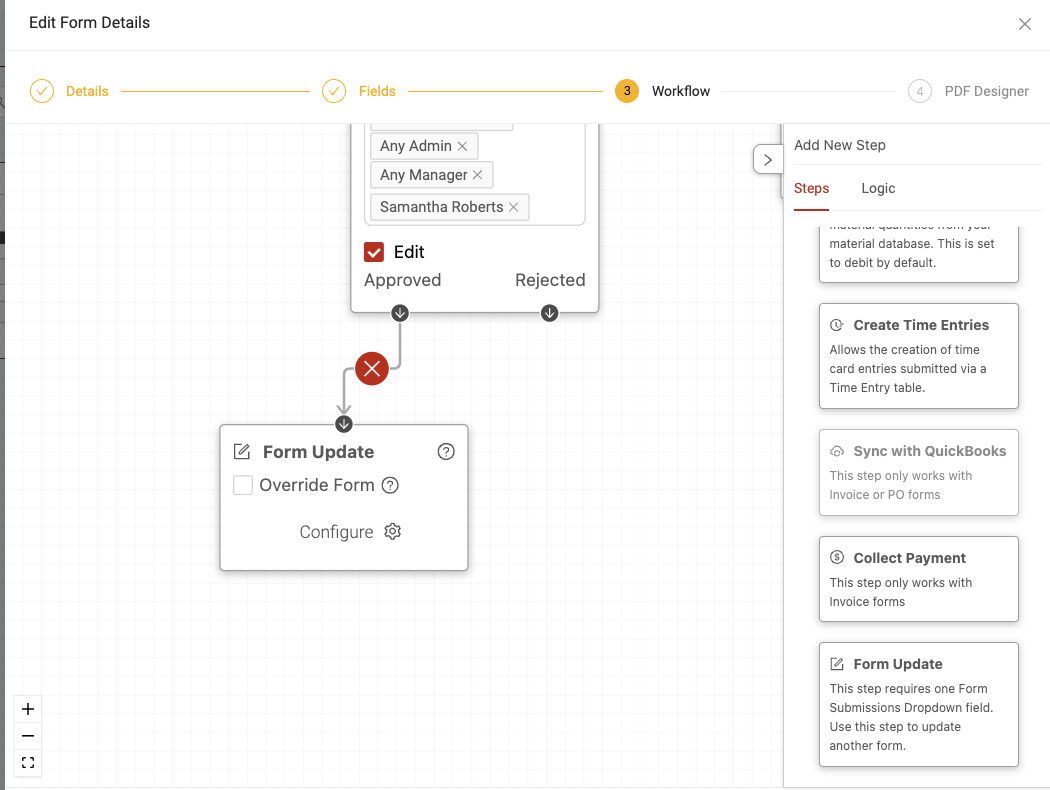
Once you've added the above 'choose one or more' field to the form, in the form workflow, you can then add the 'Update Form' step.
When adding the step, you can choose to enable the 'Override Form' option. If this is enabled, the form data will be overwritten with the new data. If disabled, the form data will be appended to the existing data.
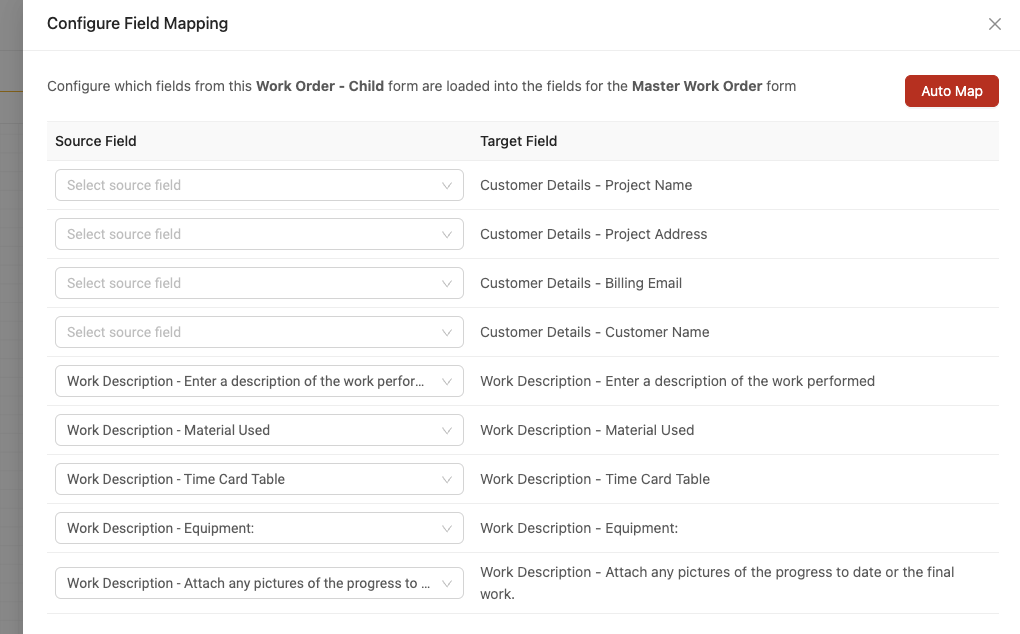
Next, you can map the fields by clicking 'Configure' on the workflow step. This is where you can decide which fields in the form (the 'source' fields) should map into the fields of the parent form (the 'target' fields). This will automatically transfer the information from the first form into the parent form when moving on to the next step.
'Create Board Card' Workflow Step
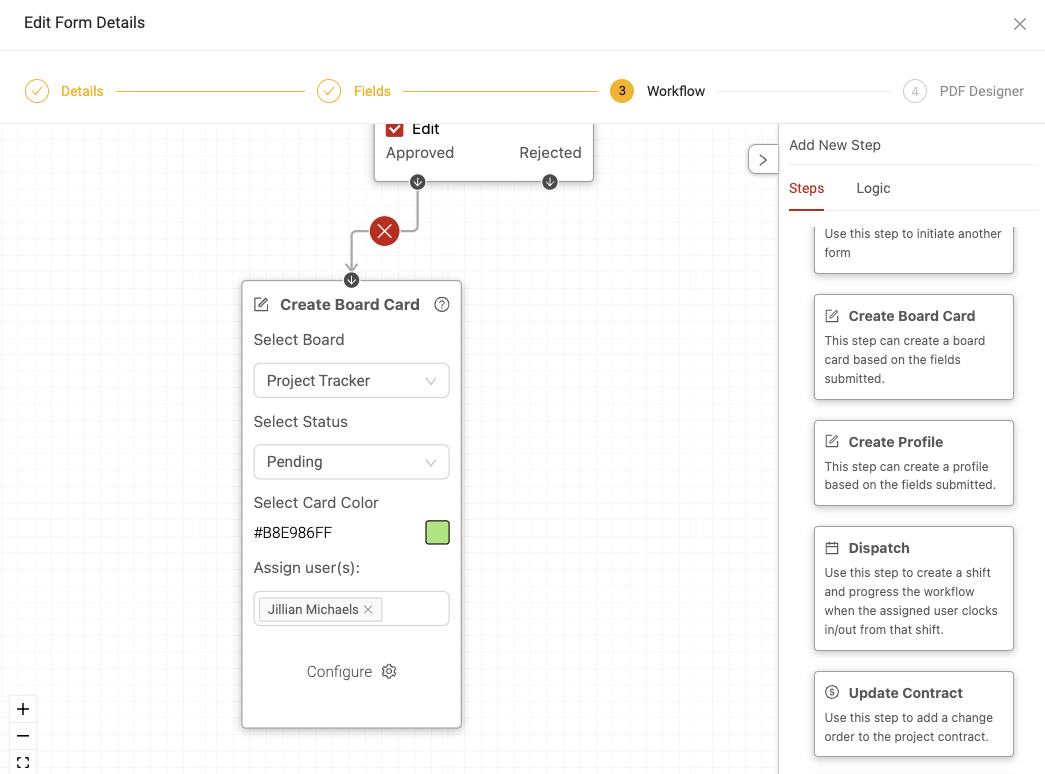
The new 'Create Board Card' workflow step can be used to automatically create and add a card to a board as part of the workflow. Simply add the 'Create Board Card' step into the workflow and connect it to other steps as needed. Configure which board and status the card should be added to using the 'Select Board' and 'Select Status' fields. You can also add a colour to the card using the 'Select Card Color' field and assigned users using the 'Assign user(s)' field. Click the 'Configure' option to map information from the form (the 'source' fields) into the fields of the board card (the 'target' fields).
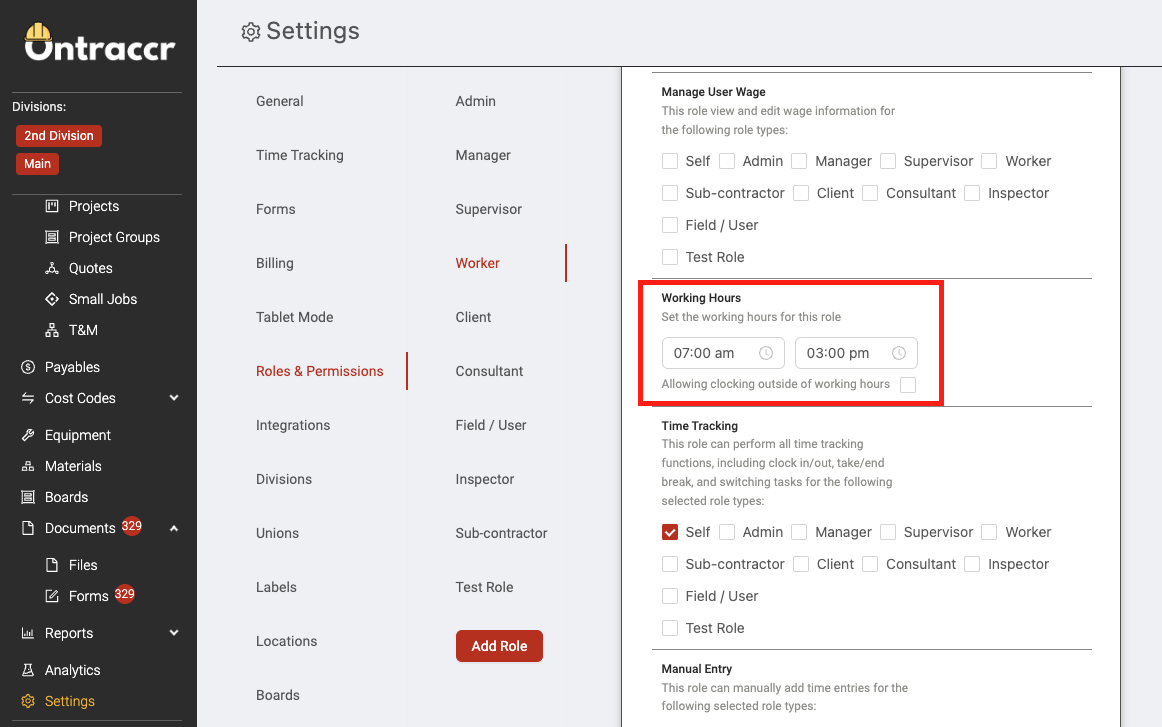
New 'Working Hours' Permission for Time Tracking
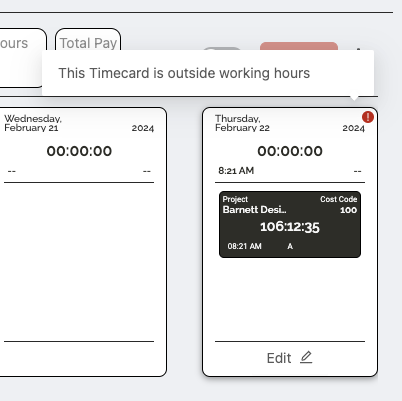
You can now set a schedule of 'working hours' when tracking time in Ontraccr. This will restrict/flag users from clocking in prior to their scheduled start time and will flag the time card if the user clocks out after their scheduled end time.
You can enable this per role in the Settings > Roles & Permissions page by adding a start and end time to the role in the 'Working Hours' permission. If you want to restrict users from being able to clock in prior to their scheduled start time, simply uncheck/disable the 'Allowing clocking outside of working hours' checkbox for the permission (if enabled, it will still let them clock in prior to start time but will just flag the time card for admins to review).
Custom Fields for Employee Certifications
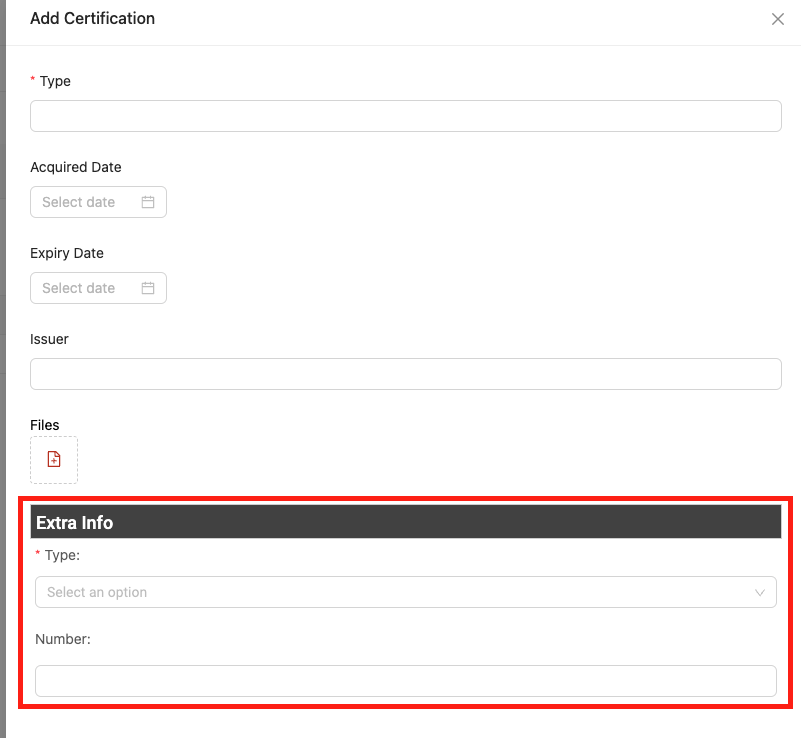
You can now add custom fields to your company's user certifications in Ontraccr to fully customize how you'd like to manage certifications in the platform.
To customize certification profiles, head over to the Settings > Customization > Custom Fields (User Certifications) page. Here, you can add any custom sections and fields that you'd like.

Once you add custom sections/fields to your certification profiles, these custom fields will then be available at the bottom of the certification profile for every certification you add or edit in Ontraccr moving forward.
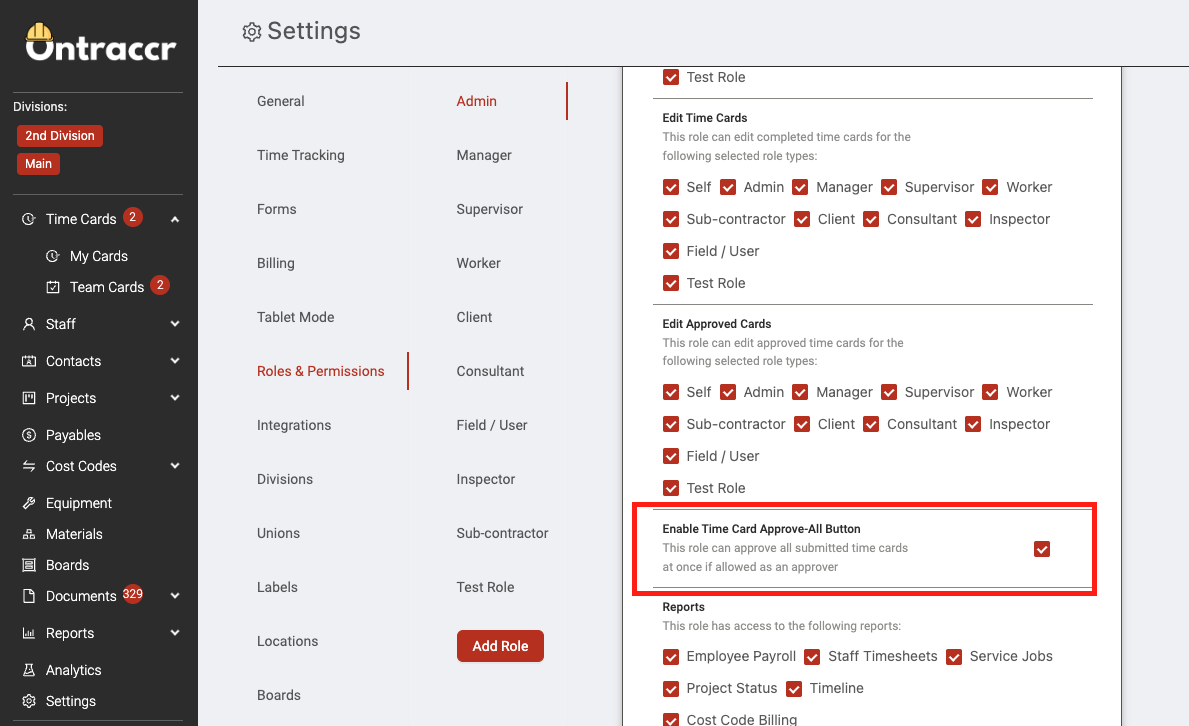
New Permission to Disable 'Approve All' Button
If you'd like to remove the 'Approve All' button in the time card approval process (shown below), Ontraccr allows admins to show or hide this per role now!
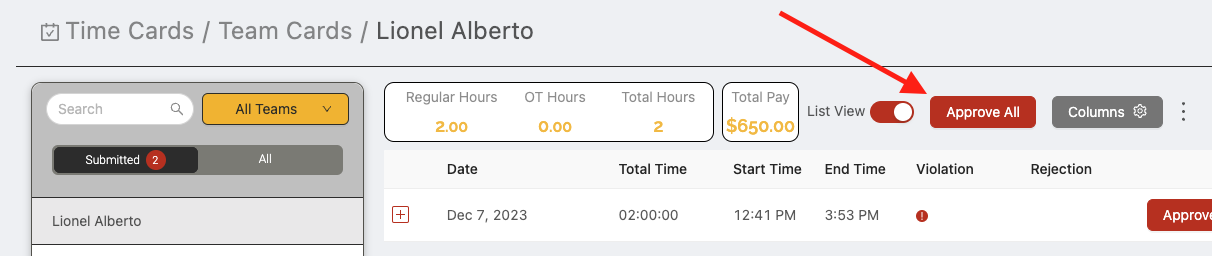
To show/hide this per role, in the Settings > Roles & Permissions page, simply enable or disable the 'Enable Time Card Approve-All Button' permission.
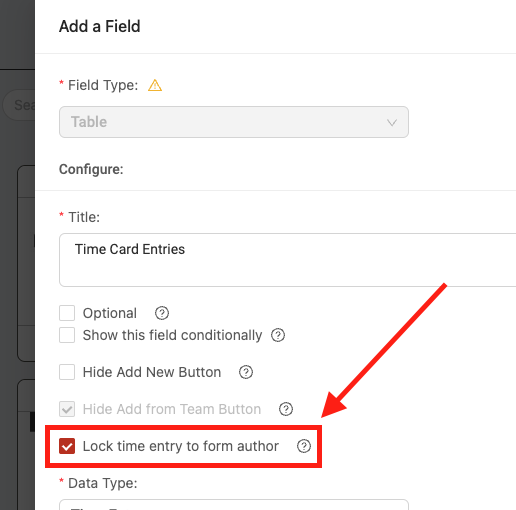
Option to Restrict Time Entry Table to Form Author
When using Time Entry table fields in forms, you can now lock the table to only add entries for the user submitting the form (the 'Form Author'). To enable this, when configuring the Time Entry table field in the form, simply enable the 'Lock time entry to form author' checkbox. With this enabled, when adding an entry into the table, the user will not be able to select any other users.
Time Card Custom Export Improvements
'Location' fields are now supported in custom exports
You can now add 'location' field types into custom exports. Locations will be shown as coordinates.
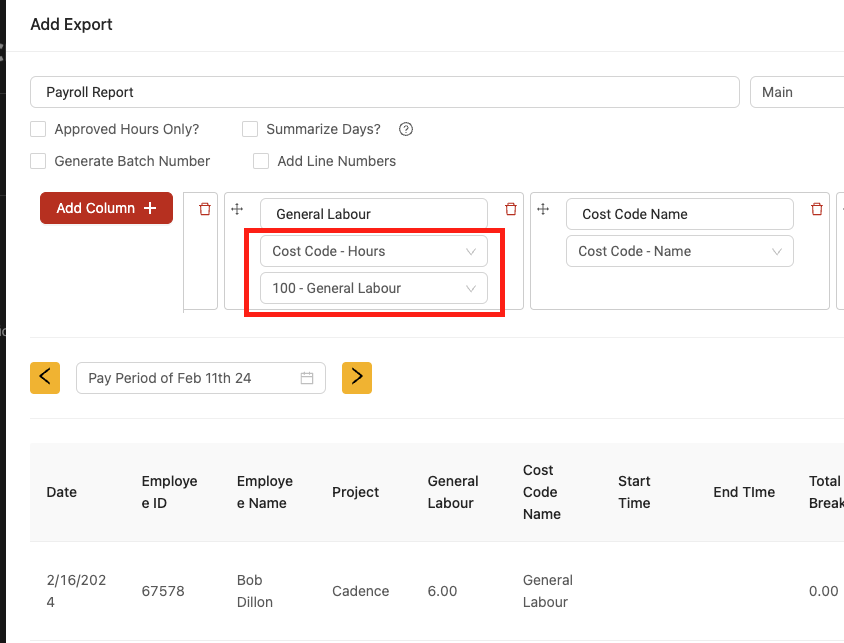
Cost code hours column now available in custom exports
You can now add a separate column for cost code hours.
Other Improvements & Fixes
- We've released a new email-based 'error report' for the Sage 100 Contractor integration which will notify the company owner anytime Ontraccr fails to sync a time entry into Sage 100 Contractor.
- Fixed an issue where time entries were adding minutes in certain rounding configurations.
- Fixed an issue where form resubmissions changed the form author name in the form timeline for actions prior to the resubmission event.
Mobile App 3.24.0
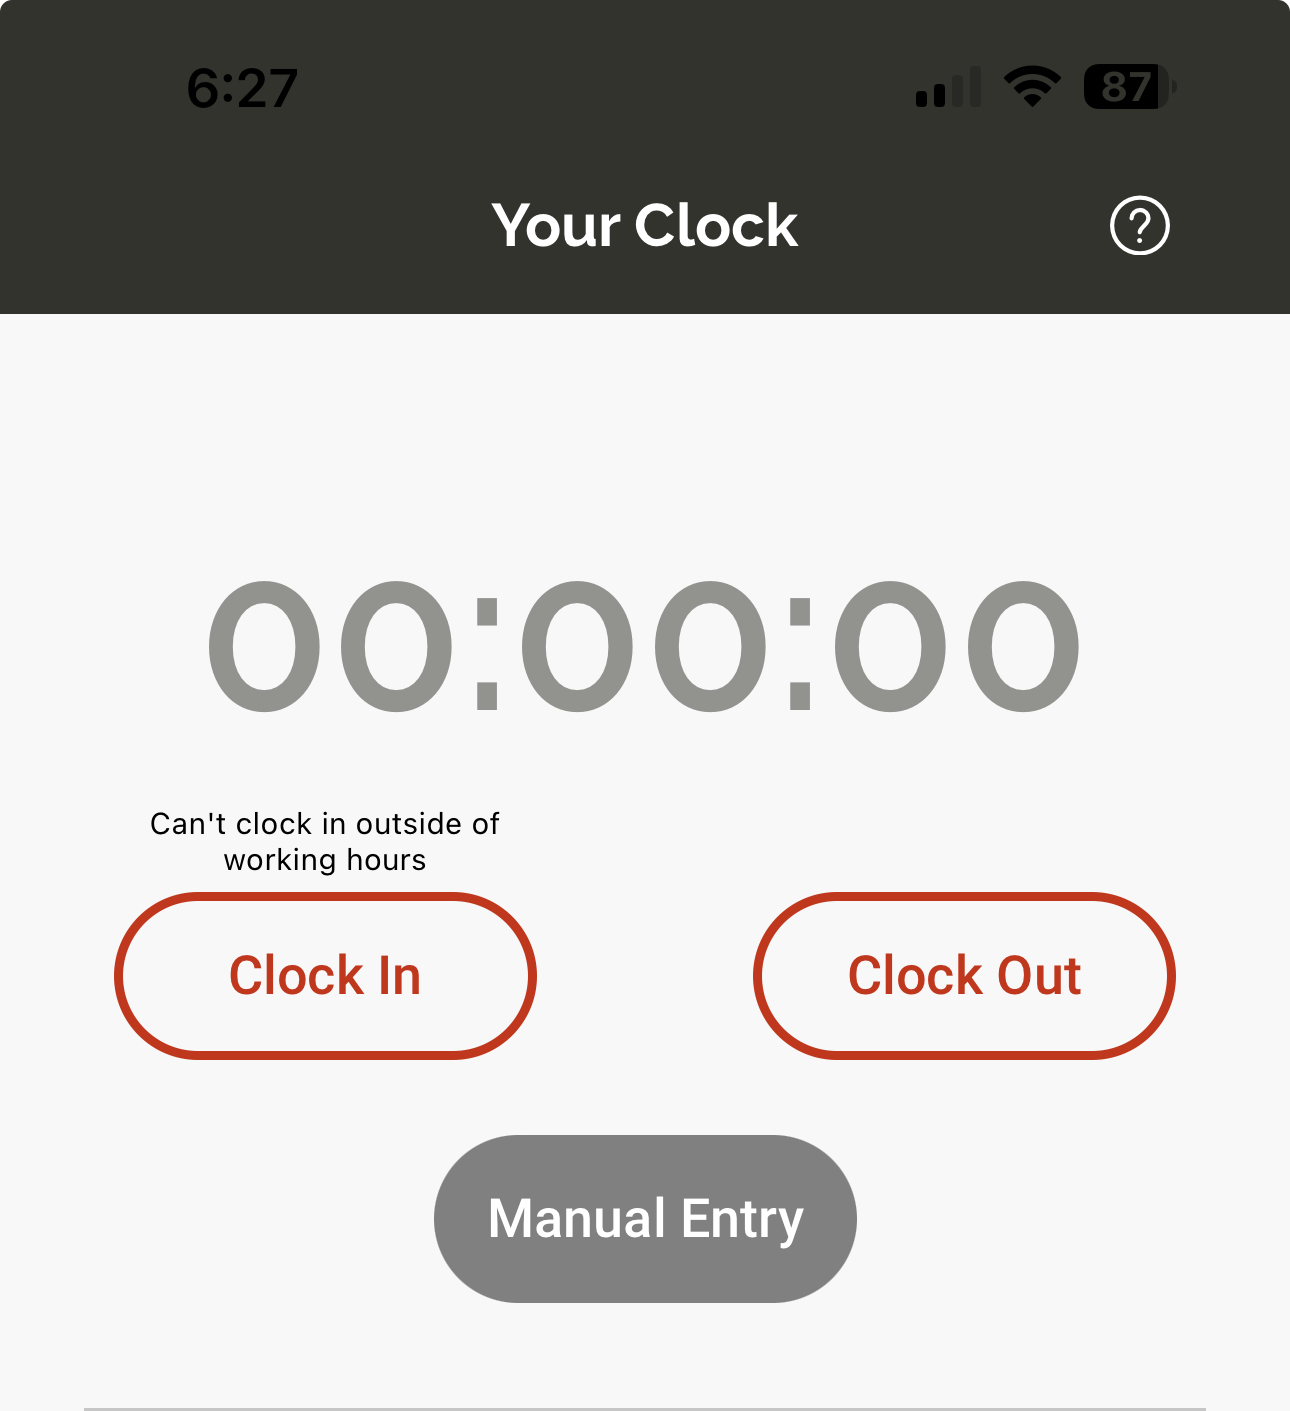
New 'Working Hours' Option for Time Tracking
You can now set a schedule of 'working hours' when tracking time in Ontraccr. This will restrict/flag users from clocking in prior to their scheduled start time and will flag the time card if the user clocks out after their scheduled end time.
Option to Restrict Time Entry Table to Form Author
When using Time Entry table fields in forms, you can now lock the table to only add entries for the user submitting the form (the 'Form Author'). With this enabled, when adding an entry into the table, the user will not be able to select any other users.
Other Improvements & Fixes
- Fixed an issue where the app may record duplicate time entries in certain scenarios when cycling between online and offline mode.
- We've repositioned the edit button in the time entry table to the left of the row to make it easier for users to edit time entries.