Customizing time cards
Native vs custom time card fields
By default, time cards in Ontraccr were designed using a standard template that works for most companies. This standard template includes a set of default fields or 'native fields'. However, Ontraccr also allows you to create fully custom time card designs for your team, giving you the ability to specify the exact set of information you'd like to capture in the time cards. To do this, you can add 'custom fields' to your time cards in the company settings.
For example, this can be used to ask users additional questions in the time card or ask them to upload photos or files as part of each time card entry.
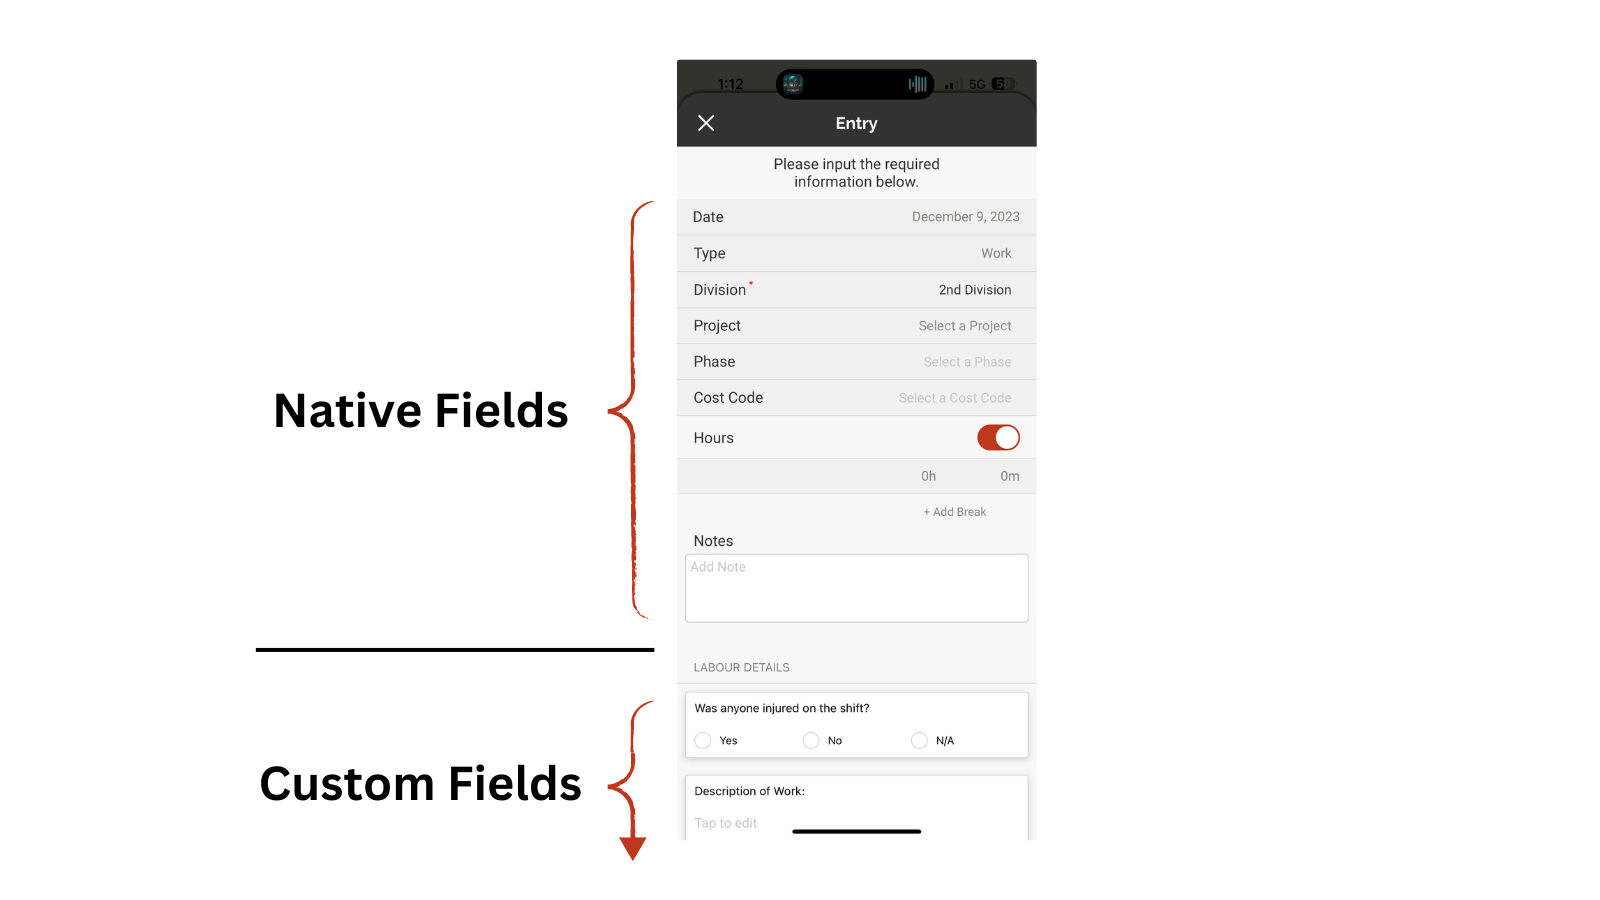
This means that time cards can consist of both 'native' and 'custom' fields, as shown below. Native fields are always shown in the top-most section of the time card, whereas custom fields will display underneath in the rest of the time card.
Please note: Time card 'custom fields' are only supported for manual entries and not for real-time clock in / clock out. Users will not see any custom fields during clock in / clock out.
For companies with more than one division, Ontraccr also allows you to independently add custom fields to time card designs in each division. This essentially means you can have separate time card designs for each division across your company.
Configuring custom fields
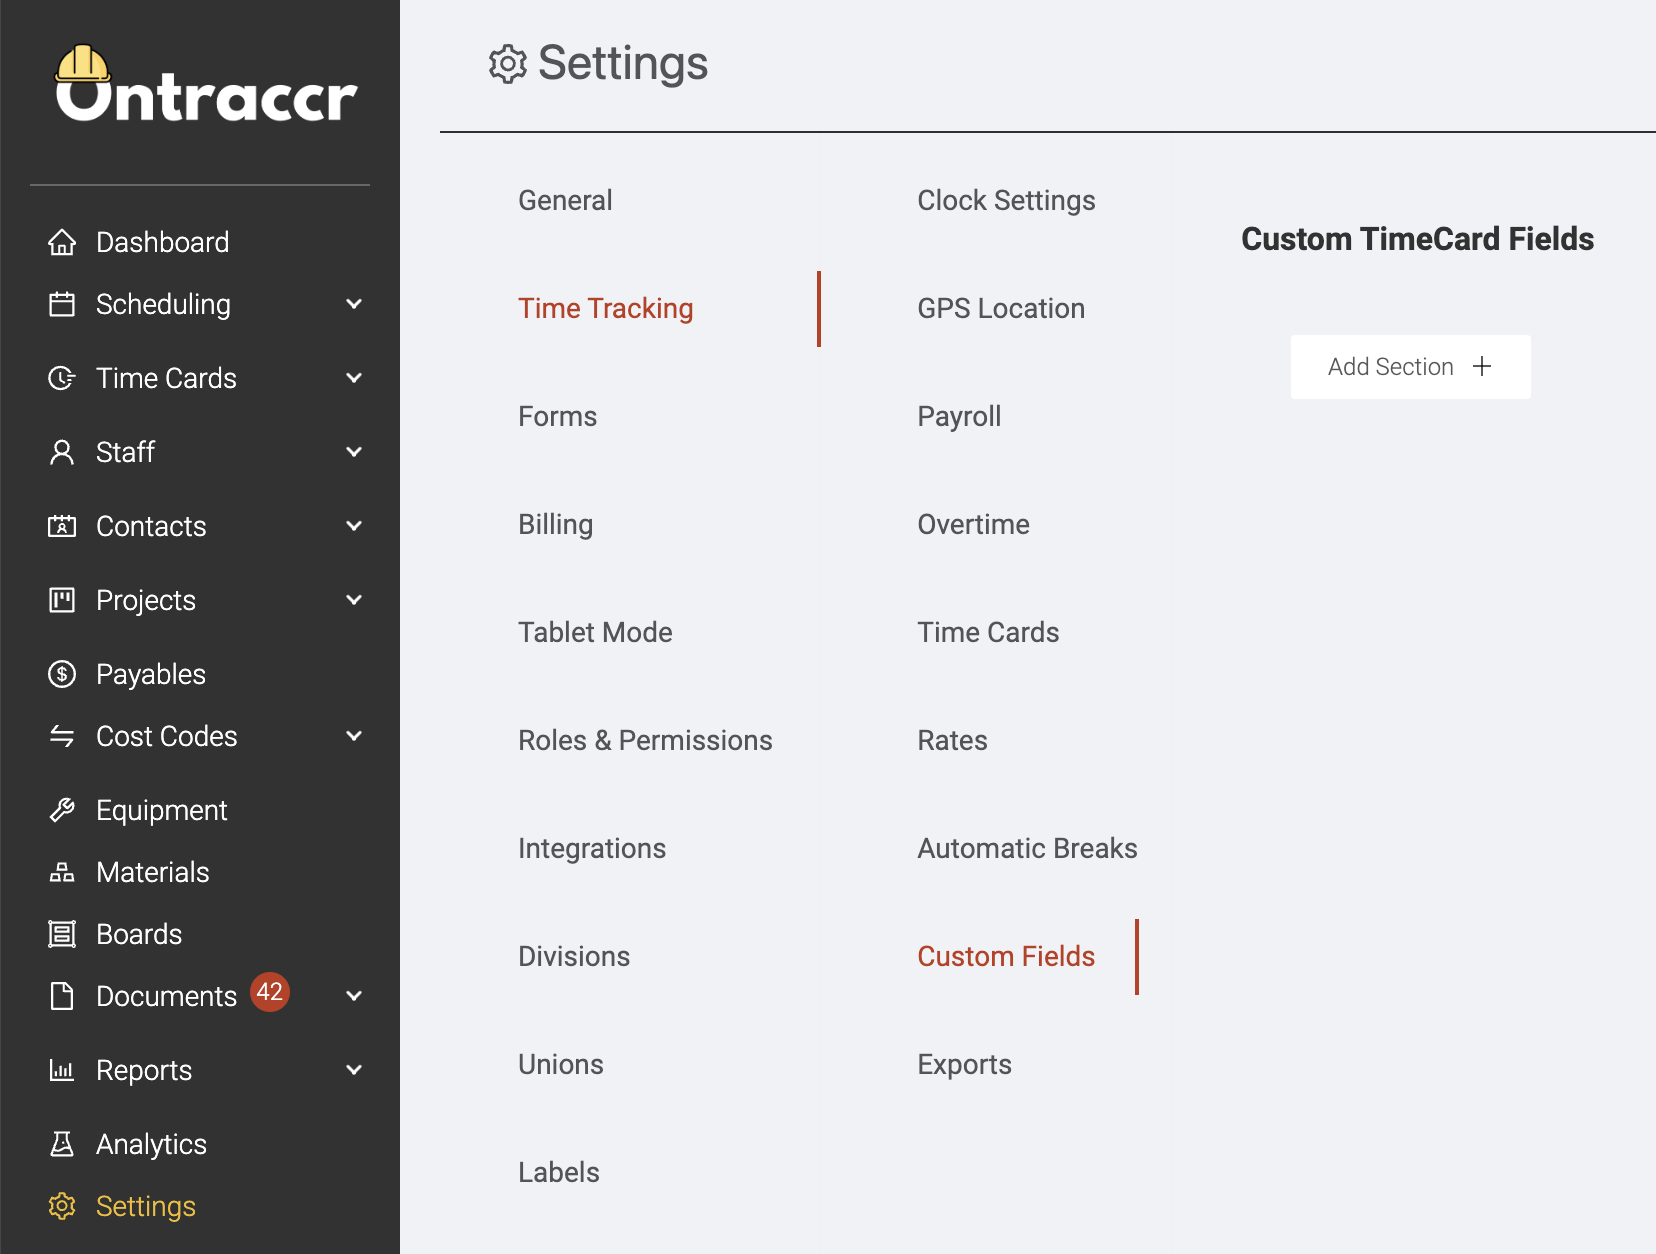
To add custom fields to your company time card design, simply navigate to the Settings > Time Tracking > Custom Fields page.
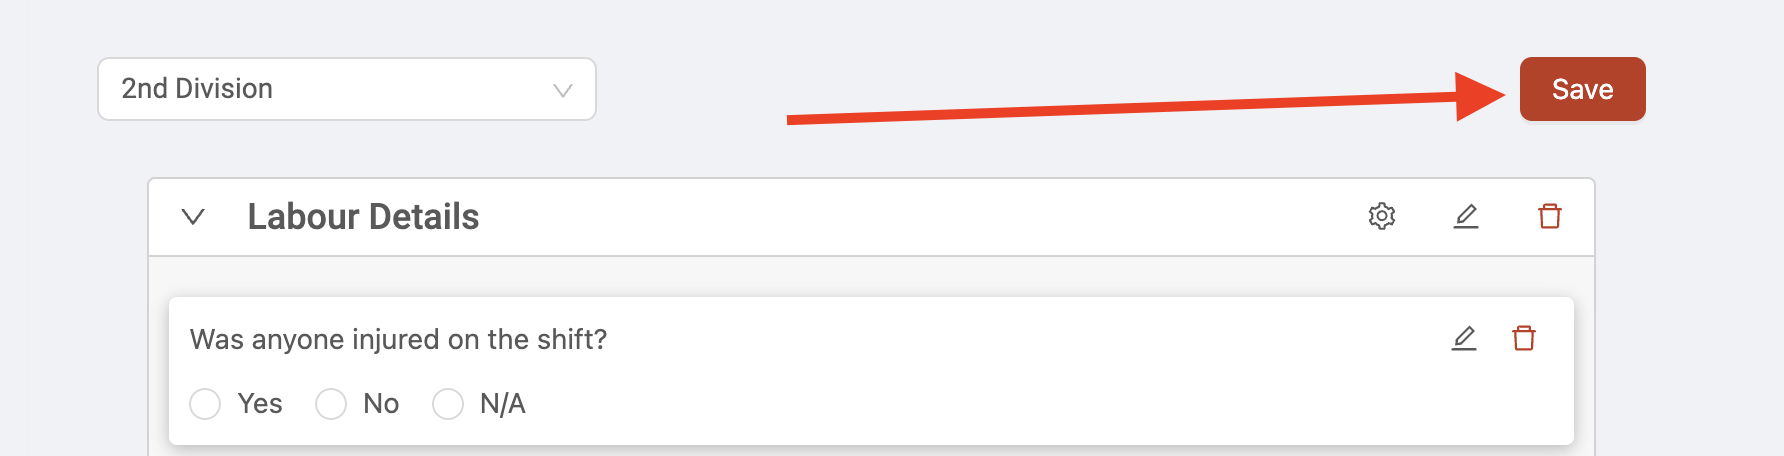
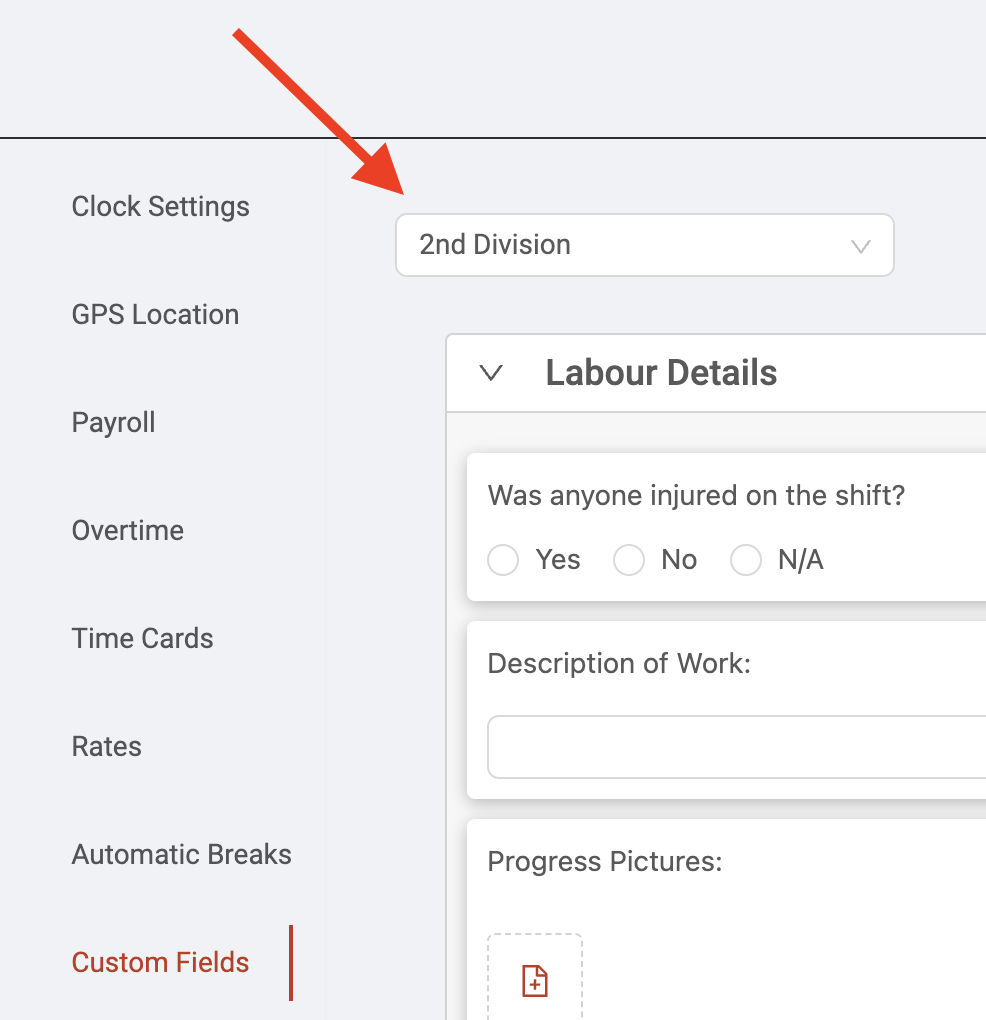
For companies with multiple divisions, you will see a division selection drop-down at the top of the page. Select the division for which you want to create/edit the time card custom fields.
Next, when you're ready to create/edit the time card custom fields, you can configure two different things: sections and fields.
A section is how you can organize the time card into various sections. For example, sometimes a time card may have a section for progress updates and another section for safety-related information. To add a new section, click the ‘Add Section’ button beneath the section box.
A field is the specific type of information you’d like to collect. A field could consist of things like questions, table entries, attachments, calculations, and more.
To add a field, click the ‘Add Field’ button within the section you’d like to add the field to. This will open the field configuration slider.
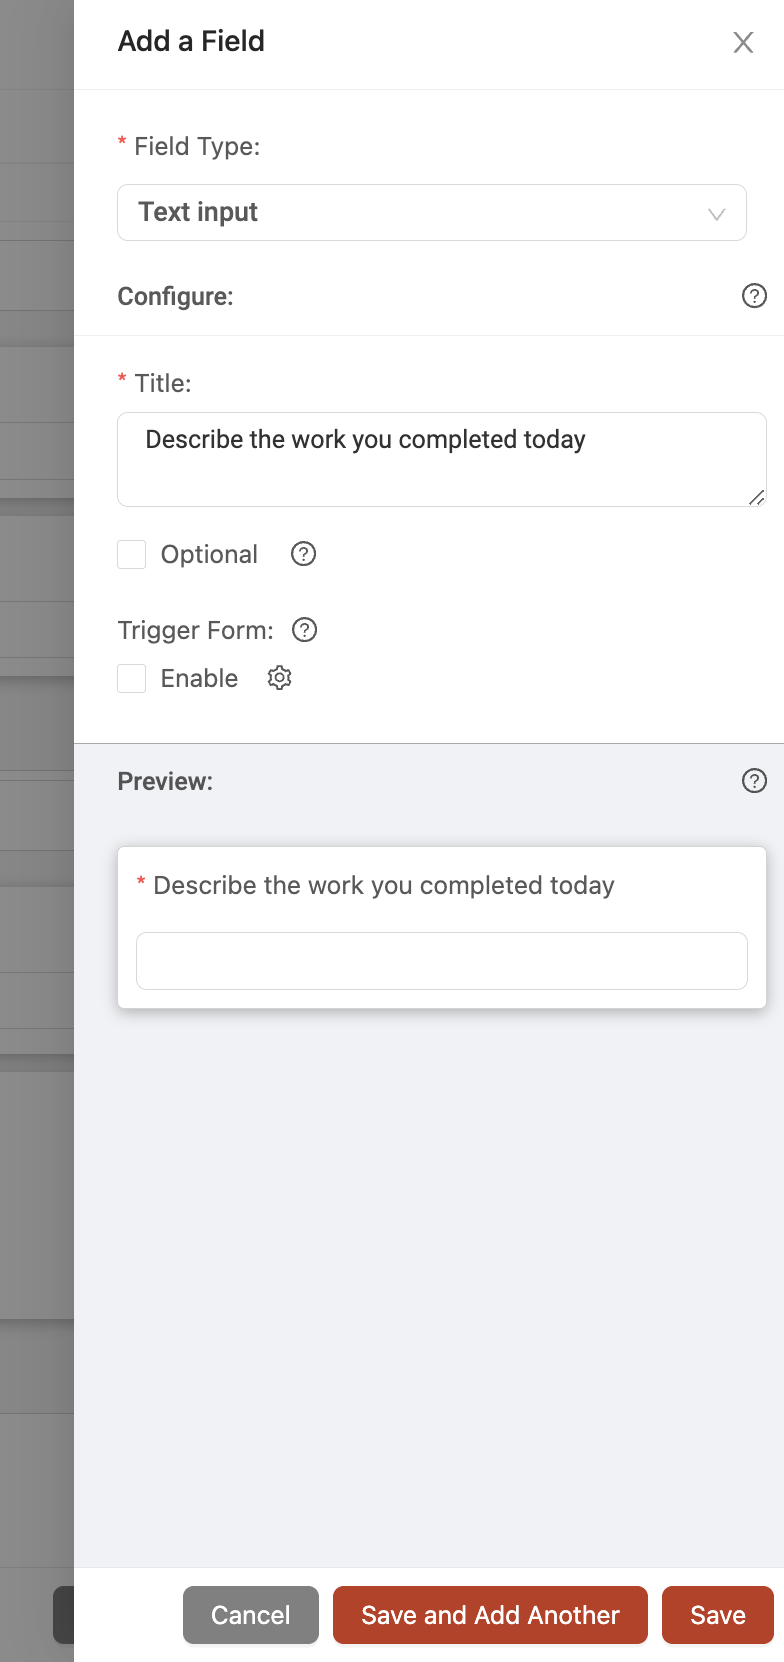
At the top of the field slider, the ‘field type’ drop-down lets you select the type of field you want to add to the time card.
The ‘configure’ section will let you configure the details of the field and will display different options depending on the type of field you select. Within the ‘configure’ section, the title is what the time card will display to the user (for example, this is where you would ask the user to answer a specific question).
Each field will also include the ‘optional’ checkbox. This is where you get to decide if the user is required to enter information into the specific field in order to submit the time card or whether it is optional for them. Leave it unchecked if you want the field to be required.
The ‘preview’ section will show you a live preview of what the field will look like in the time card. This is exactly what the user will see when they fill in the field. The preview is also fully interactive so, based on your selections in the ‘configure’ section, you will be able to test out how the field works yourself before adding it to the time card.
When you've finished adding/editing your time card custom fields, click the 'Save' button in the top right corner of the page to save your custom fields. As soon as custom fields are saved, they will immediately be available for users to access the next time they open a time card manual entry.