
Update 3.19.0
We’re excited to announce that we just released version 3.19.0 of the web and mobile apps, with some great new features.
Please see the full release notes for version 3.19.0 below:
Web App 3.19.0
Introducing the new Help widget and Learning Center!
We've added some great new resources to help our customers get the most of their Ontraccr experience and learn more about how to use the platform.
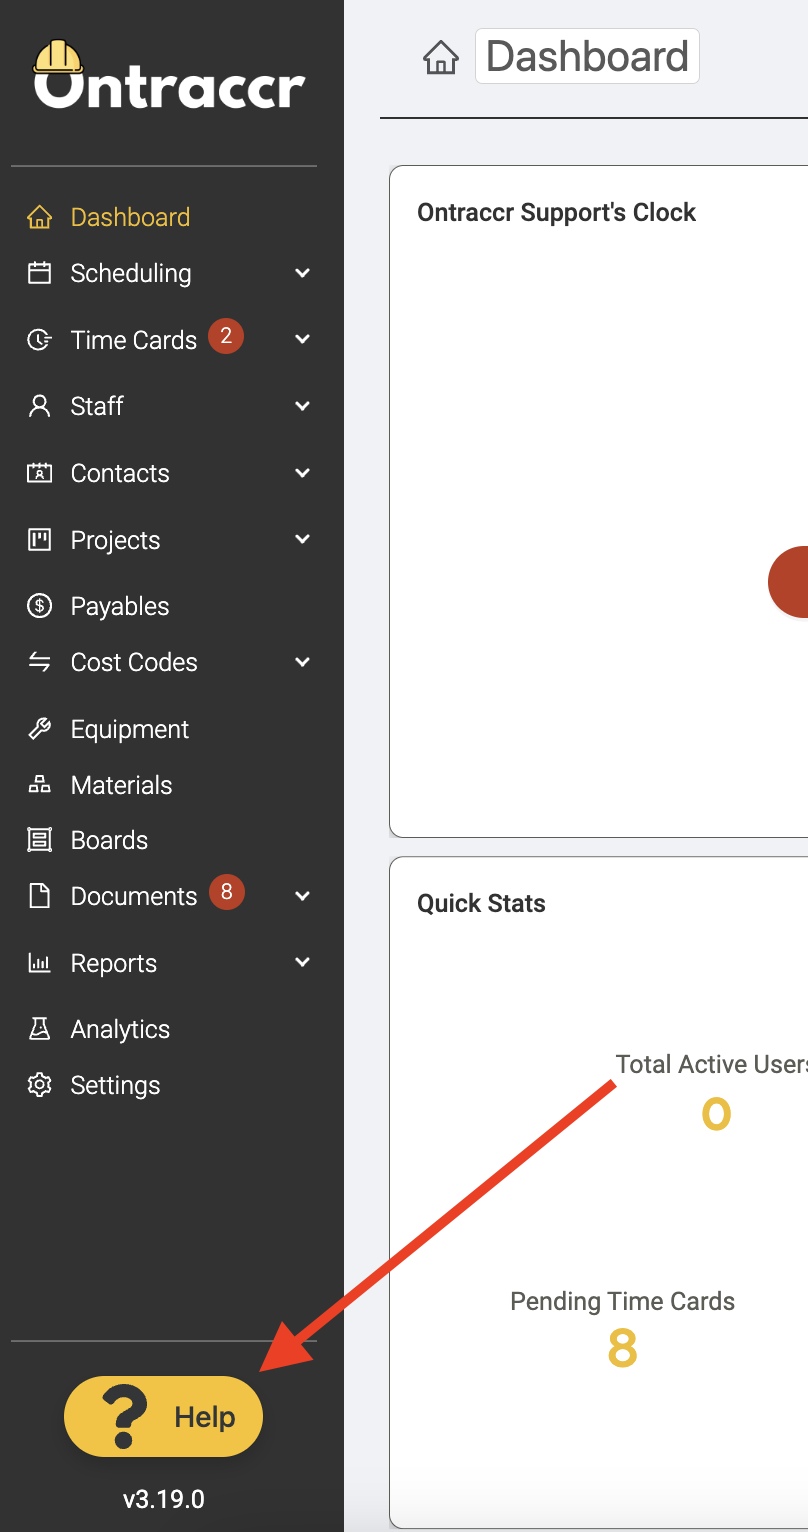
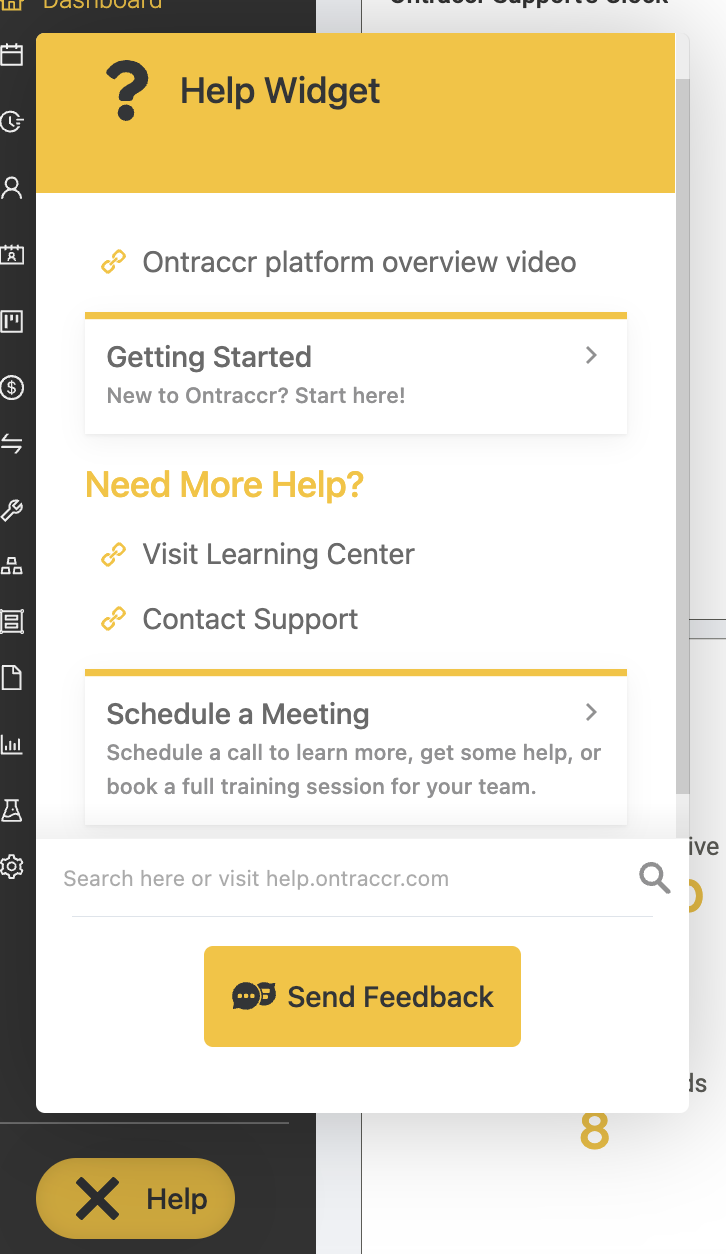
First, we've added a new Help widget to the bottom left corner of the web app. The Help widget can be used to access some helpful resources, access the Learning and Support Centers, and can also be used to schedule calls with the Ontraccr team directly.
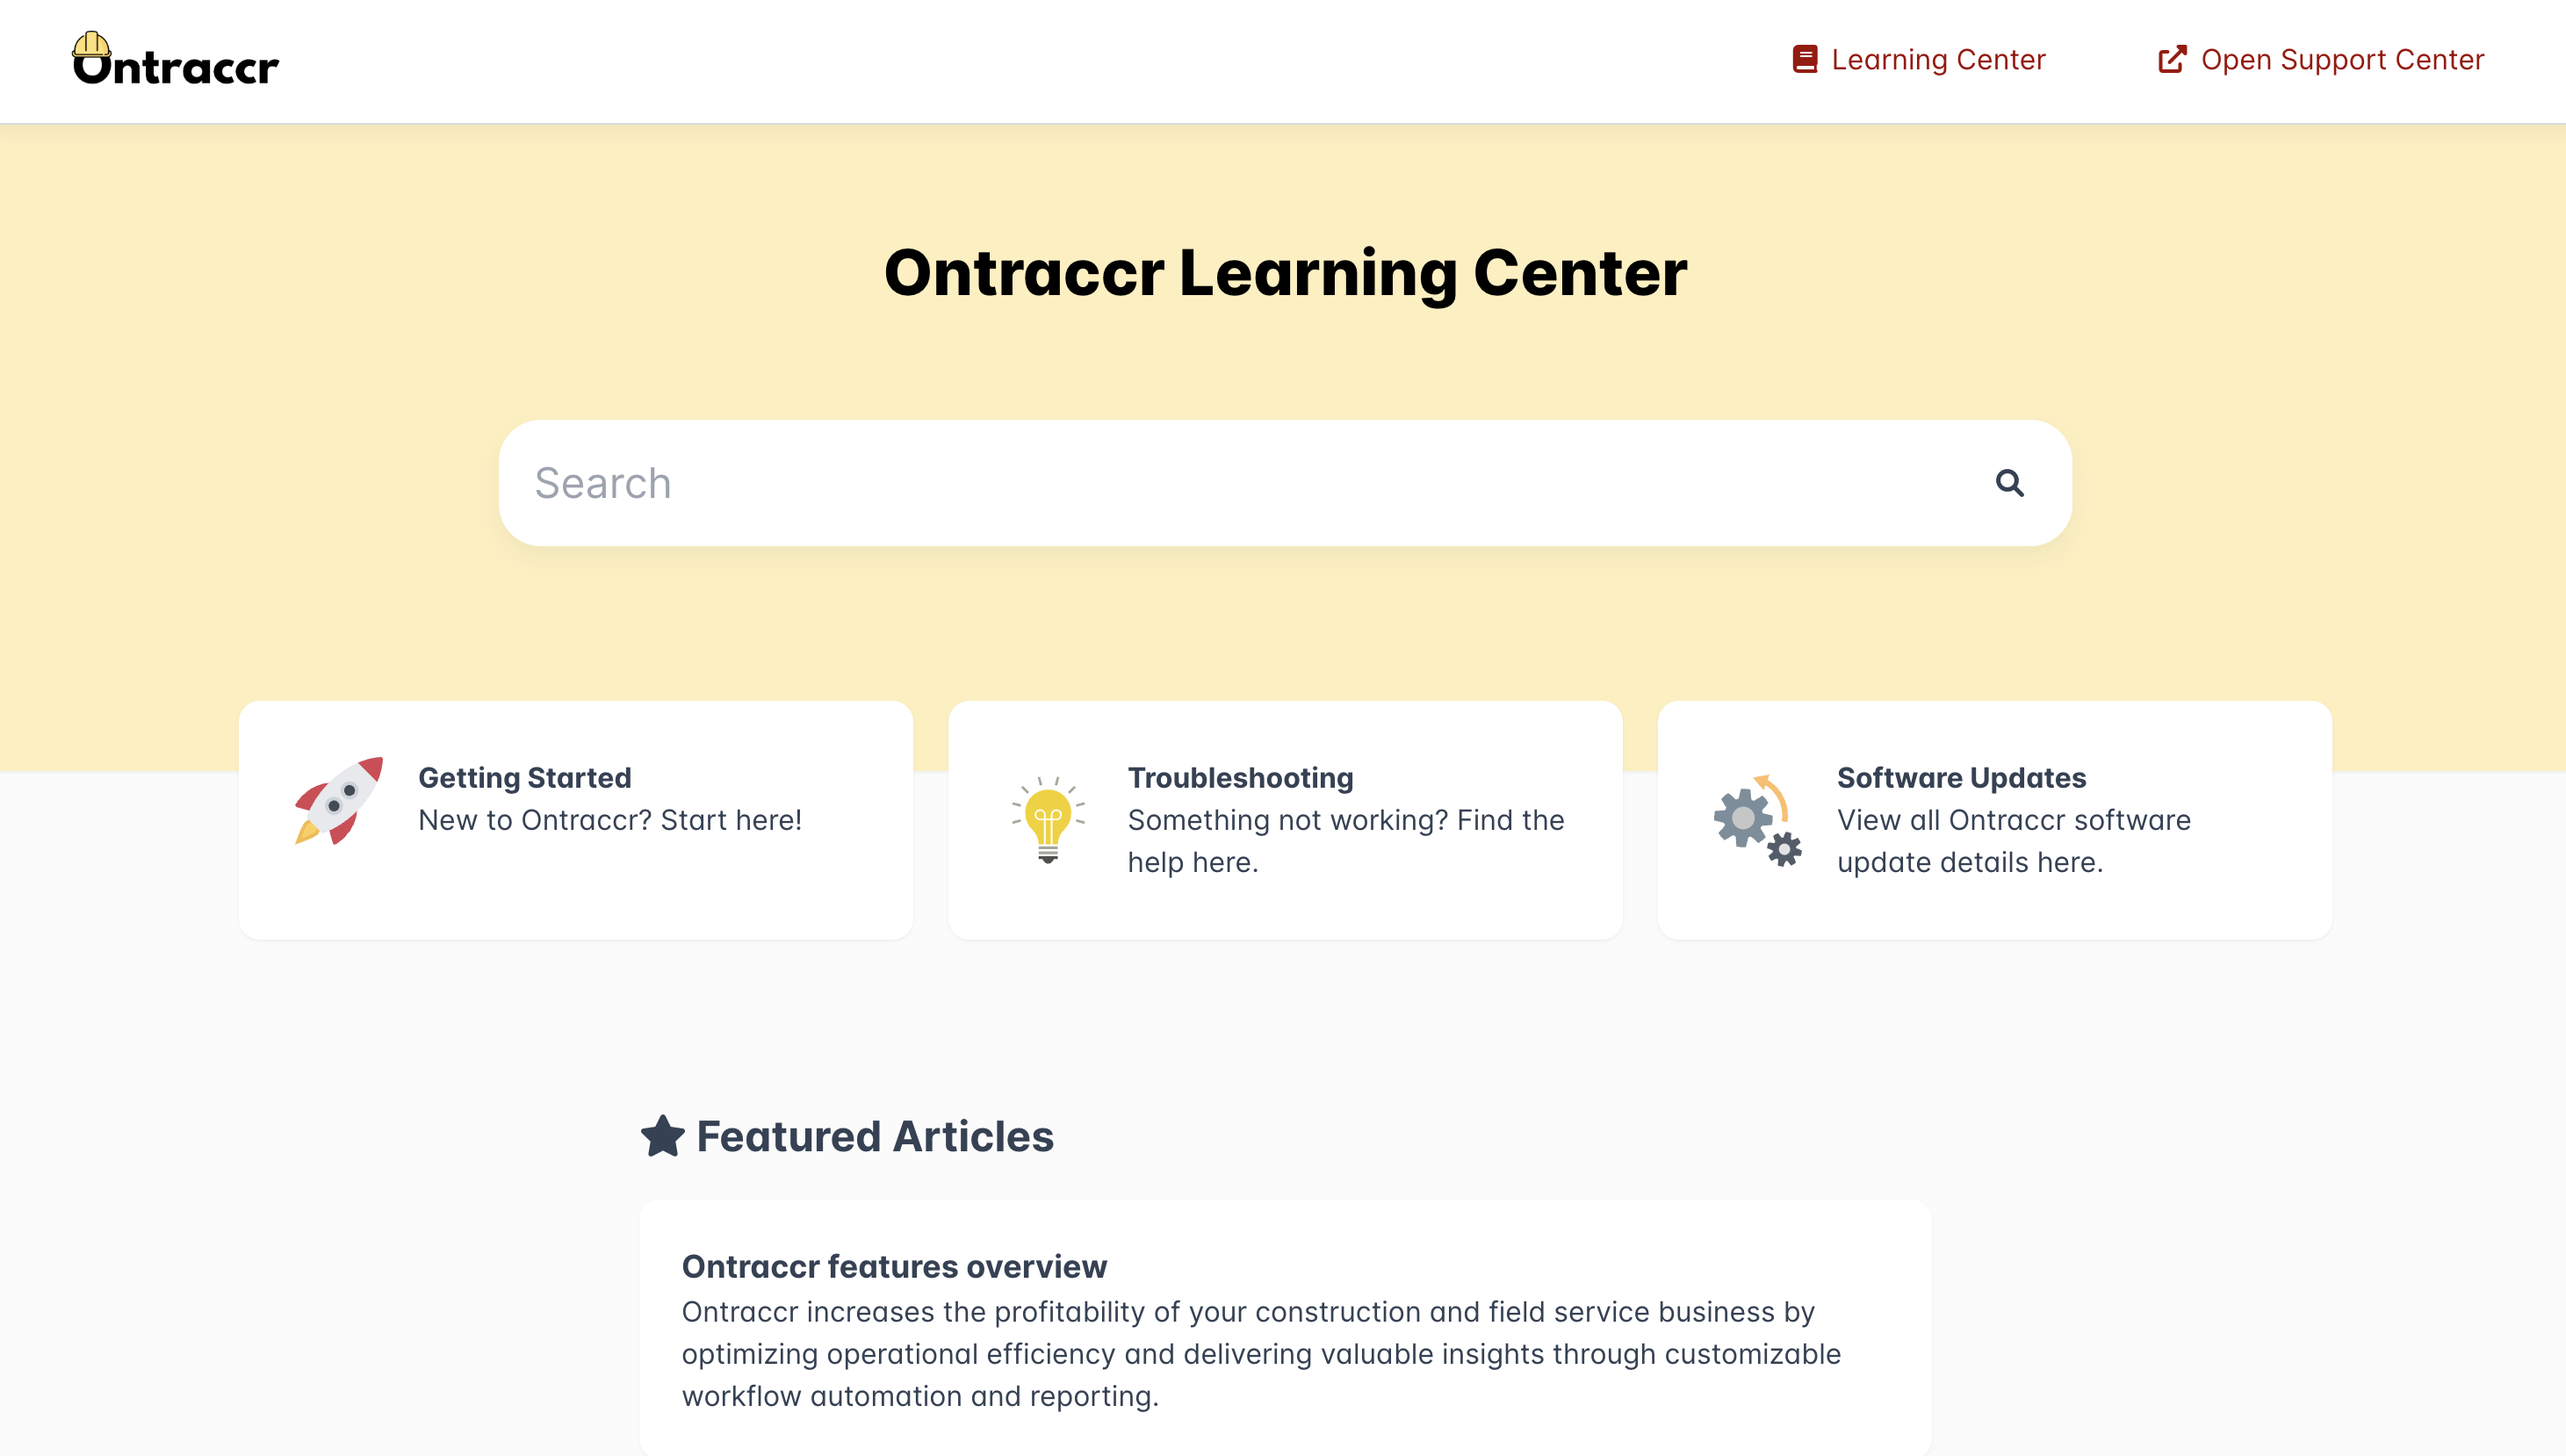
We've also launched a brand new Learning Center! The Learning Center can be accessed at help.ontraccr.com and includes a full base of articles to learn how to use any part of the Ontraccr platform. New articles will be added every week and can cover a variety of topics. If you ever have a request for a new article topic, please let us know!
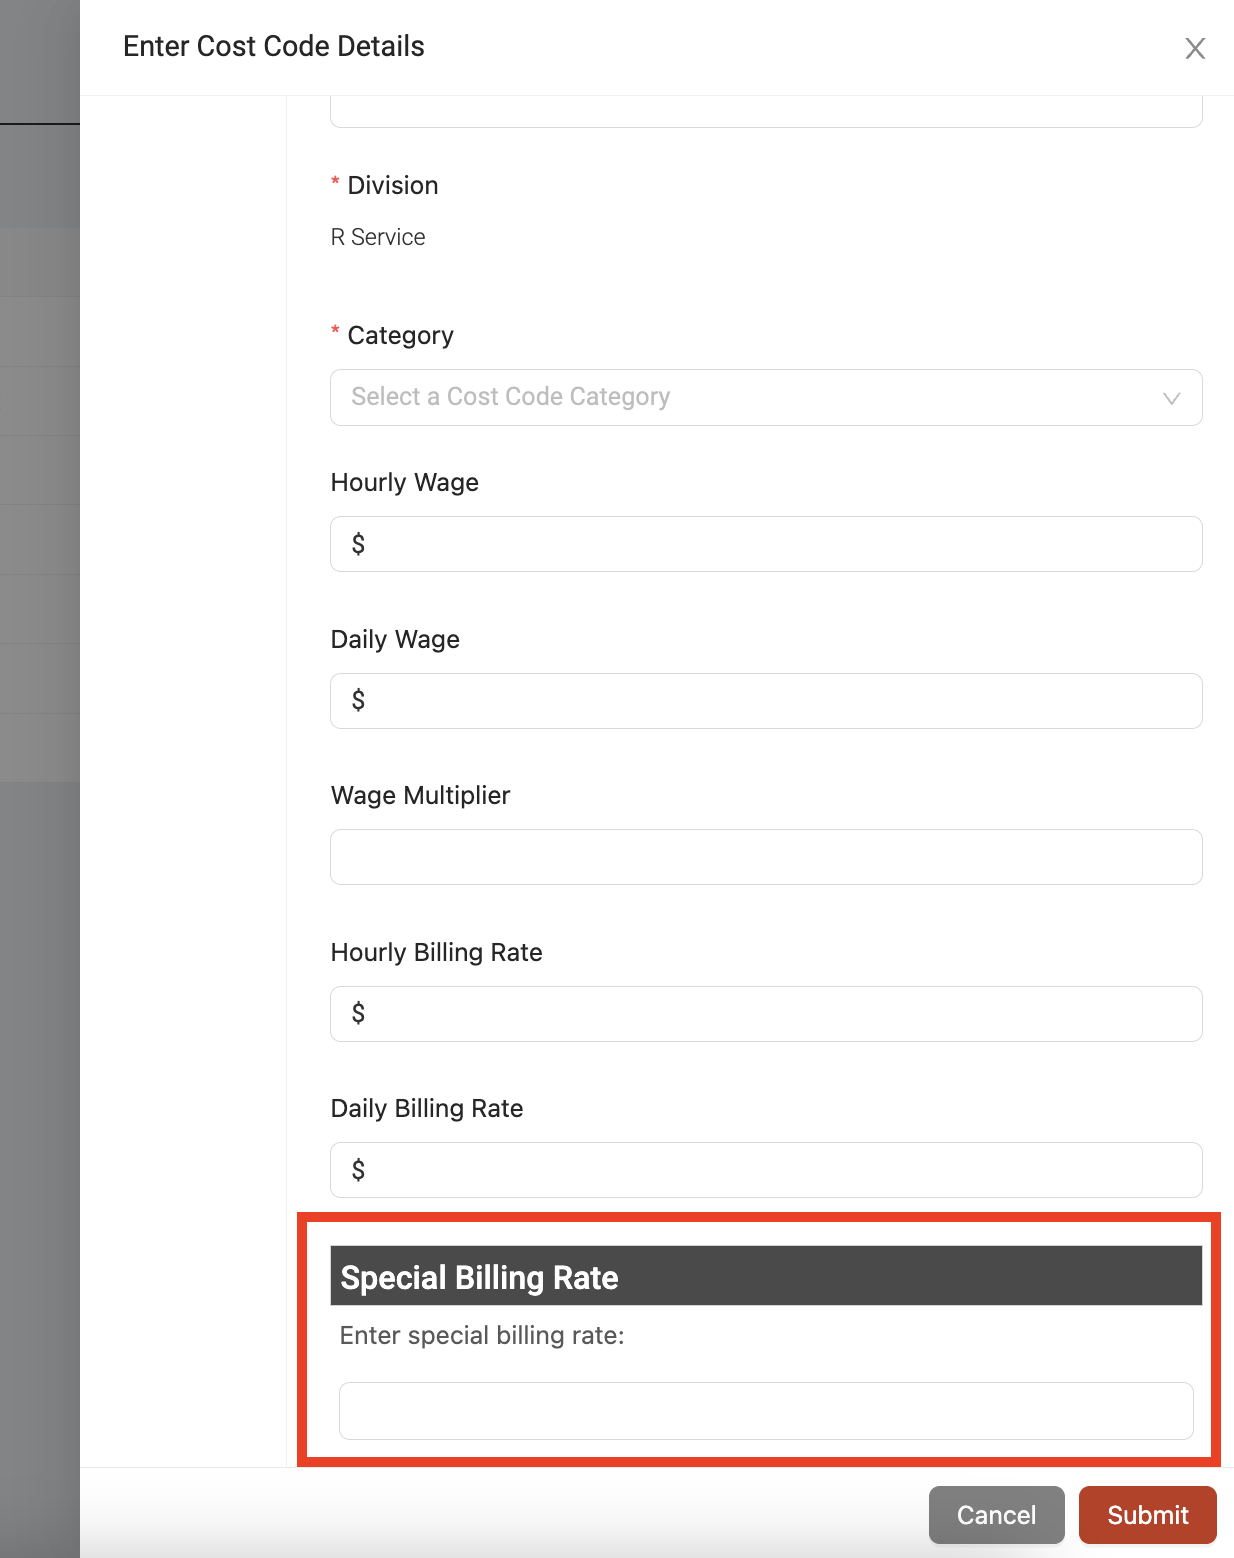
Custom Cost Code Profiles
You can now add custom fields to your cost code profiles in Ontraccr to fully customize how you'd like to use cost codes in the platform.
To customize your cost code profiles, head over to the Settings > Customization > Custom Field (Cost Codes) page. Here, you can add any custom sections and fields that you'd like.
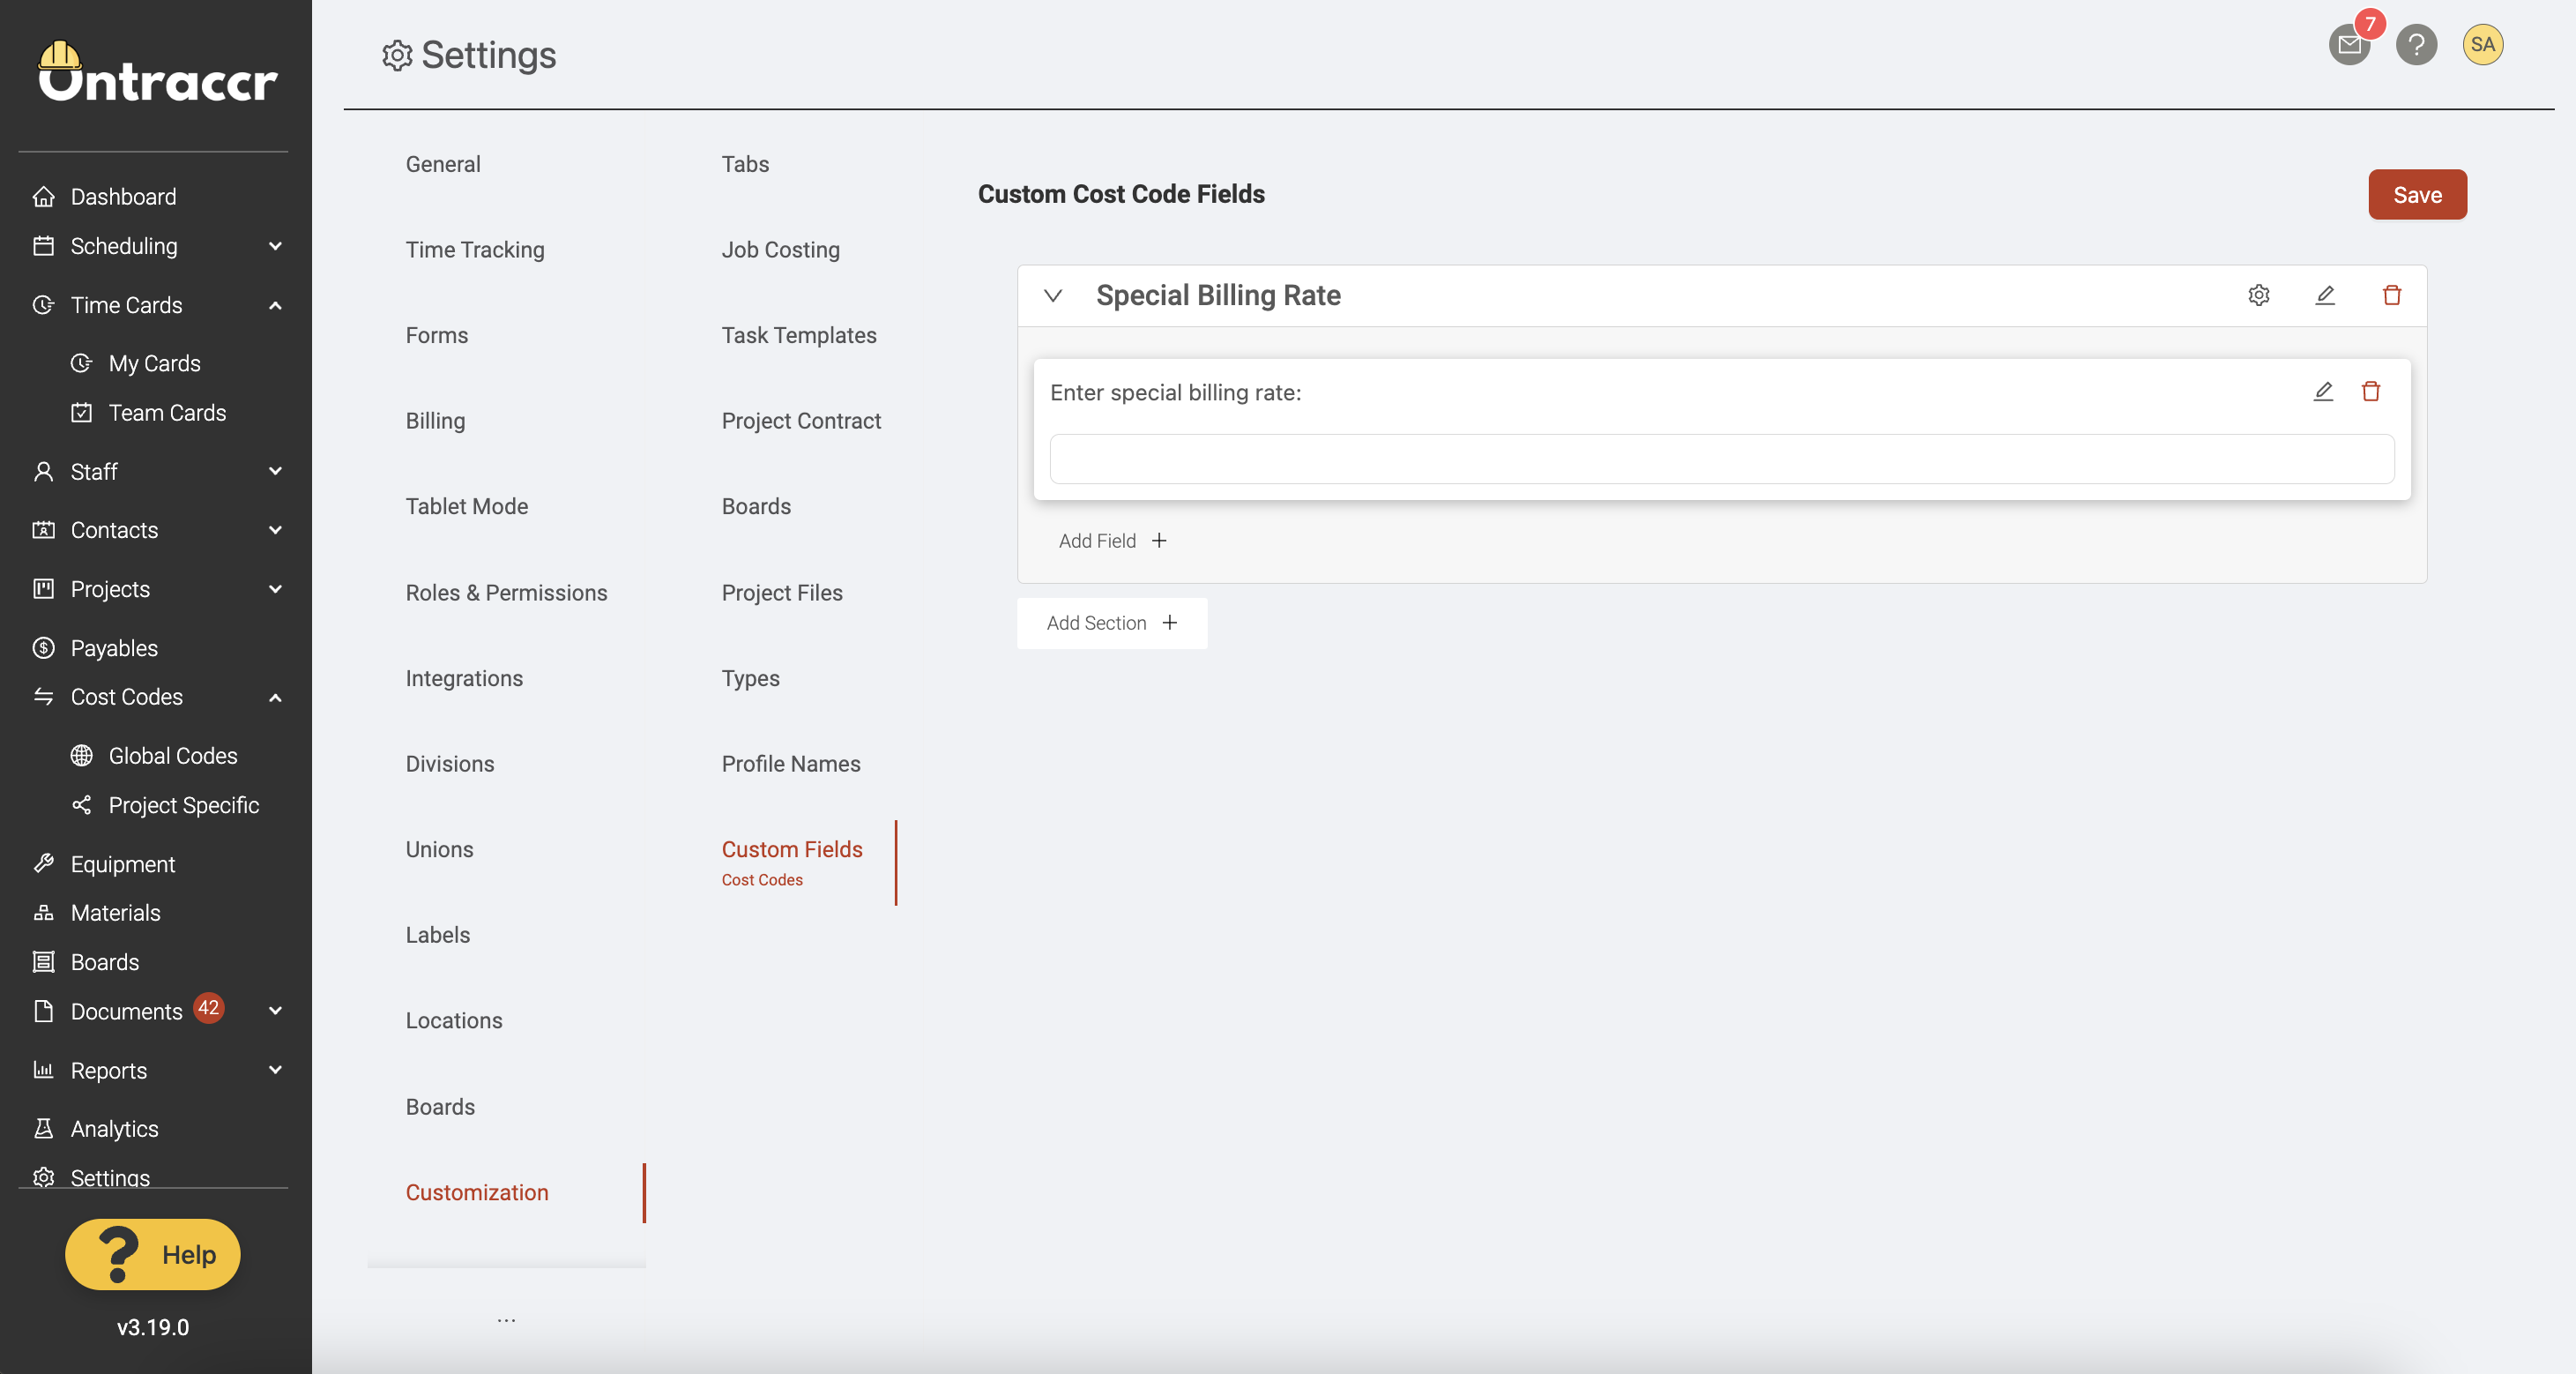
Once you add custom sections/fields to your cost code profiles, these custom fields will then be available at the bottom of the cost code profile for every cost code profile you add or edit in Ontraccr moving forward.
Invoices can now be uploaded to projects and cost codes directly
When uploading invoices in Ontraccr, you can now directly upload them to any project or cost code directly, without the need to upload them to a PO form. When uploading an invoice, there's a new 'Project' selection. Once a project is selected, the 'Distribute Cost' section can then be used to distribute the costs across the various cost codes of the project. The invoices will then update the 'Actual Spend' fields of the cost codes in the 'Progress' tab and will show a record of the invoice in each cost code's 'History' log.
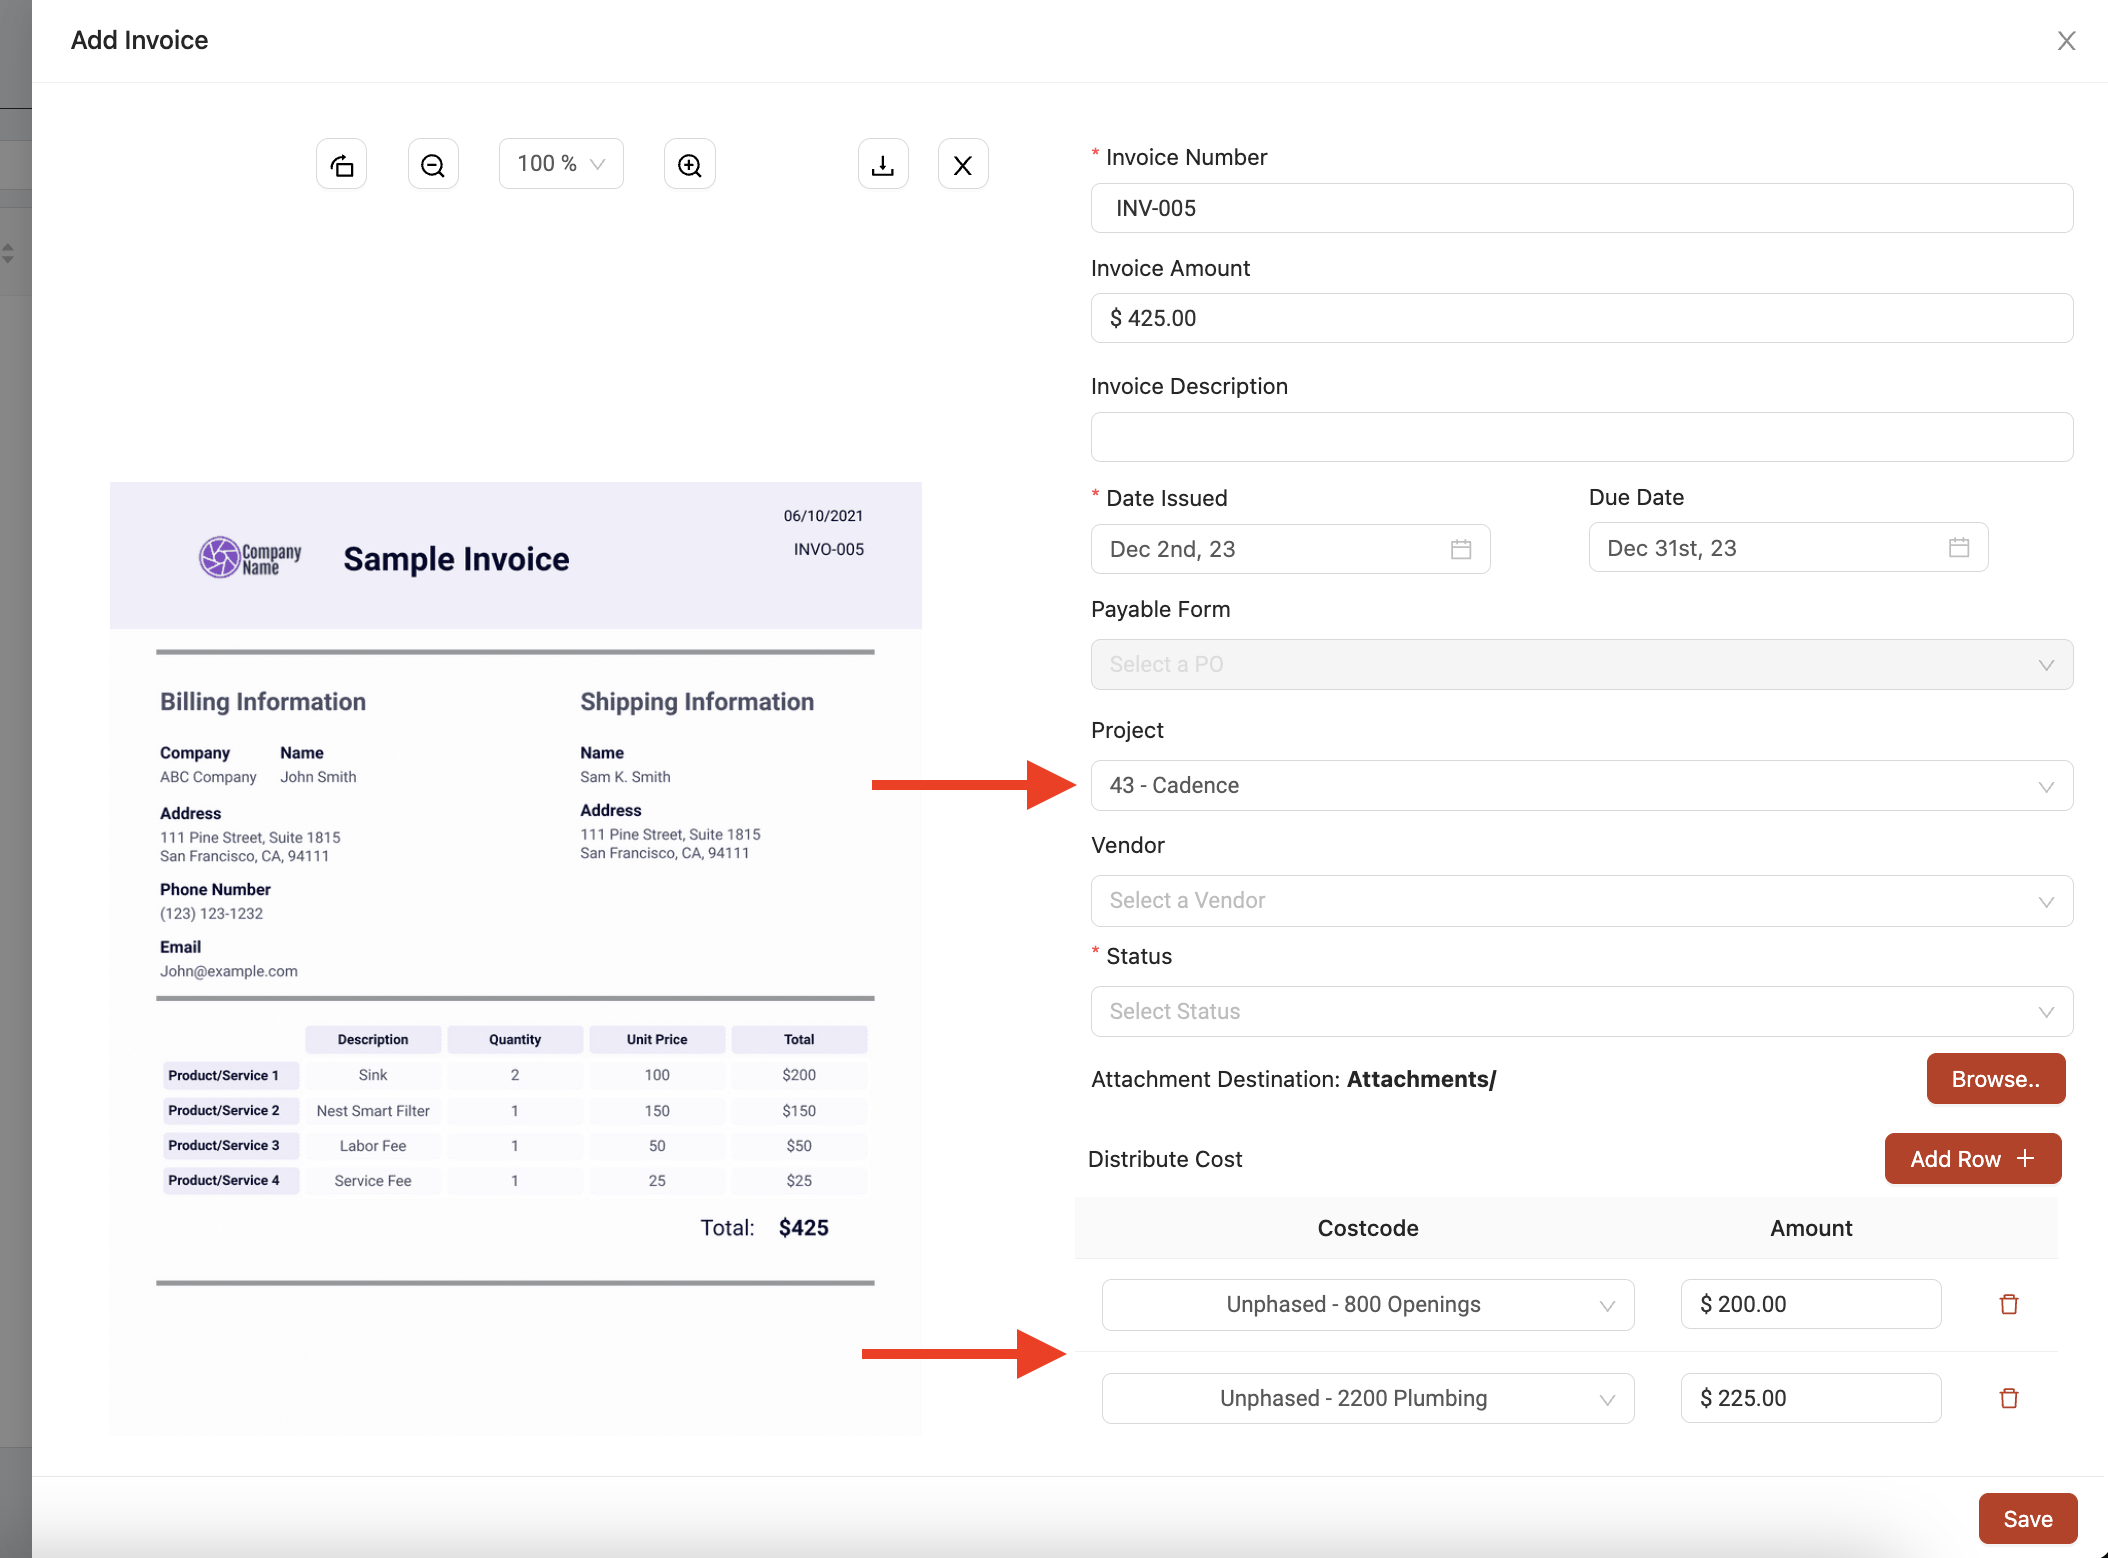
We've also added new invoice upload buttons throughout the Progress tab to make it easier to upload invoices directly.


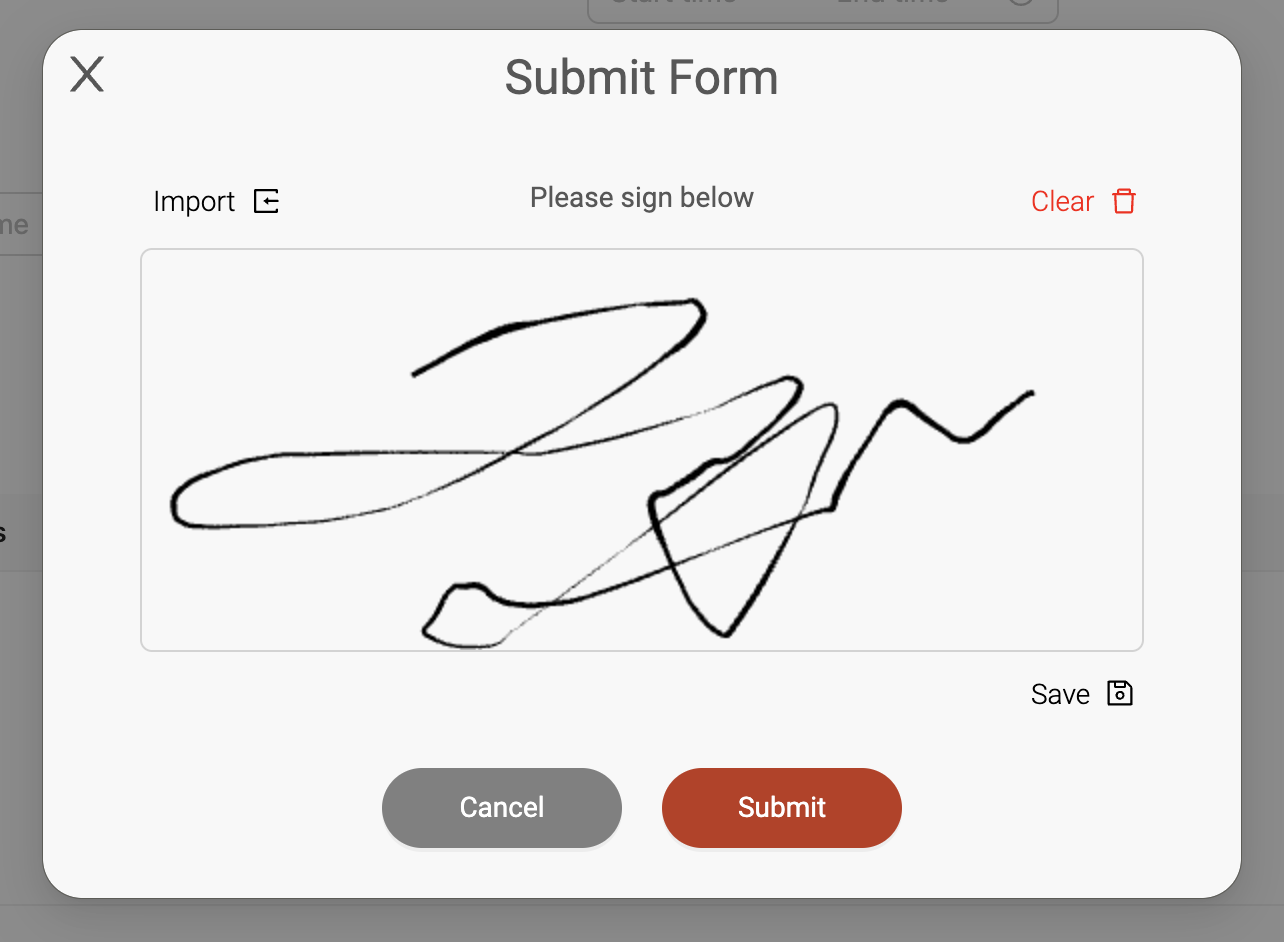
Ability to save signatures
When signing off on forms, we've added the ability to save a copy of your e-signature so you can use it for signatures moving forward.
The next time you sign off on a form, you'll see new 'Save' and 'Import' buttons. After adding your signature, you can click 'Save' to save a copy of the drawing moving forward. Alternatively, click 'Import' to upload a picture of an existing e-signature. After a signature is saved, it will display automatically the next time you're prompted to sign another form. If you want to edit it, simply add a new signature and click 'Save' again to update the copy.
Other Fixes & Improvements
- We've released a number of improvements for the Sage 100 Contractor integration to improve syncing performance and accuracy.
Mobile App 3.19.0
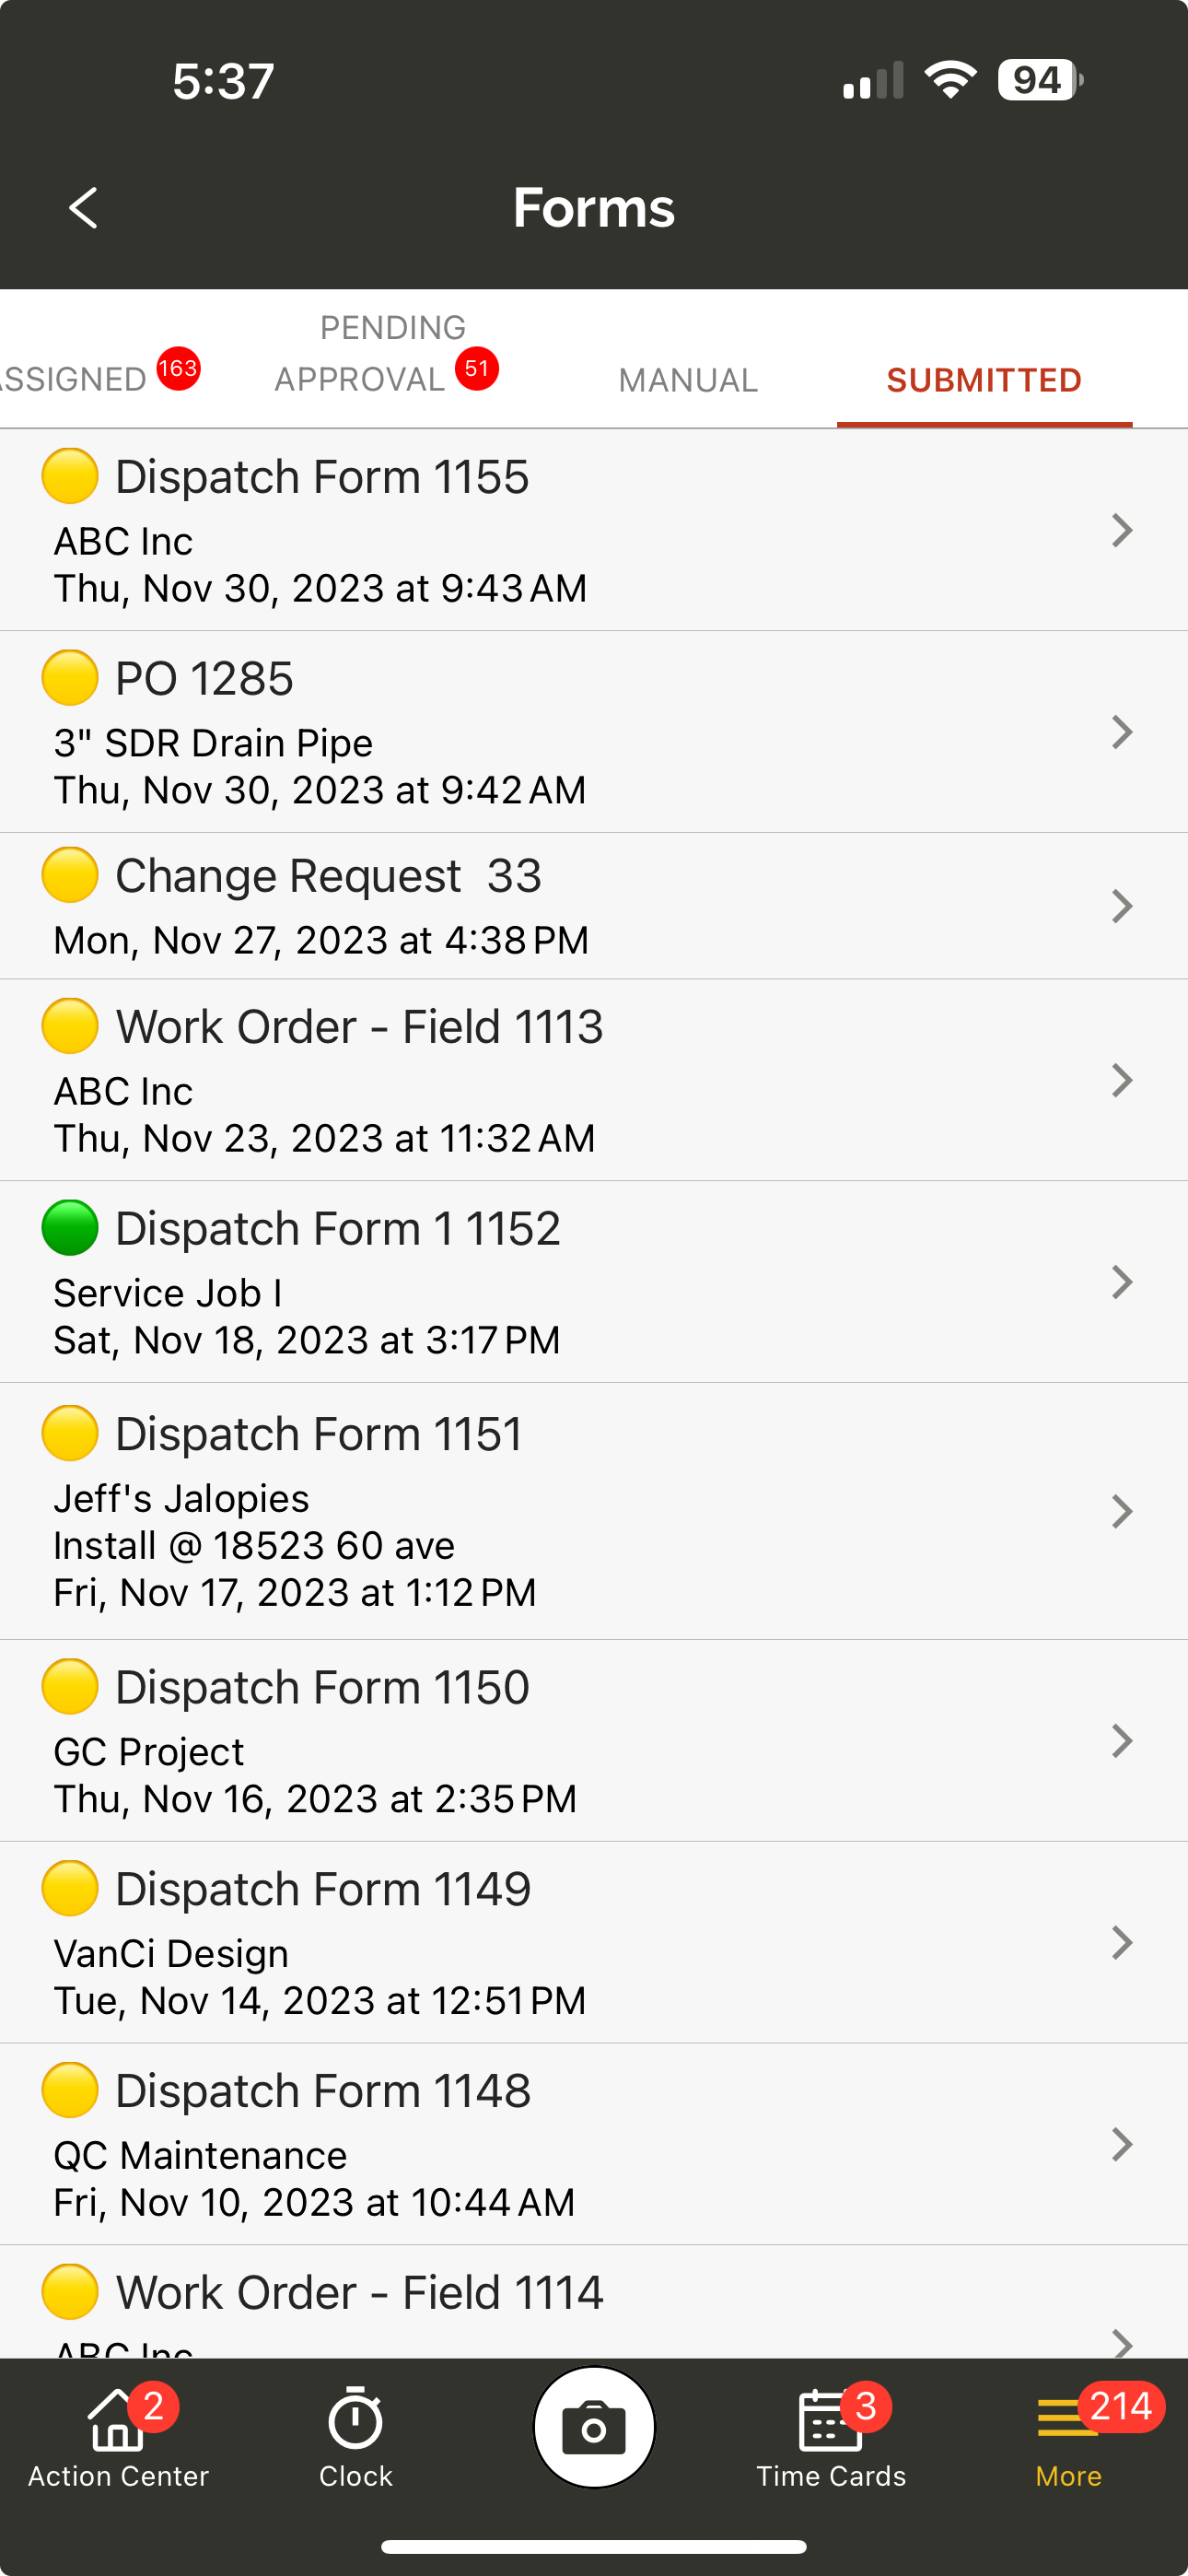
Shared forms submissions now available for all shared users
For users who are all part of a shared form, the submitted shared form will now be available for everyone via the 'Submitted' forms log.
Other Fixes & Improvements
- Fixed an issue where signatures were not being uploaded to forms and time cards correctly in certain scenarios.