Troubleshooting the Sage 100 Contractor integration
After first connecting your Sage 100 integration and first importing data, it's a good practice to have a look at the data which was imported to see if it aligns with your team's expectations and preferences. This article will provide a quick overview on how to check the important data set for the integration and also how to troubleshoot common issues if you come across them.
Checking the imported data
The 3 main data sets to check after finishing an initial import are:
- Users
- Projects
- Cost codes
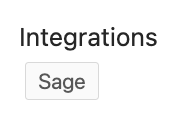
Data will only sync from Ontraccr into Sage 100 Contractor if the profiles in Ontraccr are correctly linked to the Sage 100 Contractor equivalent profile. To check whether a specific profile is linked correctly, you can open the user/project/costcode profile in Ontraccr to check the 'Integrations' field. If you see a 'Sage' label under the 'Integrations' field, then that means that the specific profile is linked correctly and should sync accordingly.
Checking users
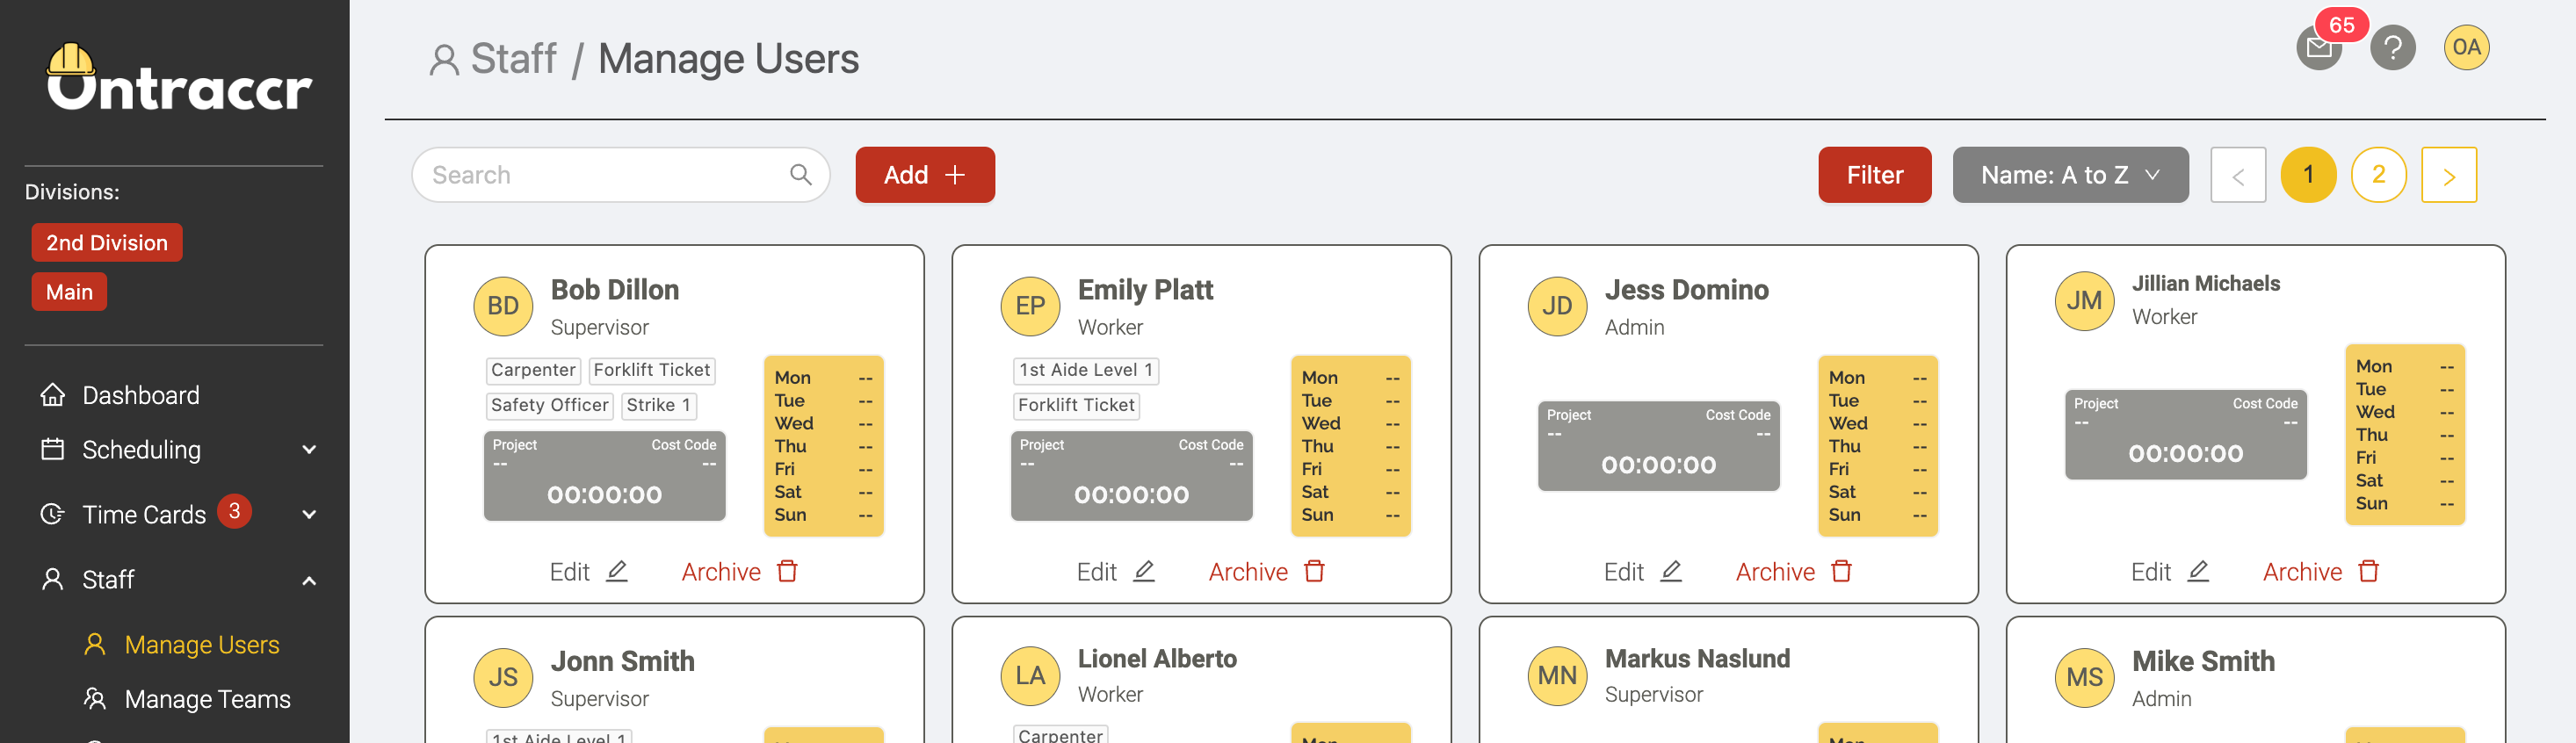
To check which users have been imported, open the Staff > Manage Users page in your Ontraccr web app. Flip through the pages to ensure that you're seeing the users you're expecting to see.
What to do if you're seeing inactive users
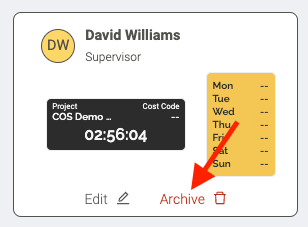
If you're seeing users in this list which are no longer involved with the company, then you can simply archive the user profiles.
What to do if you're missing users
If you're missing users in this list which are currently involved with the company, then you will need to update the user's profile in Sage 100 Contractor as follows:
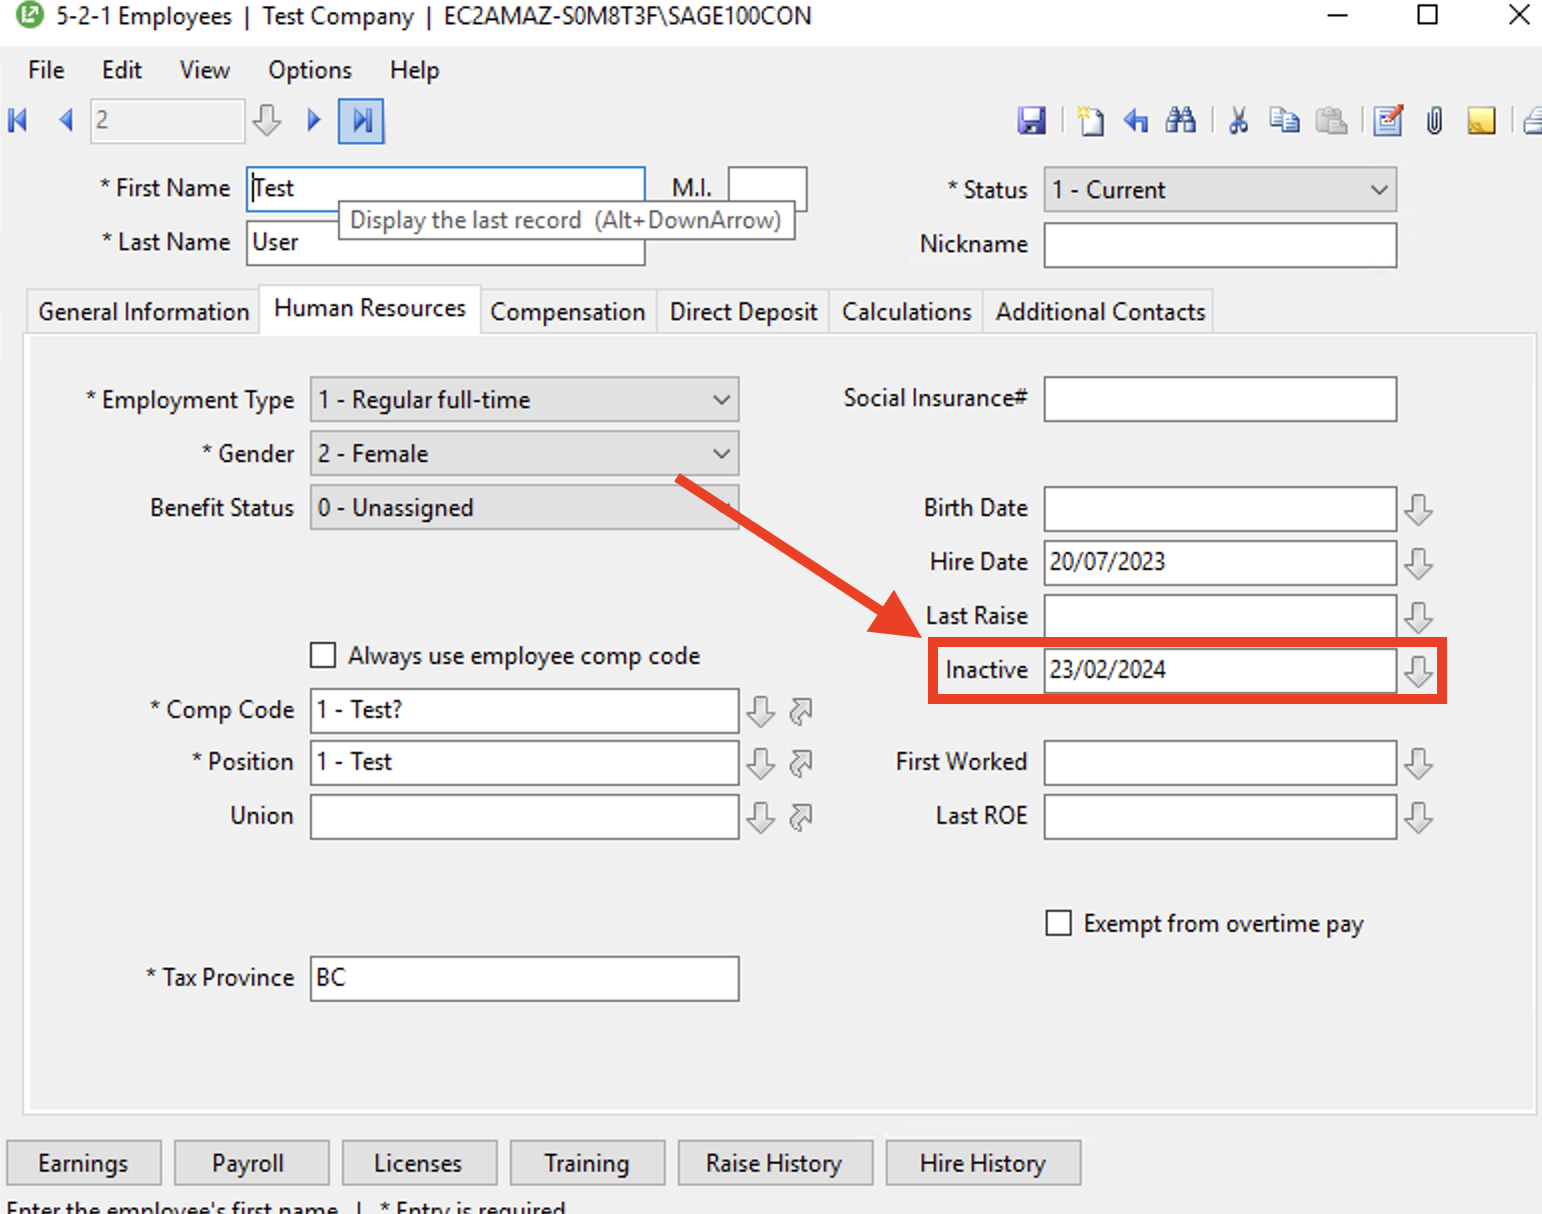
1. For any missing user, open the user's profile in Sage 100 Contractor.
2. For this profile, check the 'Inactive Date' field. Clear this field for the profile and remove the inactive date.
3. Once this inactive date is removed from the user profile and the profile is saved in Sage 100 Contractor, Ontraccr will then automatically attempt to re-sync the profile from Sage 100 Contractor since it has been marked active (this may take some time to sync).
Checking projects
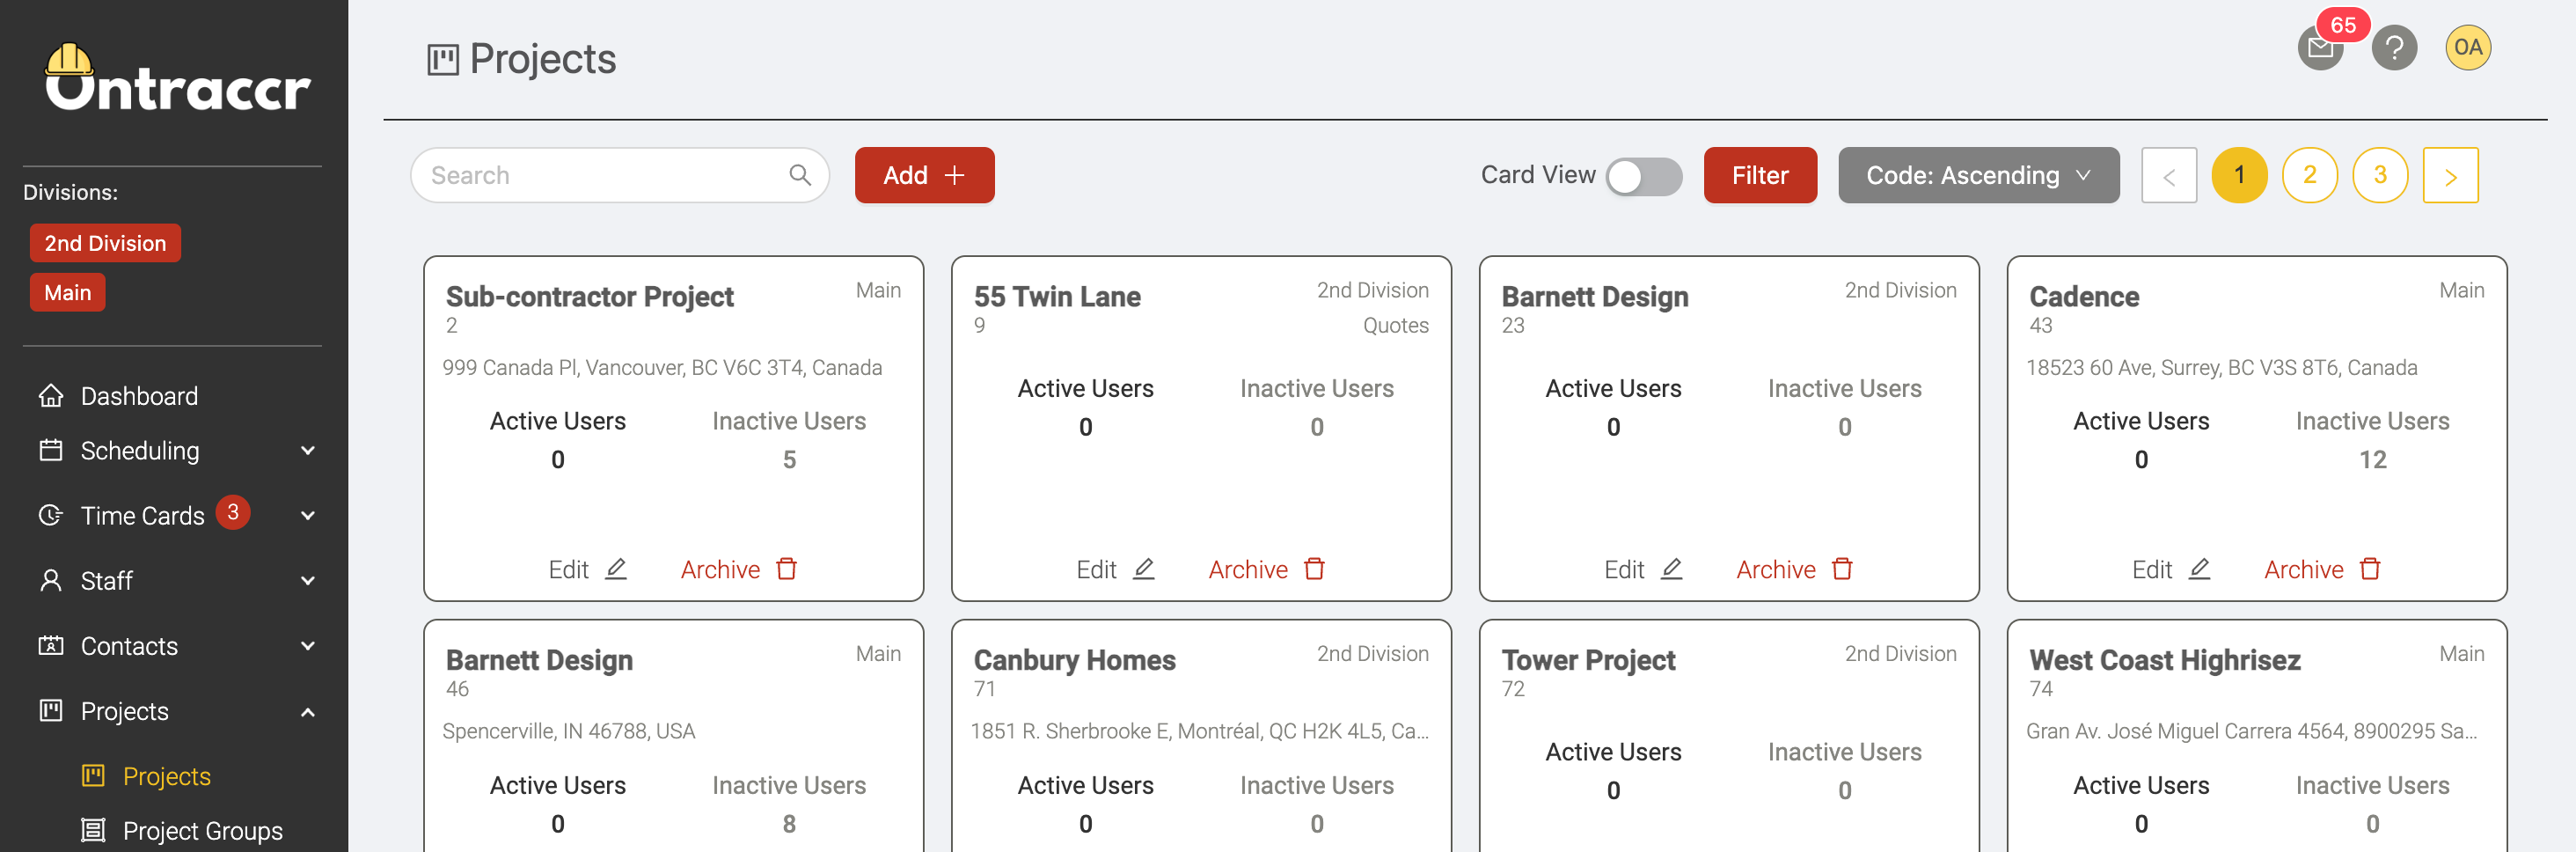
To check which projects have been imported, open the Projects > Projects page in your Ontraccr web app. Flip through the pages to ensure that you're seeing the projects you're expecting to see.
What to do if you're seeing inactive projects
If you're seeing projects in this list which are no longer active for the company, then you can simply archive the project profiles.

What to do if you're missing projects in the list
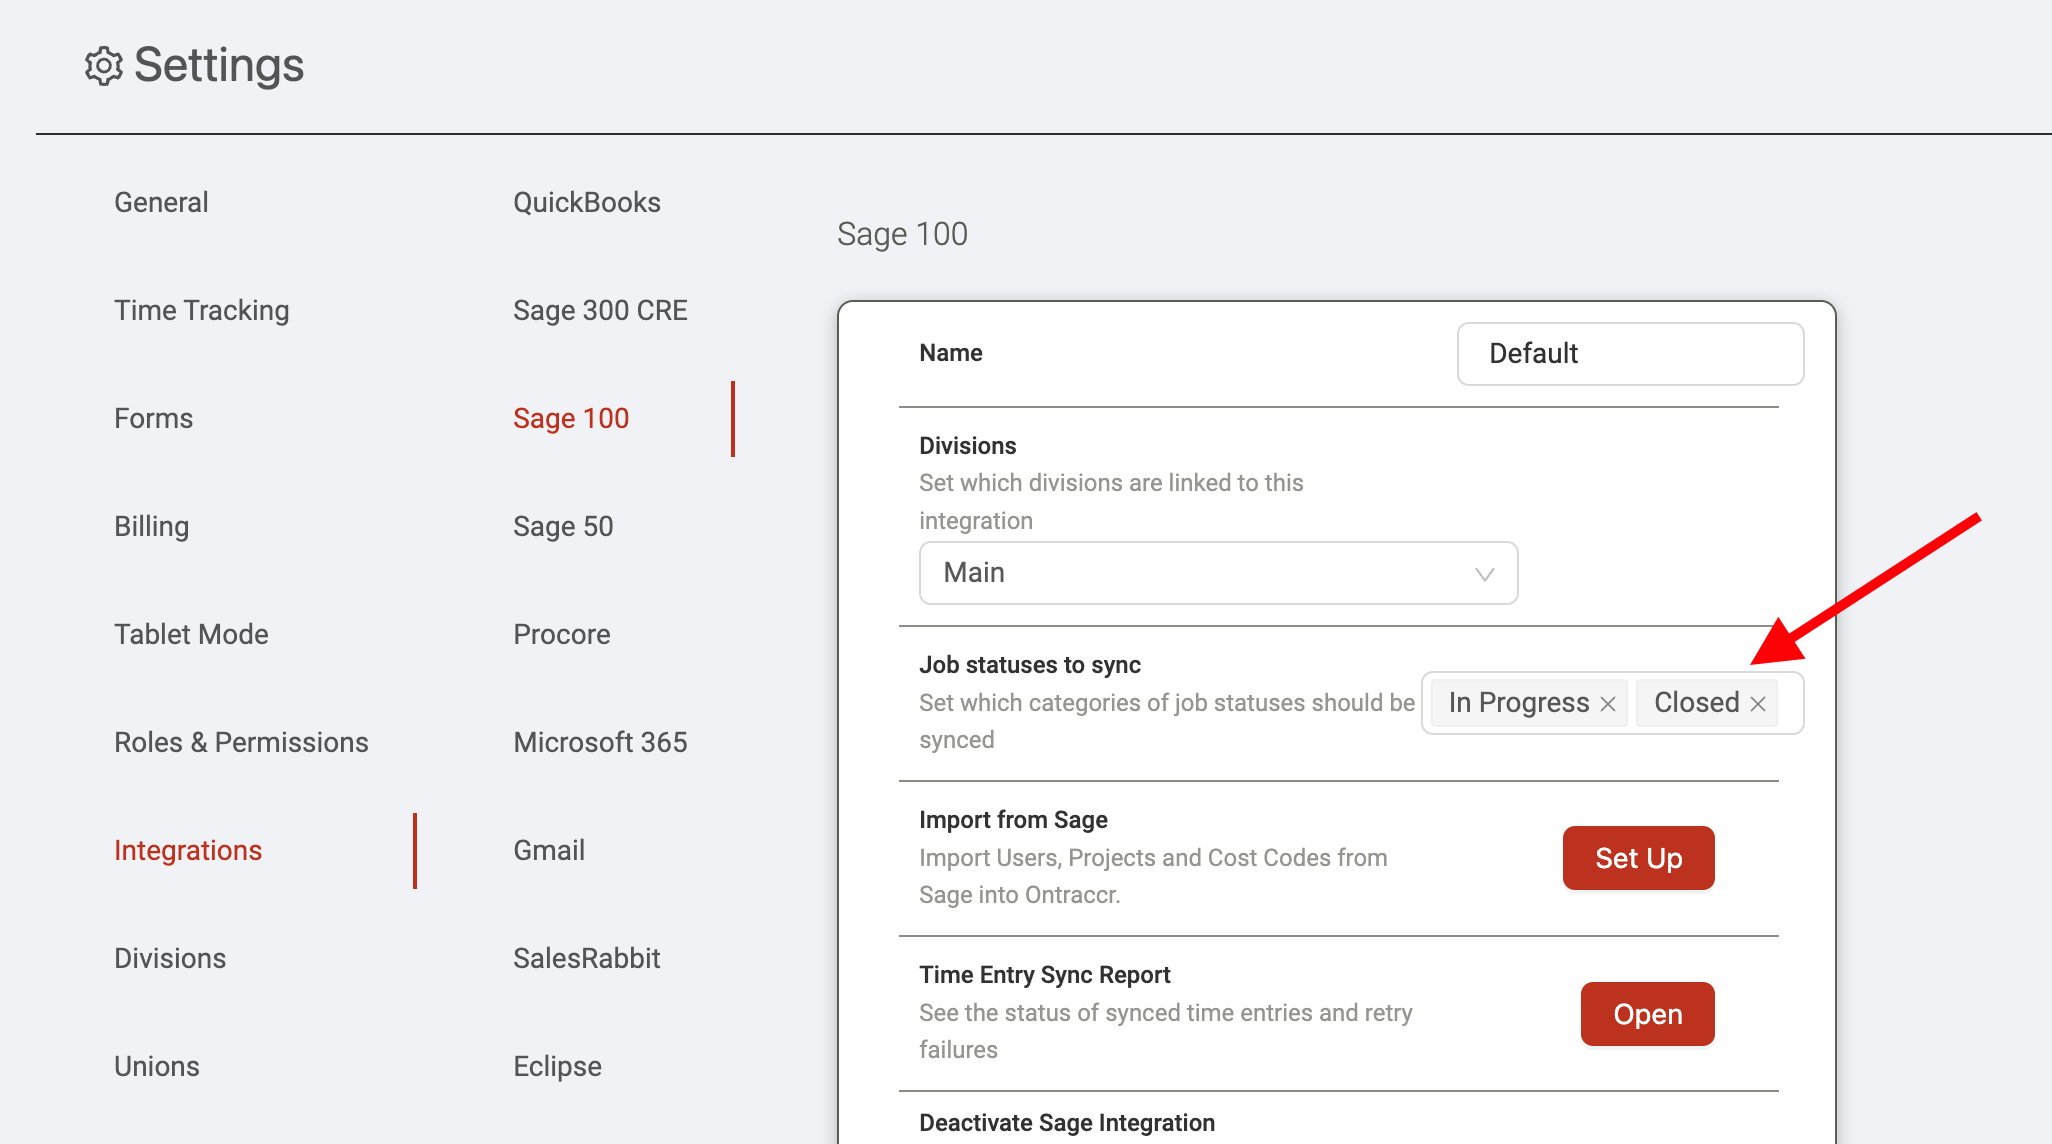
By default, all projects with 'Bid', 'Contract' and 'Current' statuses should sync over from your Sage 100 Contractor account into Ontraccr. You can edit the project statuses for the projects you'd like to sync by changing the status selections in the Settings > Integrations > Sage 100 settings page using the 'Job statuses to sync' field. Note that changing the status selections won't apply retroactively, so if you change status selections after the initial data import, you will need to re-do the project import step to sync over projects with the new statuses.
However, if you don't see certain projects show up in Ontraccr at all even after selecting the right job statuses in the settings above, then there may be an issue with the Sage 100 Contractor integration's cloud-enabled connector. In this event, please submit a 'Technical Support' request ticket and the Ontraccr team will be able to troubleshoot this immediately.
Checking cost codes
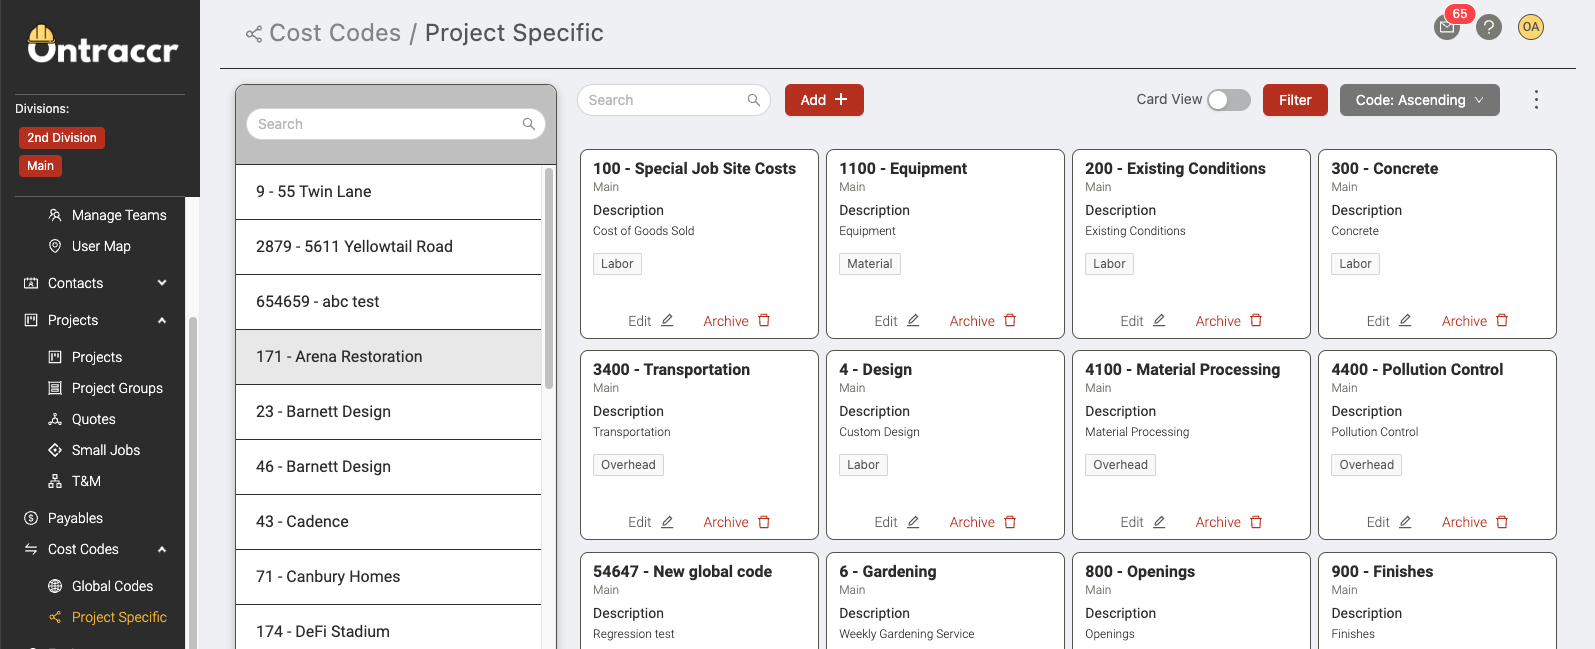
To check which project cost codes have been imported, open the Cost Codes > Project Specific page in your Ontraccr web app. Flip through the projects to ensure that you're seeing the cost codes you're expecting to see for each project.
If any cost codes are missing from this list, then it's first important to understand how Ontraccr syncs cost codes from Sage 100 Contractor in the section below.
How cost codes are synced into Ontraccr using the 'Job Costs' module
By default, cost codes are synced along with projects from Sage 100 Contractor into Ontraccr. In Sage 100 Contractor, cost codes must be linked to projects using the 'Job Costs' module. If cost codes are not linked to the projects in Sage 100 Contractor through this module, they will not be synced into Ontraccr correctly for job costing purposes.
It's also important to note that you need to link the cost codes to the project through the Job Costs module only for the cost codes that you want to show up in Ontraccr for time tracking purposes. Any other cost codes aren't necessary to link through this module.
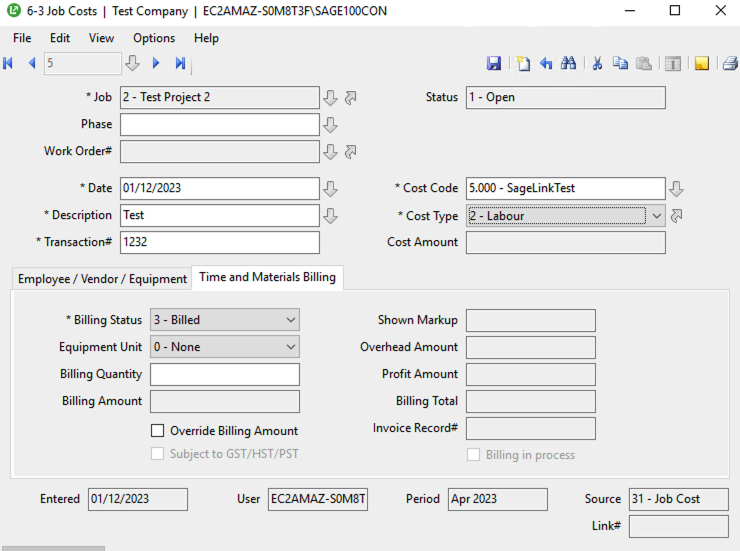
To check which cost codes are currently linked to the projects in Sage 100 Contractor:
1. In the Job Costs module in Sage, click the search function:
2. Pick the job (or leave it blank to show all jobs) and run the query.
3. It will then show you a list of the associated cost codes. This is where you can see the difference between the cost codes for the project in Sage 100 Contractor compared to Ontraccr. If the projects are not showing the desired cost codes in this report, then you should add them to the project through the Job Costs module in order for them to sync into Ontraccr.
What to do if you're seeing inactive or unnecessary cost codes
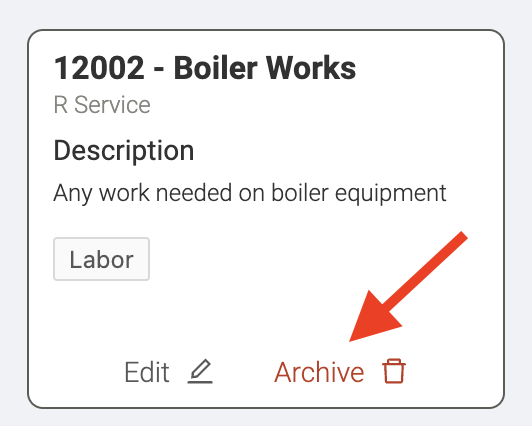
If you're seeing cost codes in this list which are no longer active for the company or not needed for Ontraccr workflows, then you can simply archive the synced cost code profiles.
Troubleshooting time card syncing issues
Although the Sage 100 Contractor integration is designed to sync time cards automatically, there are certain instances where time cards may fail to sync. This could be due to a number of reasons, including an improper configuration of the integration or unlinked profiles.
In the event that time cards fail to sync during the time card approval process, Ontraccr provides two main tools you can use to be notified of any errors and troubleshoot or resolve the errors immediately: the Error Report and the Time Entry Sync Tool.
Error Report
Any time a time card fails to sync, Ontraccr will send an automated email report notifying selected admins of the issues. An example of the email report is shown below.
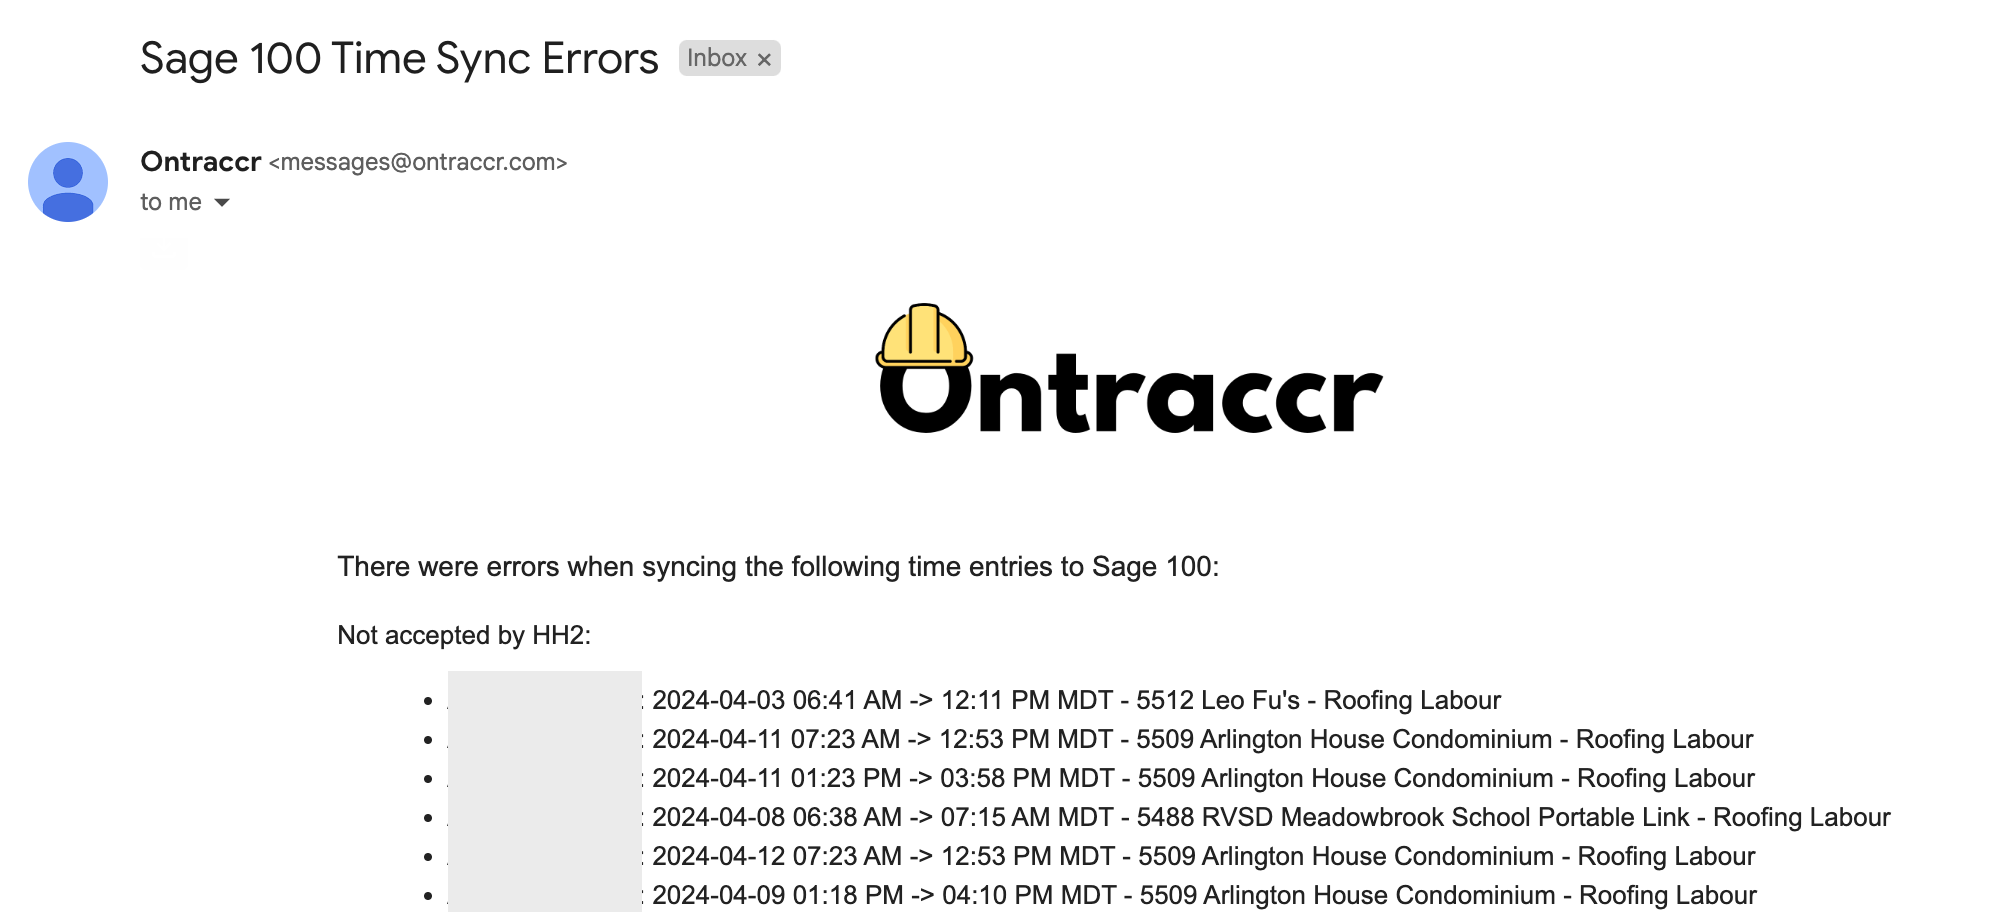
The email report is designed to show you a list of the specific time card entries which failed to sync and will provide the exact details of each failed entry for troubleshooting purposes.
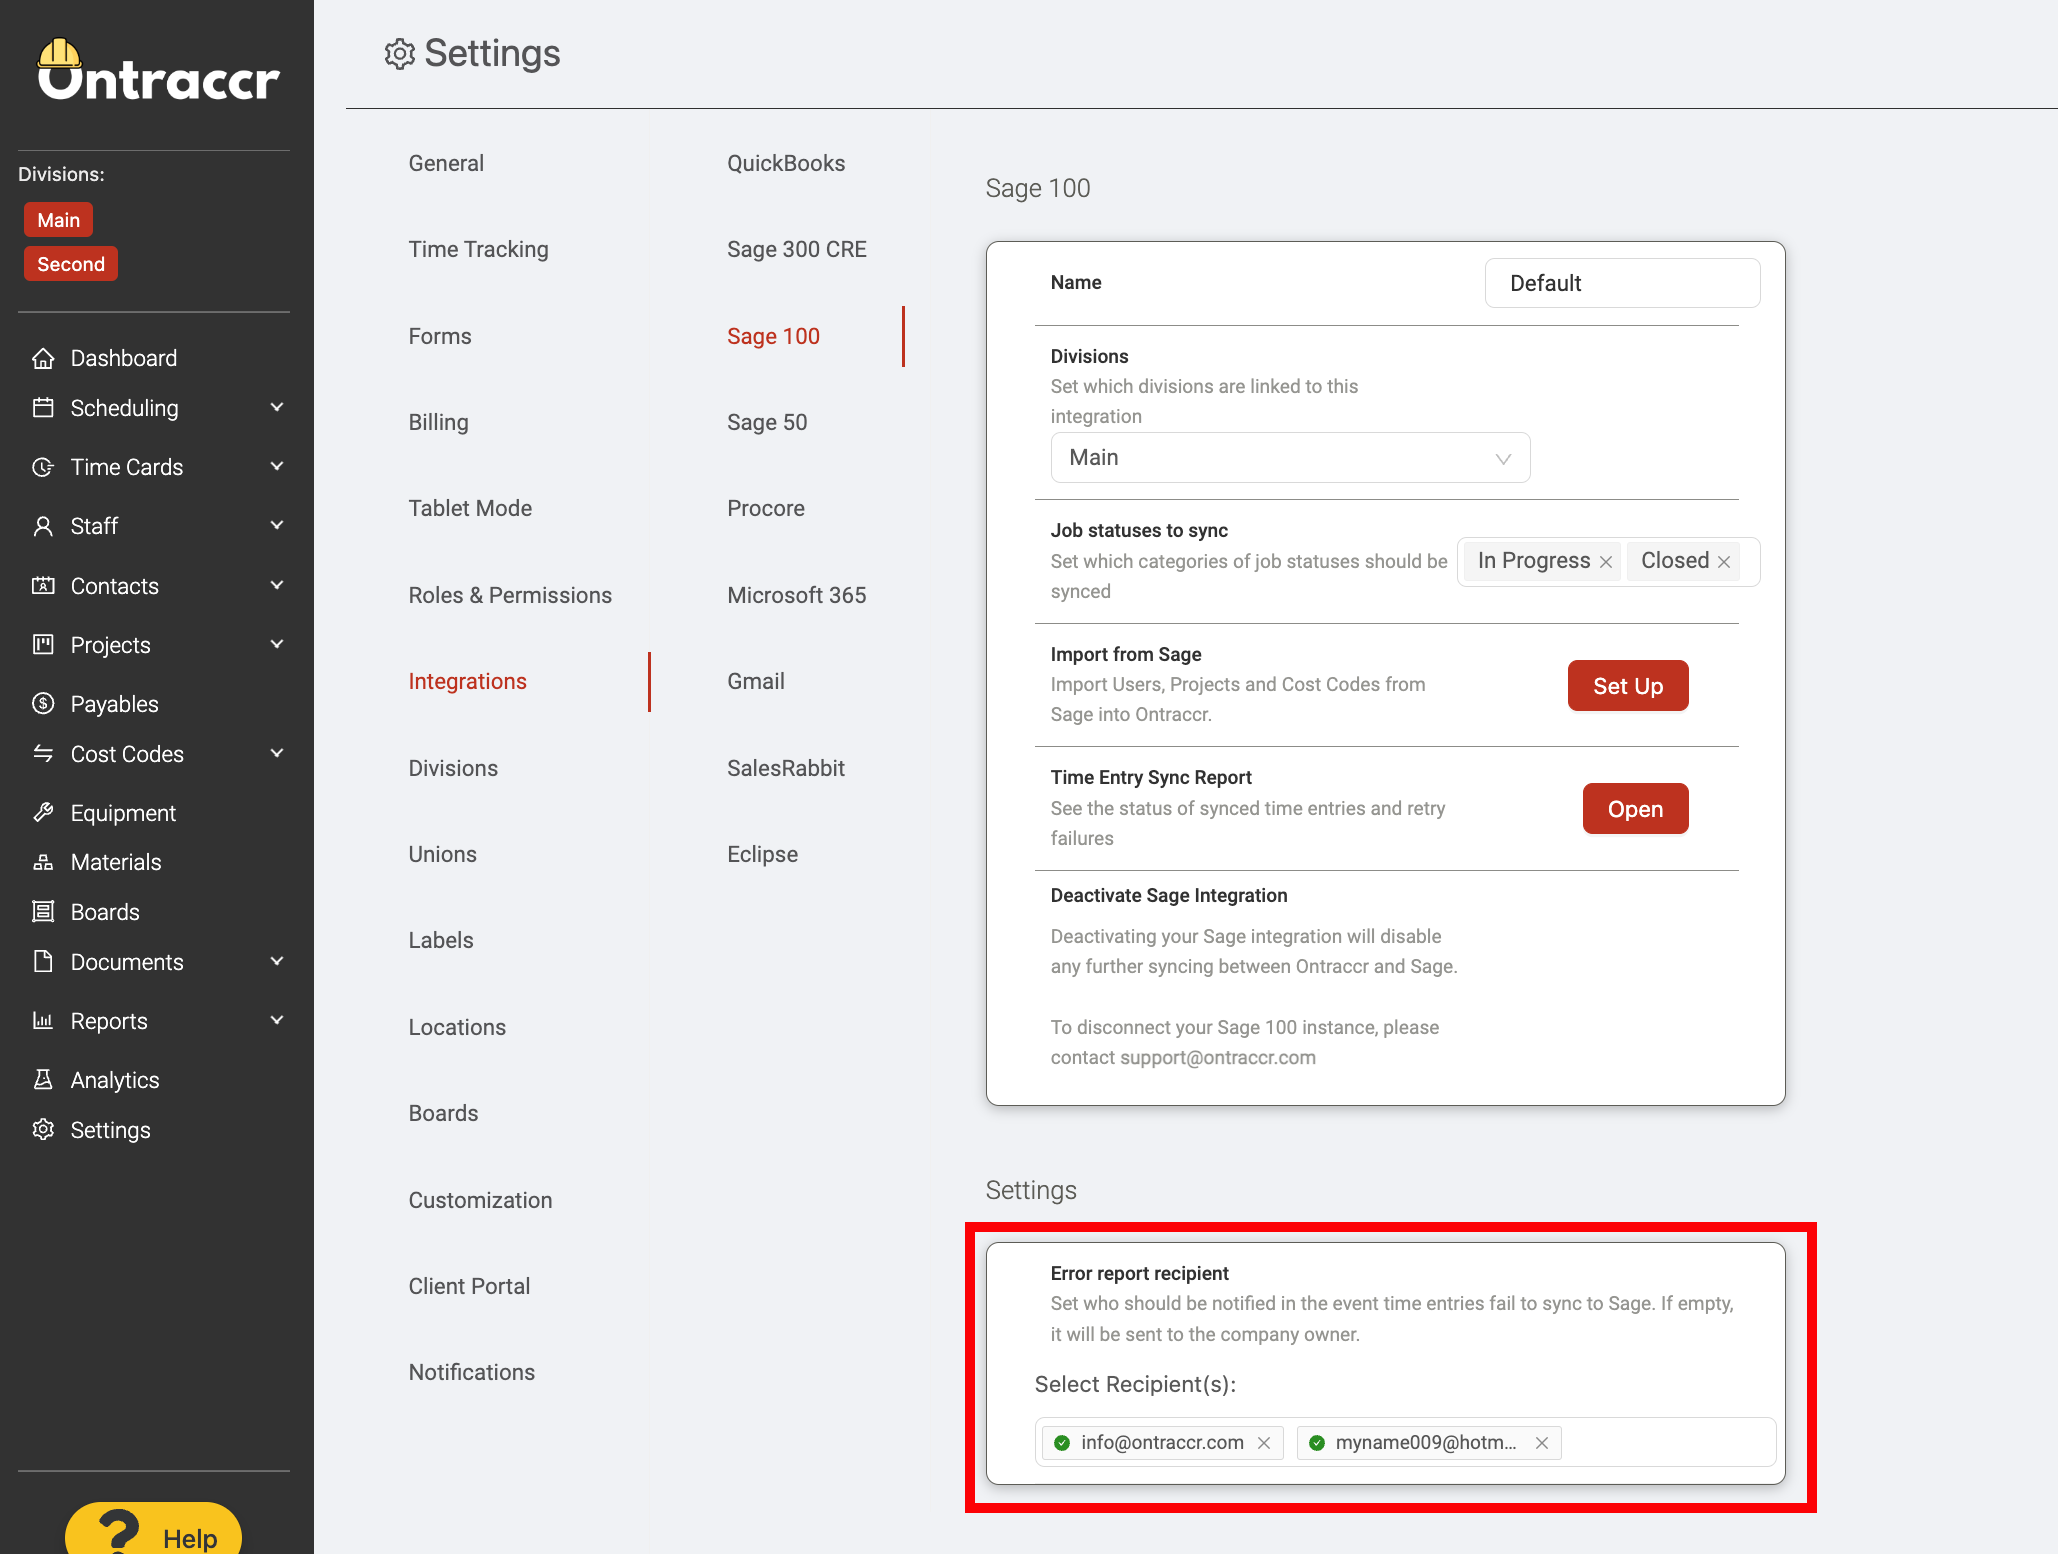
By default, this error report will be sent to the 'Primary Account Owner' for your company's Ontraccr account. However, if you want to add more recipients to the list of users who will receive this email report, you can easily add more email addresses by navigating to the Settings > Integrations > Sage 100 settings page. Under the 'Email report recipient' setting, click into the 'Select recipient(s)' field to start typing any email addresses you'd like to add to the recipient list to also receive a copy of this report.
Time Entry Sync Tool
While the email error report will let you know which time card entries failed to sync, the Time Entry Sync Tool allows you to retry or resolve any of the failed entries directly.
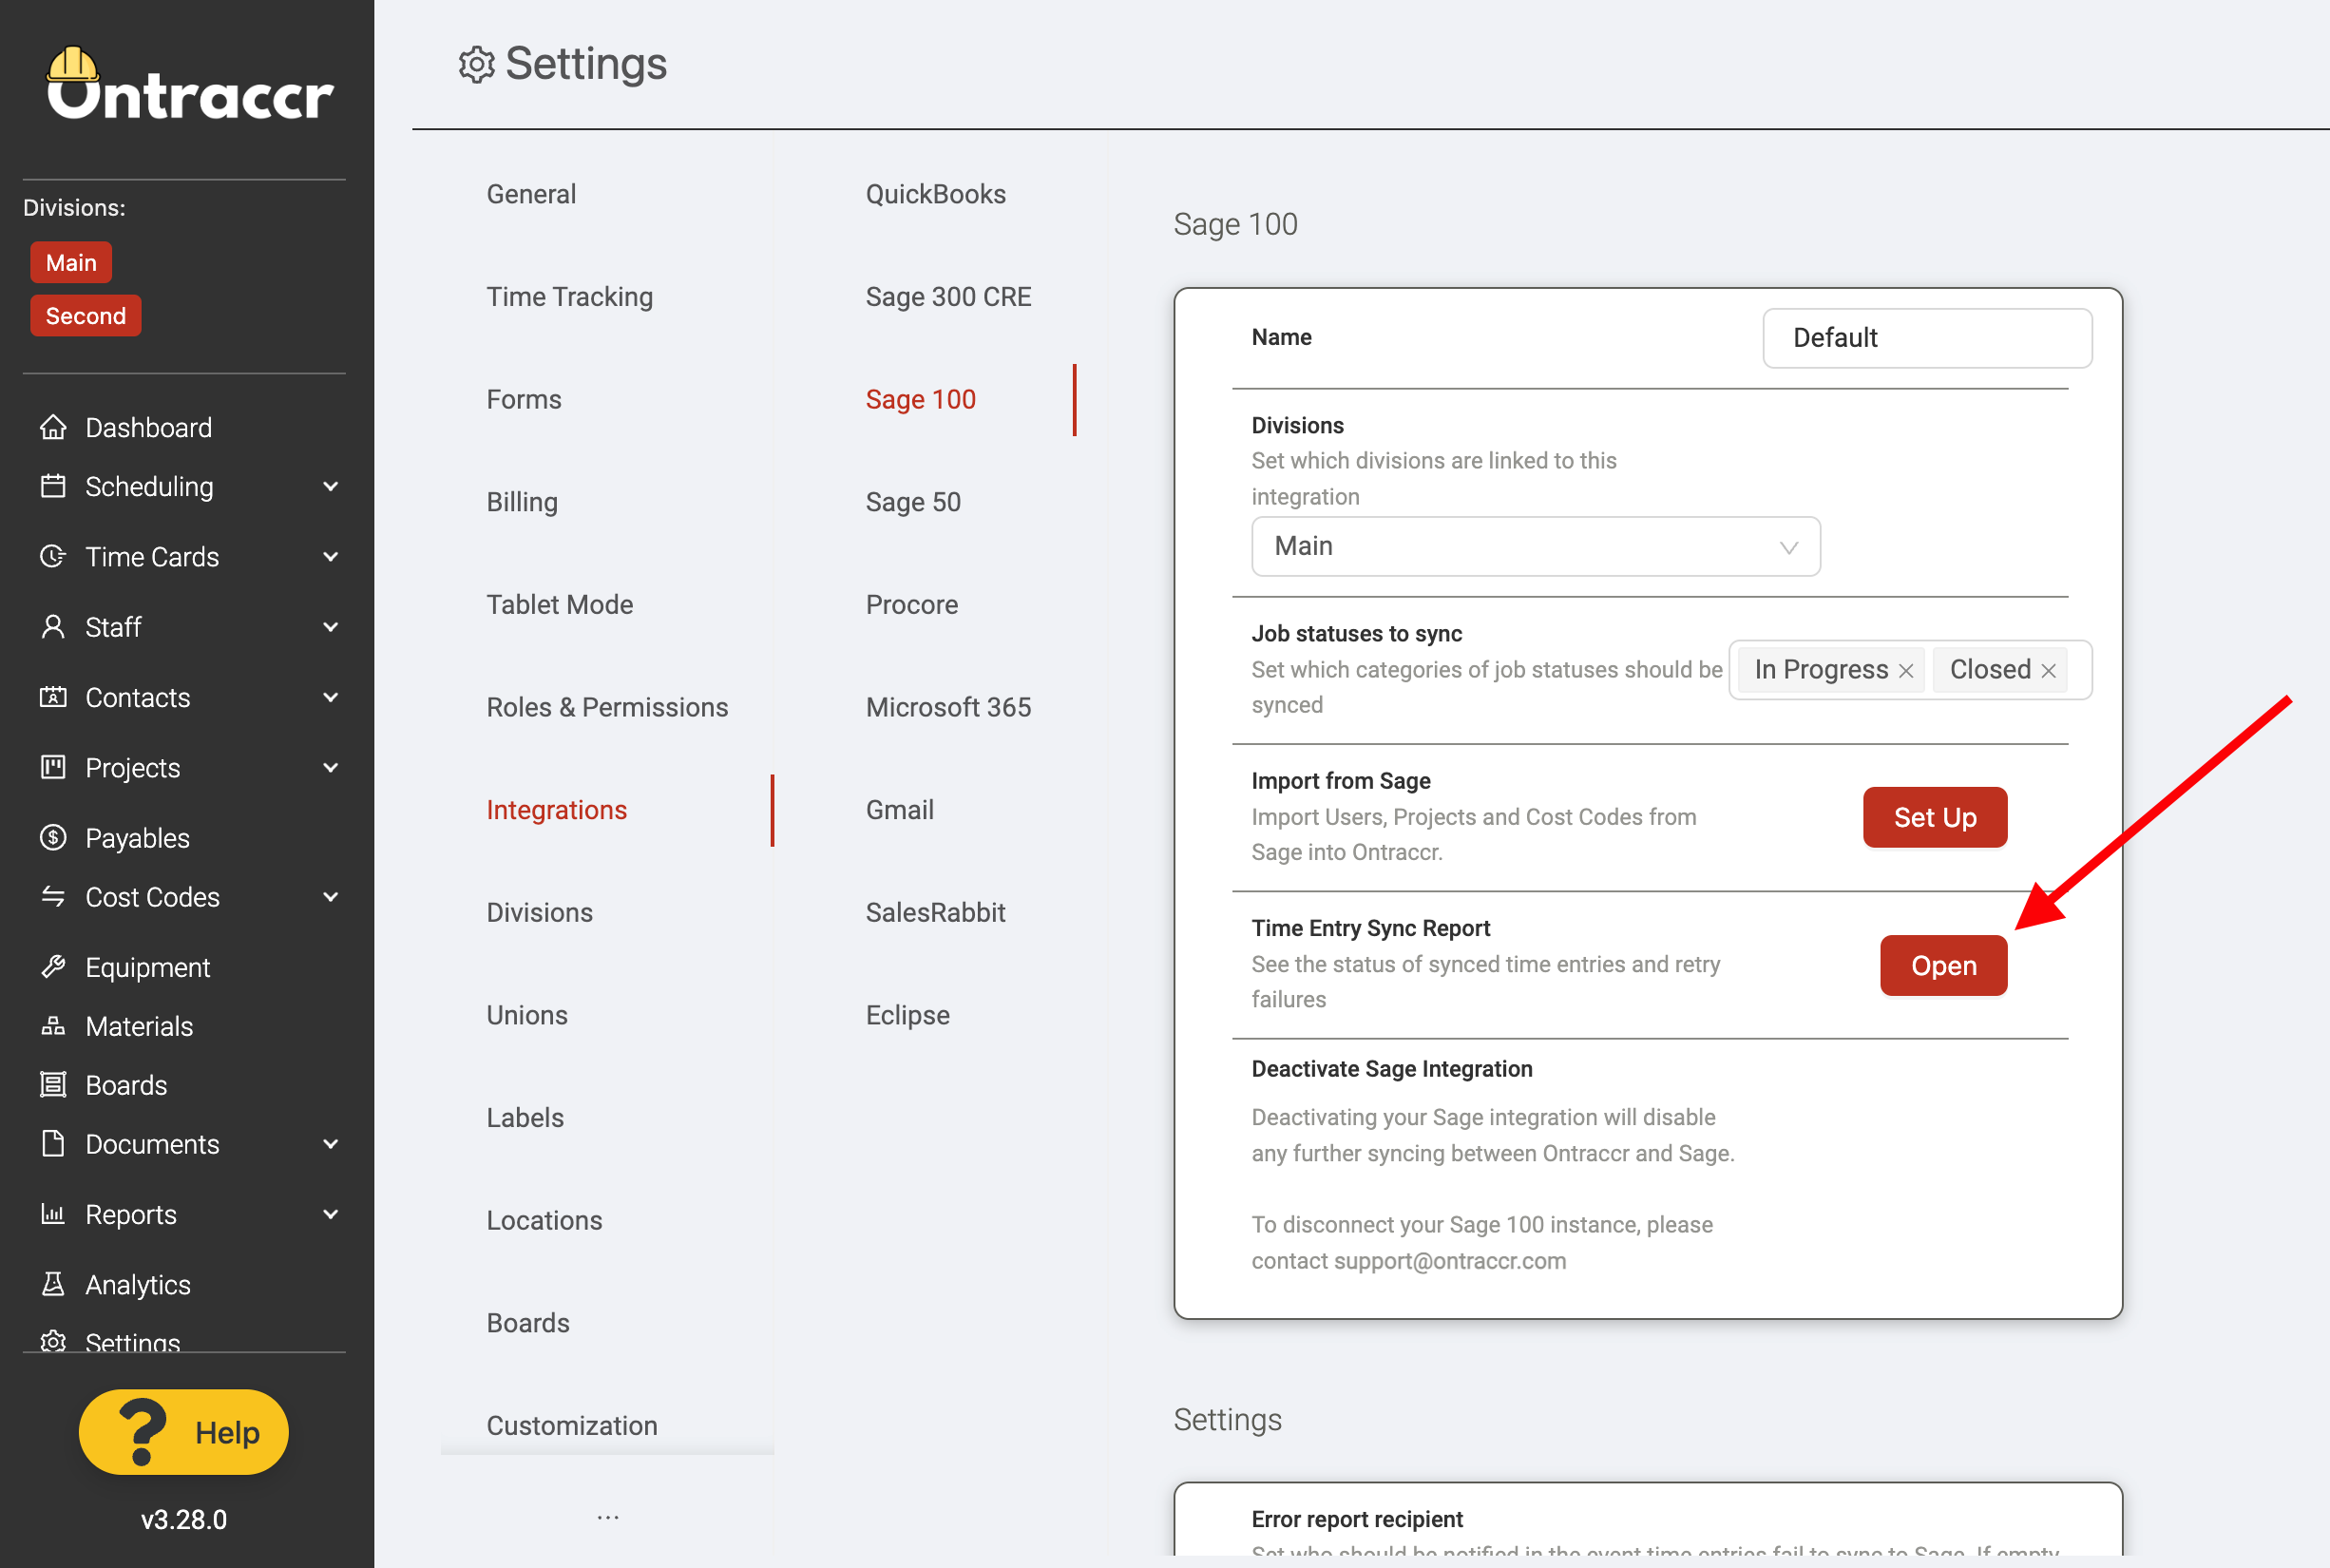
To access the Time Entry Sync Tool, navigate to the Settings > Integrations > Sage 100 settings page, and click 'Open' under the 'Time Entry Sync Report' setting.
On the left-hand side of the report, you'll see a section titled 'Unresolved Errors' and another titled 'Successful / Resolved'. Any failed time card entries will show up under the 'Unresolved Errors' section.
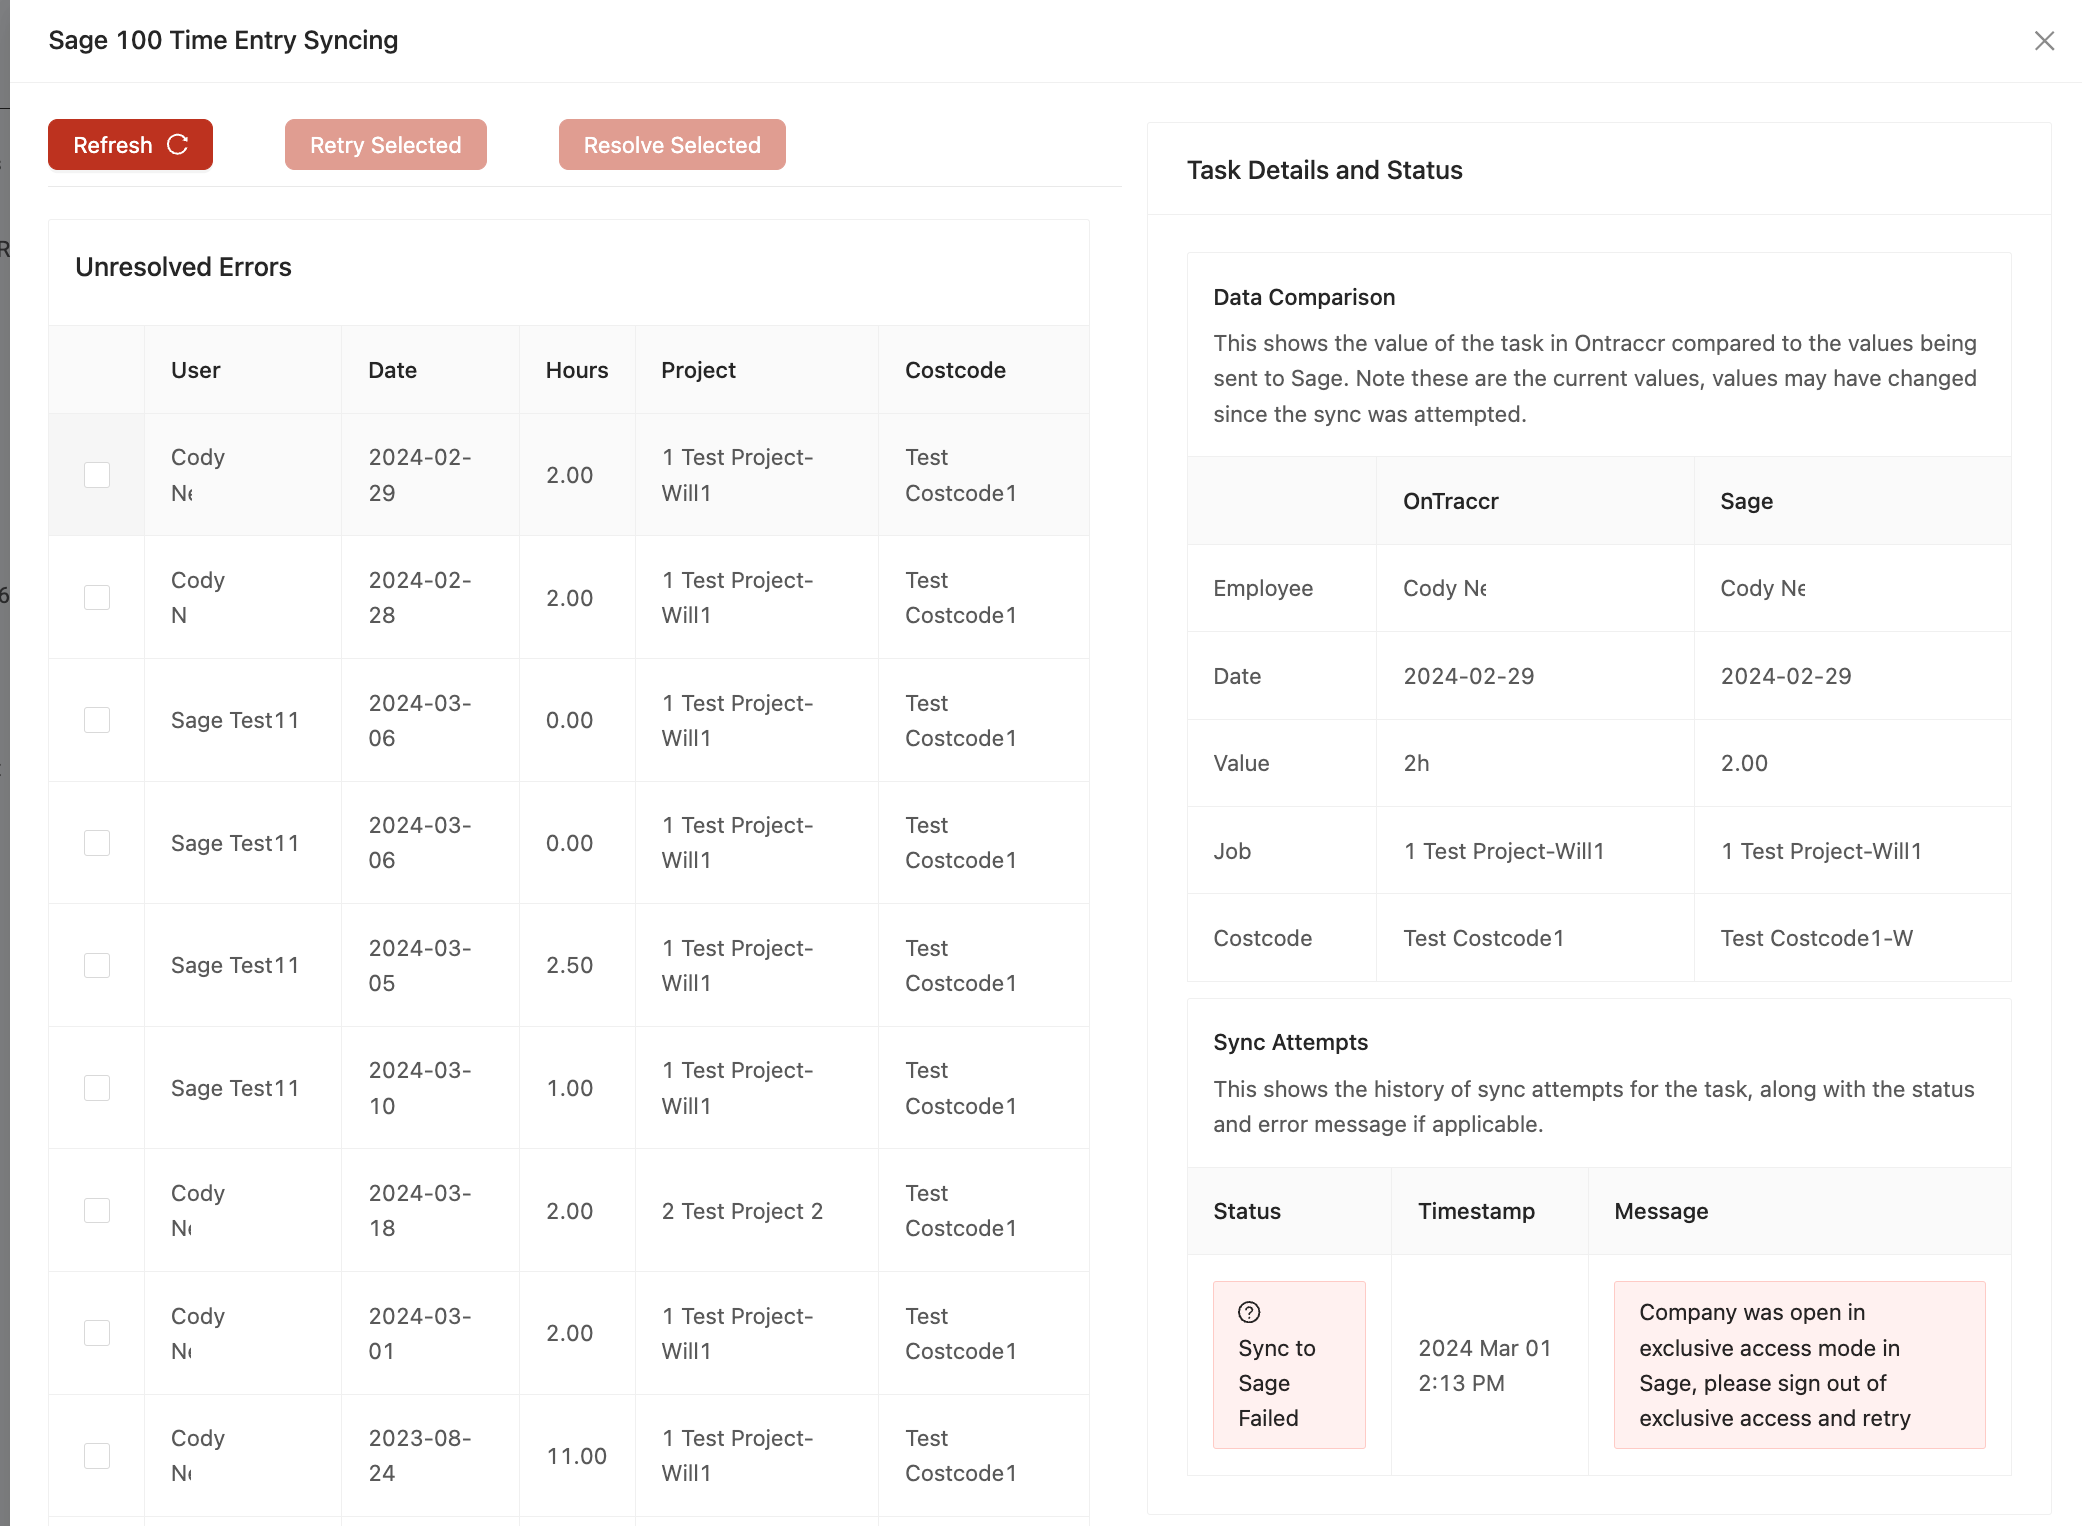
Click into any entry in the list and you will see detailed information about the entry on the right-hand side. The 'Sync Attempts' section in the bottom right will show you information about the specific error which caused the sync attempt to fail and will provide some guidance to troubleshoot the issue.
Whenever an entry fails to sync, you have two options:
1. You can either manually add the failed time entry into Sage 100 outside of Ontraccr. In this case, you should 'resolve' the entry using the Time Entry Sync Tool. OR
2. You can retry the sync attempt again using Ontraccr.
Resolving failed entry syncs manually
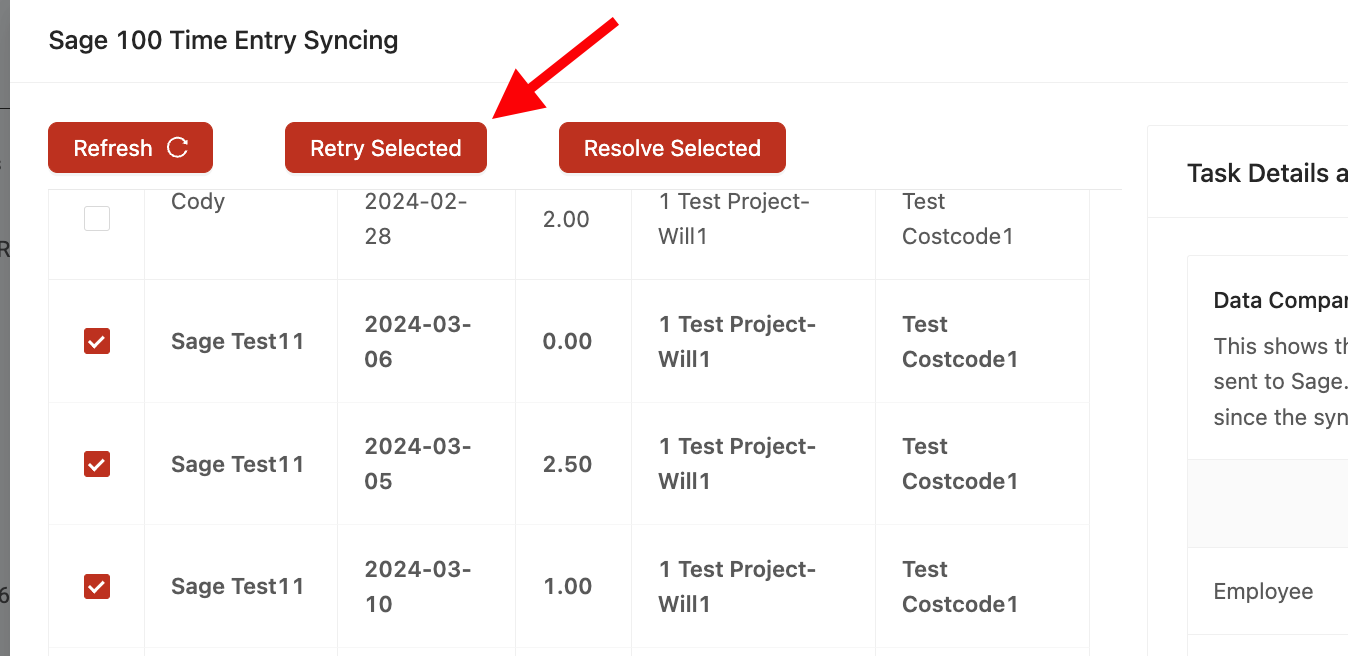
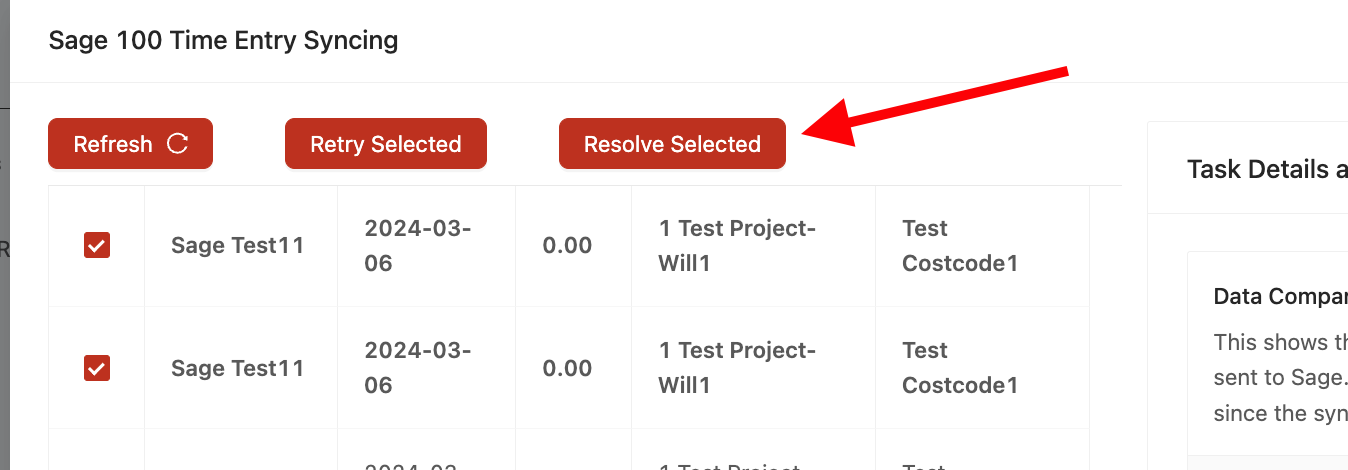
If you'd like to manually add the failed time entry into Sage 100 outside of Ontraccr, we'd recommend 'resolving' the failed entry sync using this Sync Tool to avoid any duplicate time card entries in Sage 100. To mark a failed entry sync as resolved, simply check the box next to the entry/entries you'd like to resolve and click the 'Resolve Selected' button at the top. Once the entry/entries are marked as resolved, they will be moved to the 'Successful / Resolved' section of the sync tool report.
Retrying failed entry syncs using Ontraccr
If you'd like Ontraccr to retry the sync attempt for any failed time entry syncs, simply check the box next to the entry/entries you'd like to retry and click the 'Retry Selected' button at the top. When retrying sync attempts, it may take a bit of time for Ontraccr to perform the sync attempt (up to 15 minutes). If you want to check the status of the retried sync attempts, click the 'Refresh' button in the top left as needed. If the retry attempts succeed, the entries will be moved to the 'Successful / Resolved' section of the sync tool report. If the retry attempts fail, you may need to simply 'resolve' the entries manually instead.