
Creating your first board
How boards work in Ontraccr
Tracking anything across your construction operation is as easy as creating a tracking board for your specific needs. You can create tracking boards for any purpose. Examples include tracking your project bids, customer leads and deal stages, active projects and project updates, field tasks and progress, material orders and shipments, job recruiting, or even a personal to-do list.
Boards in Ontraccr consist of two main pieces:
1. Cards
2. Board
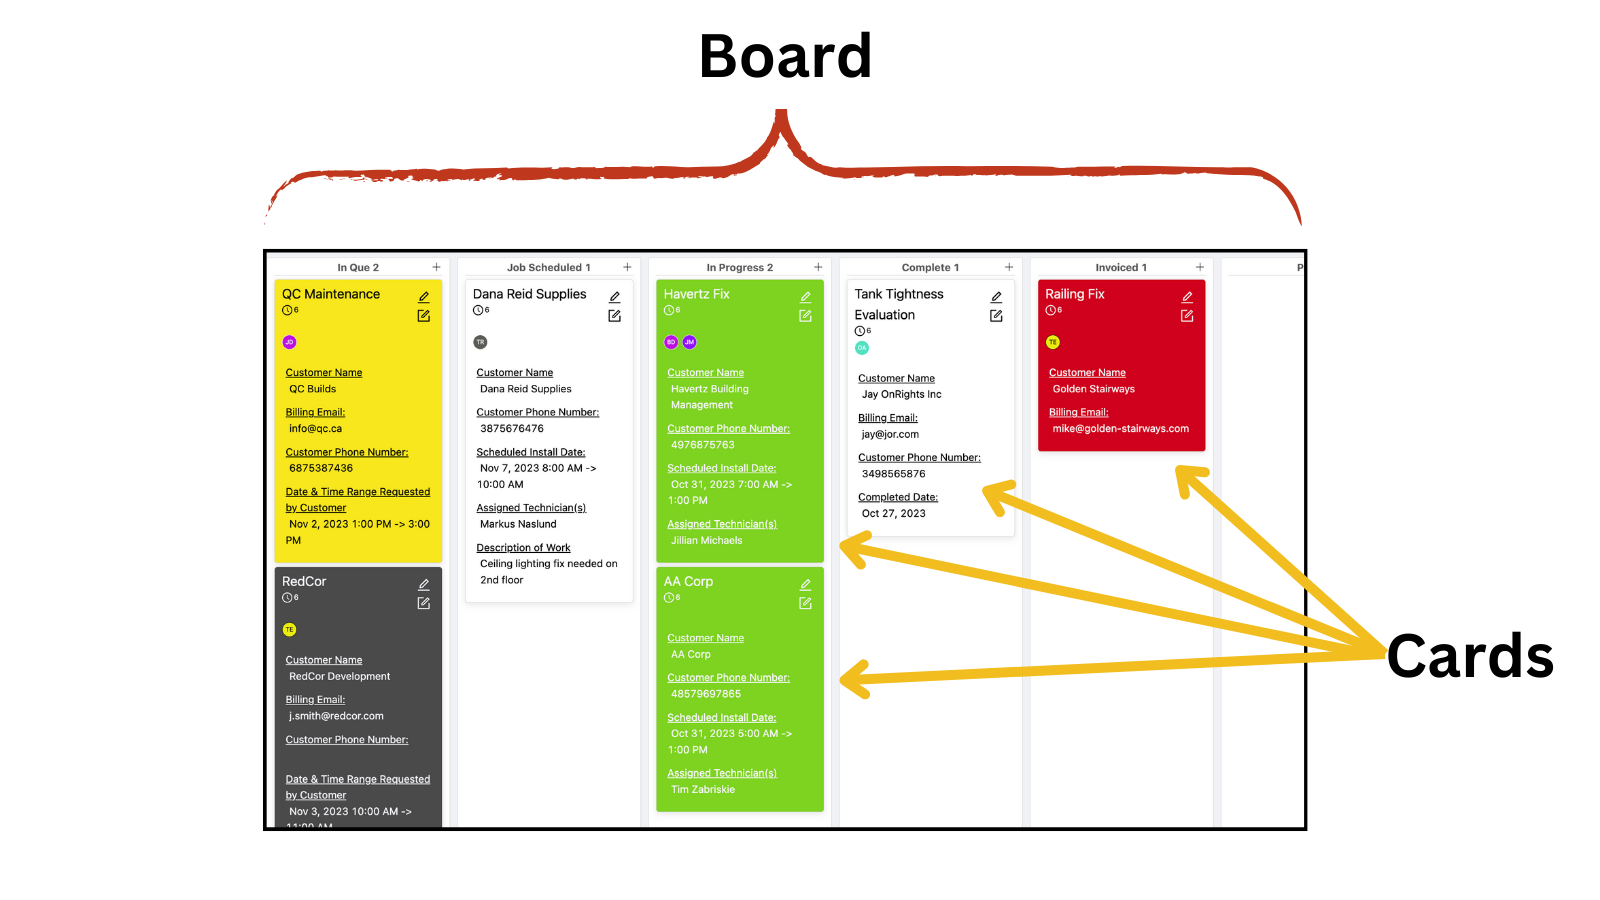
Every board is designed to track a set of cards, which represent the type of information you are trying to track. For example, cards can be created for customer leads, project bids, field tasks, material shipments, or a candidate for a job you’re trying to fill.
Each board consists of 'statuses', which represent the different stages or columns in the board.
For each card you create, you can decide exactly what kind of information you need to track for the specific activity. You can include any type of field such as text, image or file attachments, calculations, multiple choice selections, and much more. Each field can even be configured to be required or optional.
It's important to keep in mind that, in order to create a board, you must first design the card that you'd like to use for the board.
Creating a board from a template
Ontraccr comes pre-loaded with a set of board templates that you can use out-of-the-box. Once you import a template, you can also modify it to suit your needs.
To create a board using one of Ontraccr's board templates:
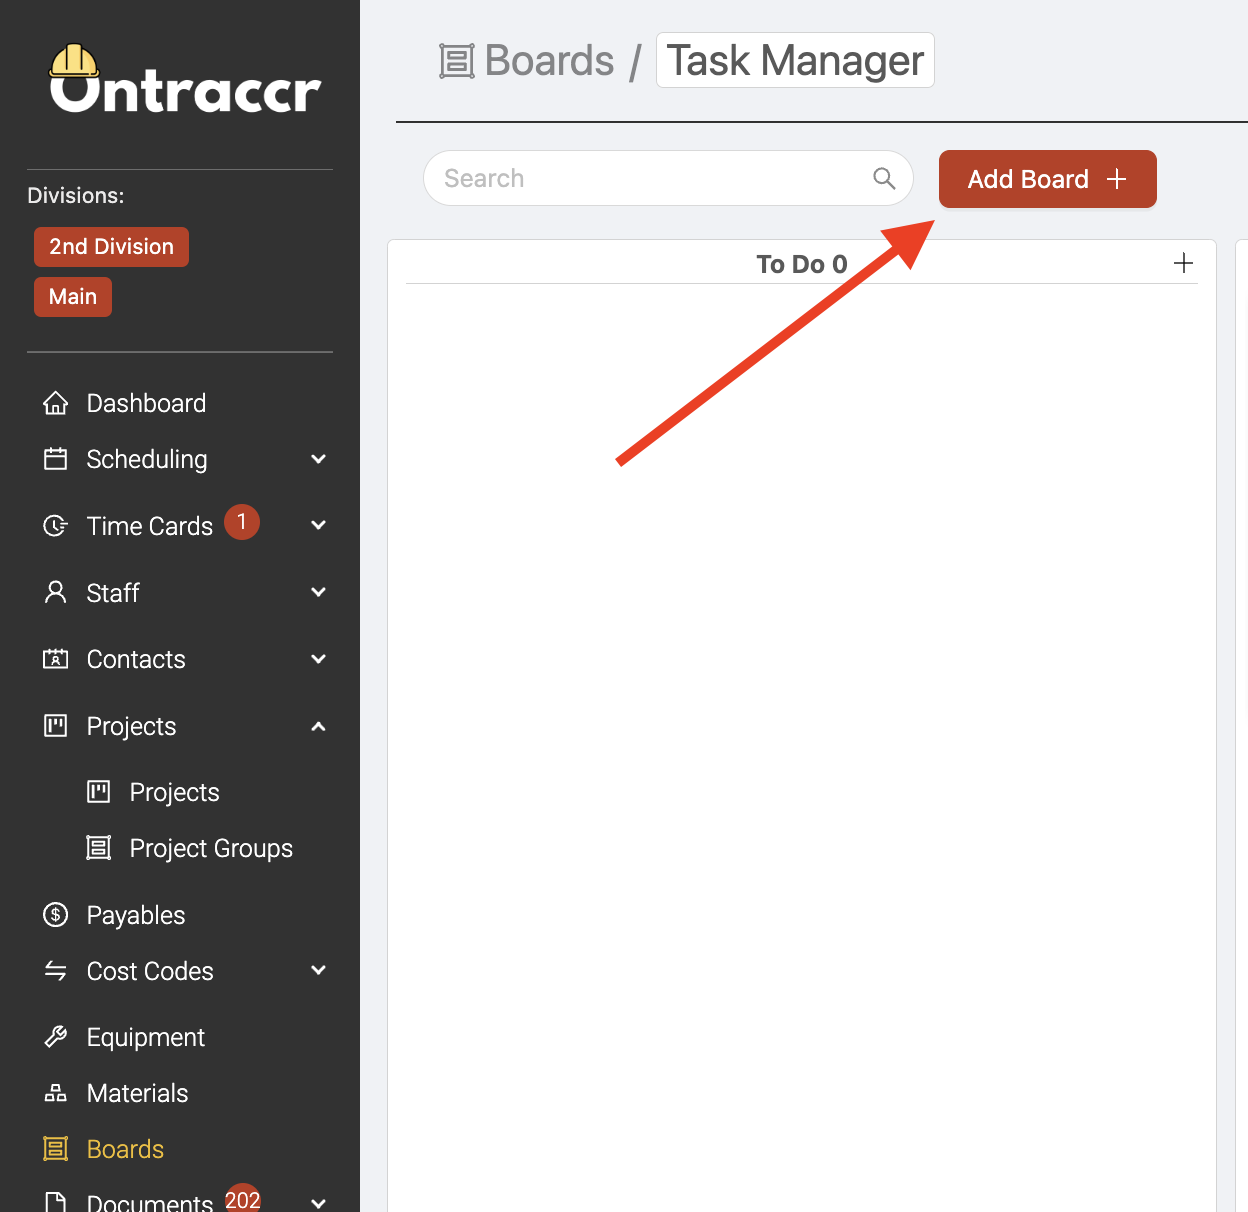
1. Open the Boards page and click the 'Add Board' button. This will open the board creation slider.
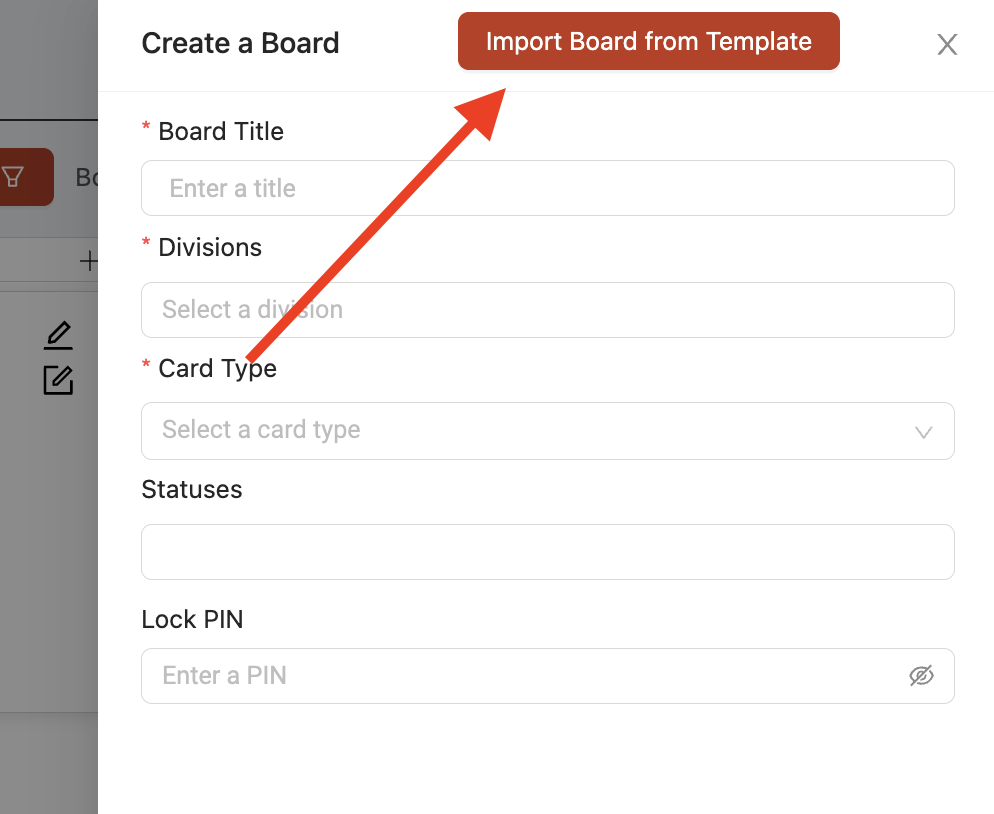
2. Click the 'Import Board from Template' button.
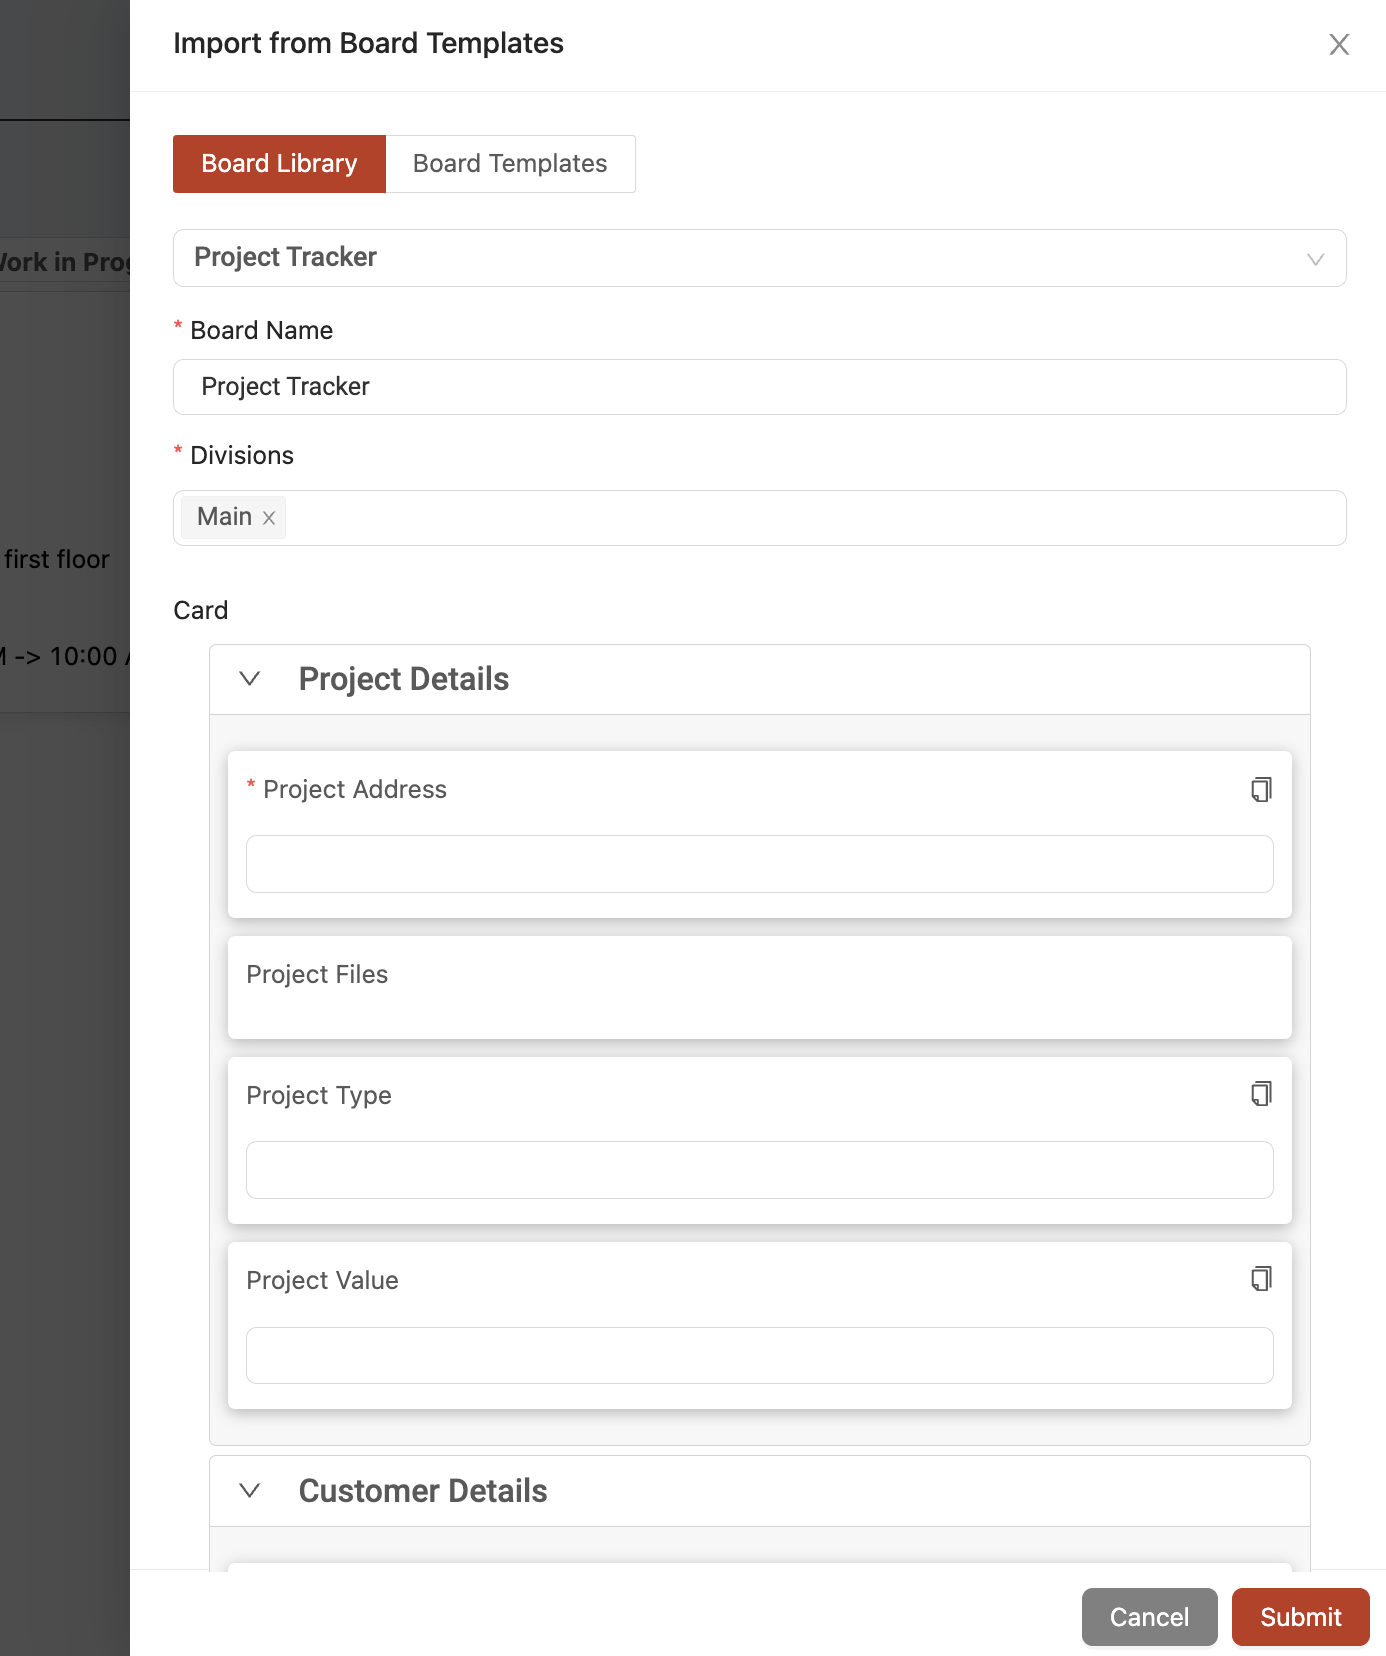
3. Select your desired board template from the drop-down list.
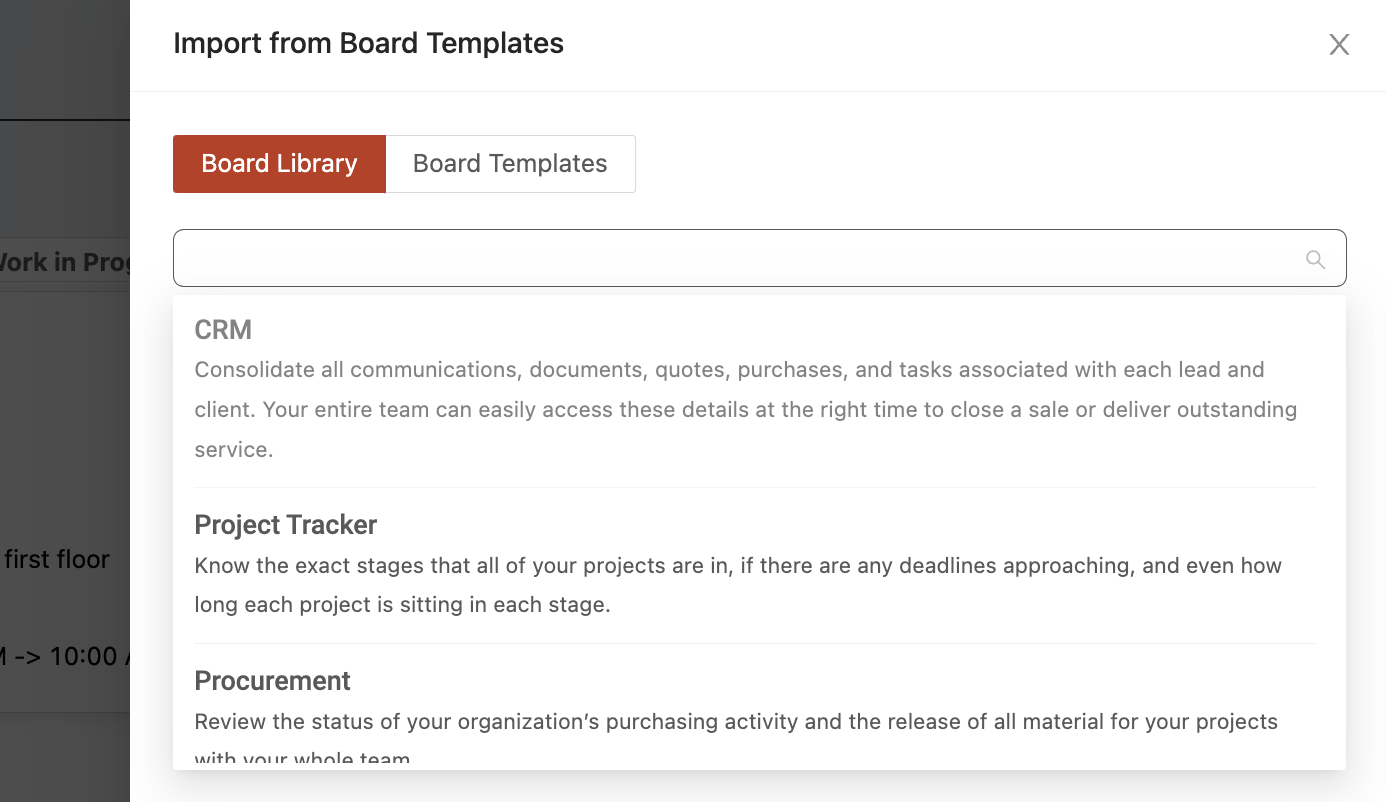
4. Once you select your template, you will then see a preview of how the board template will work. It will show you a preview of the card fields and also the board statuses. Any of these details can be easily modified after you import the board. Simply give the board a name and click 'Submit' to import the template into your account.
Creating a board from scratch
If you'd like to create a brand new custom board from scratch, you will need to create your card design first and then use the card design to create the board after:
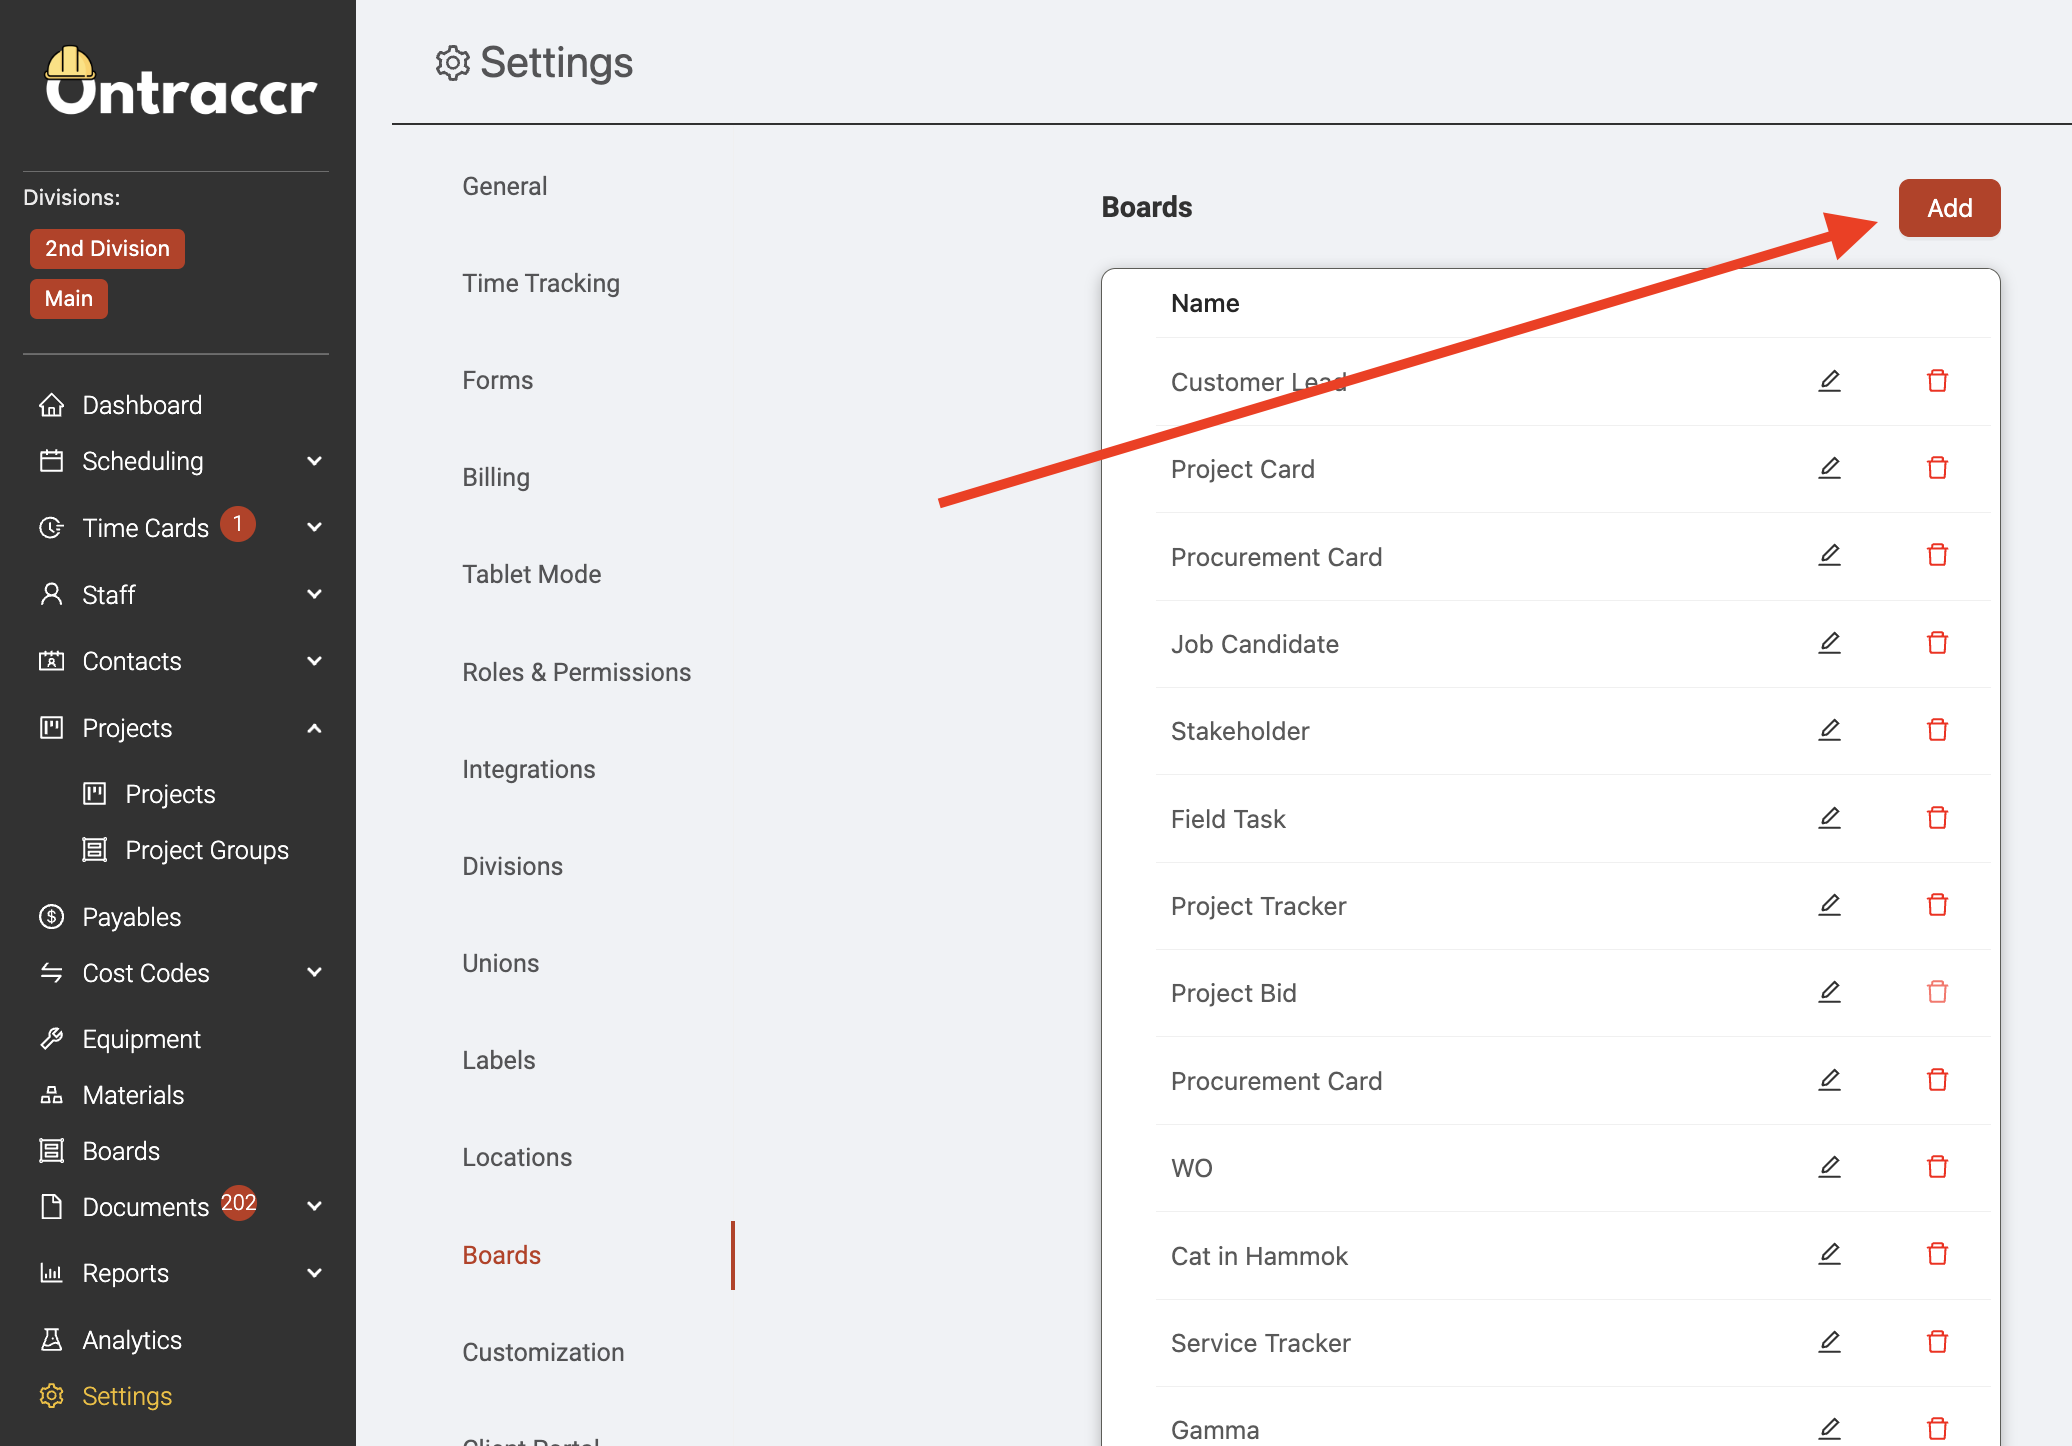
1. To create a card design, navigate to the Settings > Boards page. This is where you can manage all of your card designs for all of the boards in your company's Ontraccr account. Click 'Add' to start creating your card design.
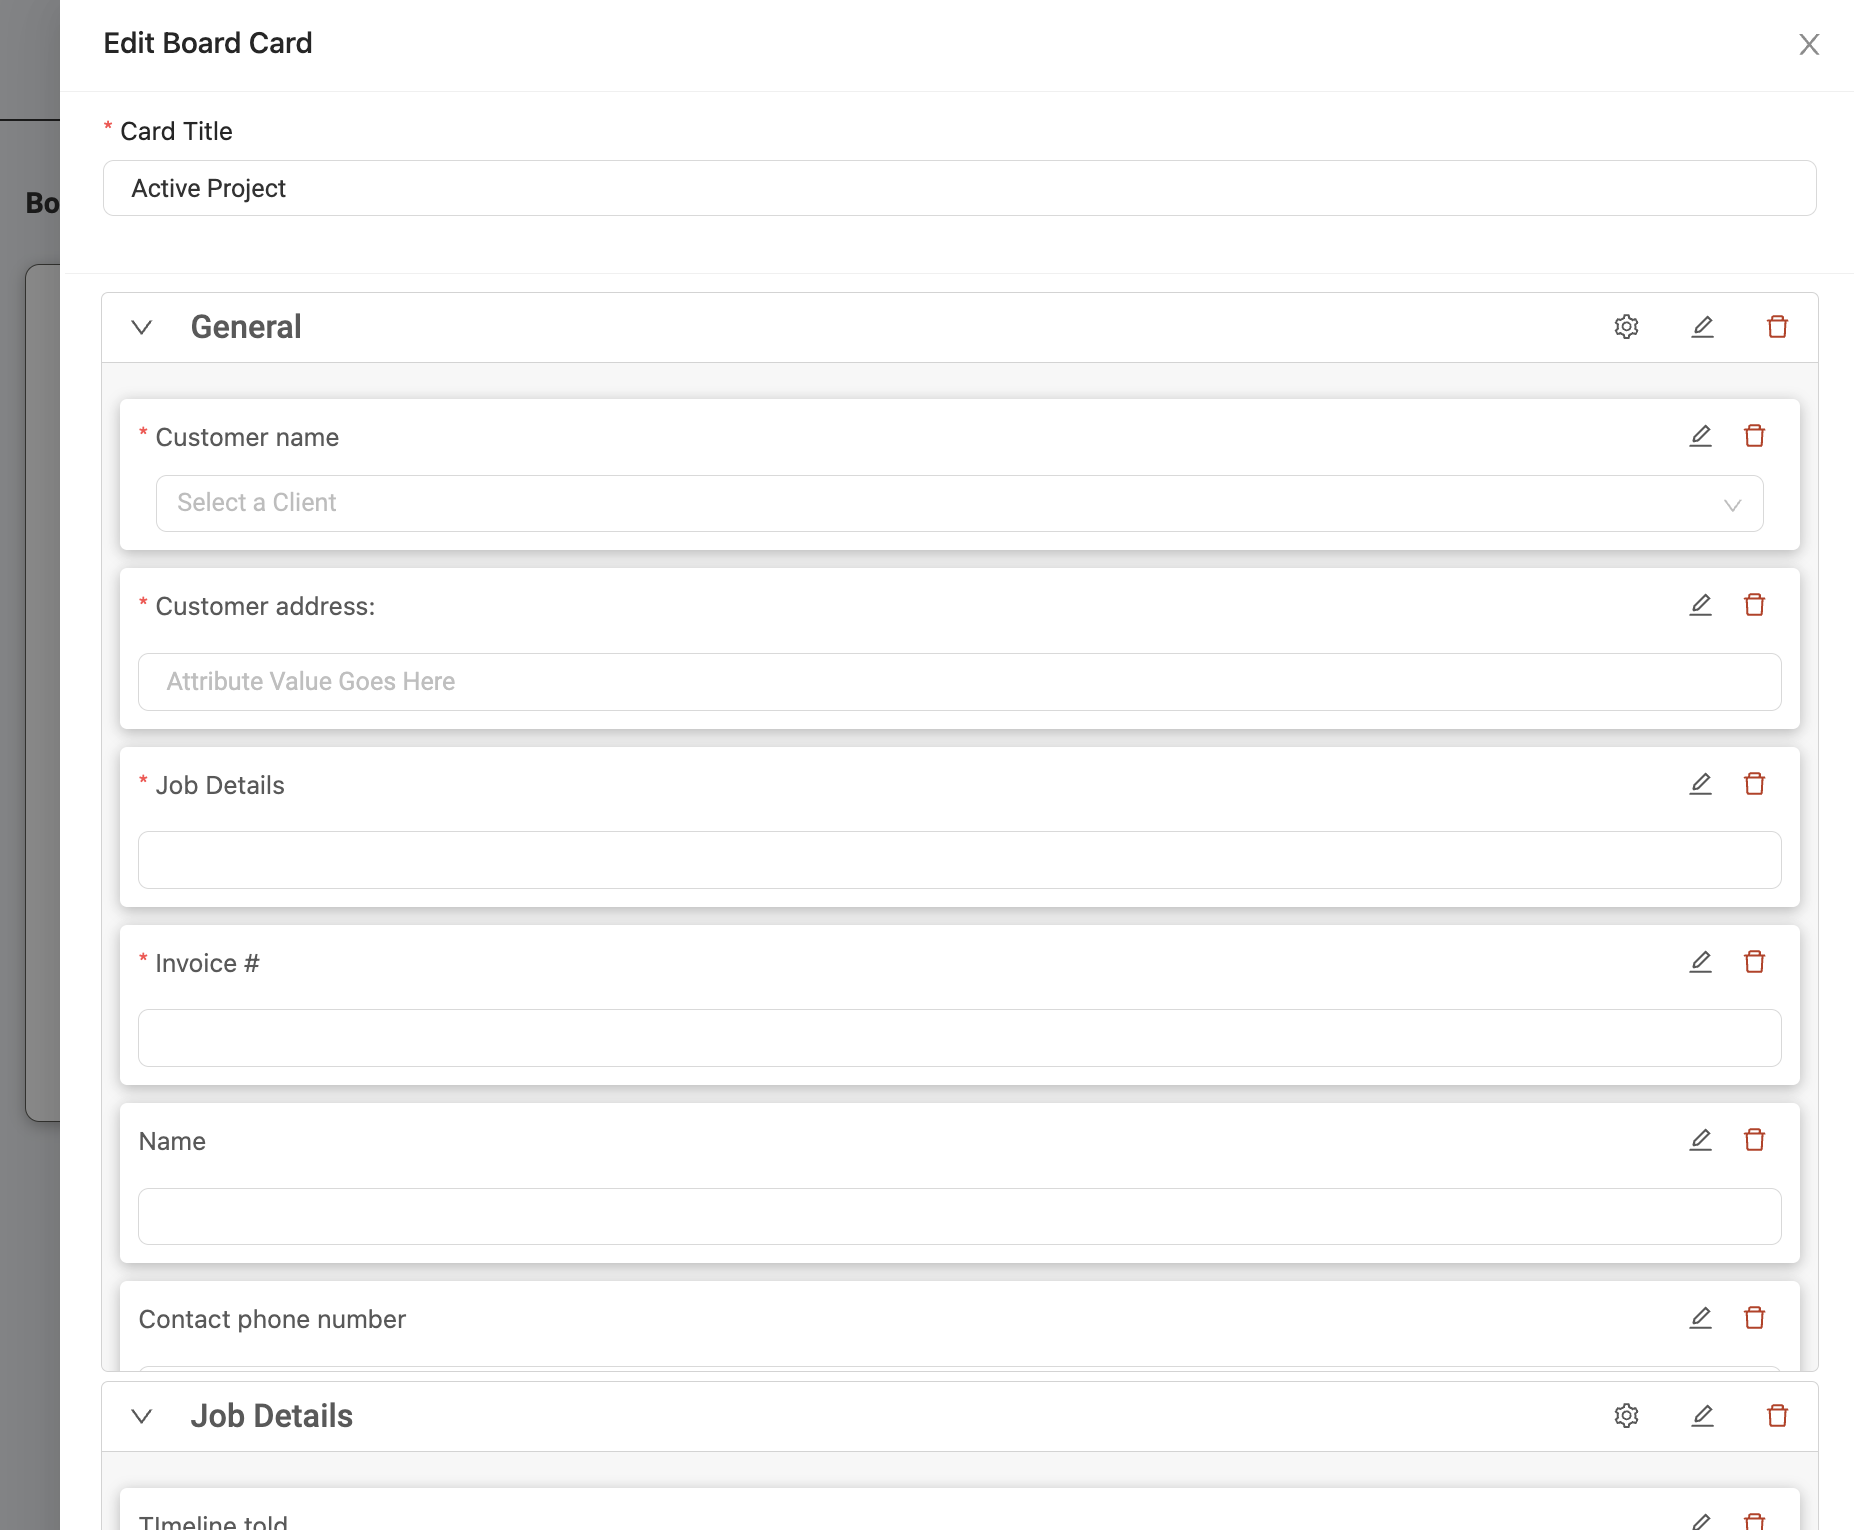
2. Give the card design a name and start adding the section and fields you want to the card. Click 'Submit' once you're finished to save your new card design. Keep in mind you can always come back to this settings page to modify the card design whenever you want.
3. Now that you've created your card design, open the Boards page to begin creating your board. Click 'Add Board'. This will open the board creation slider.
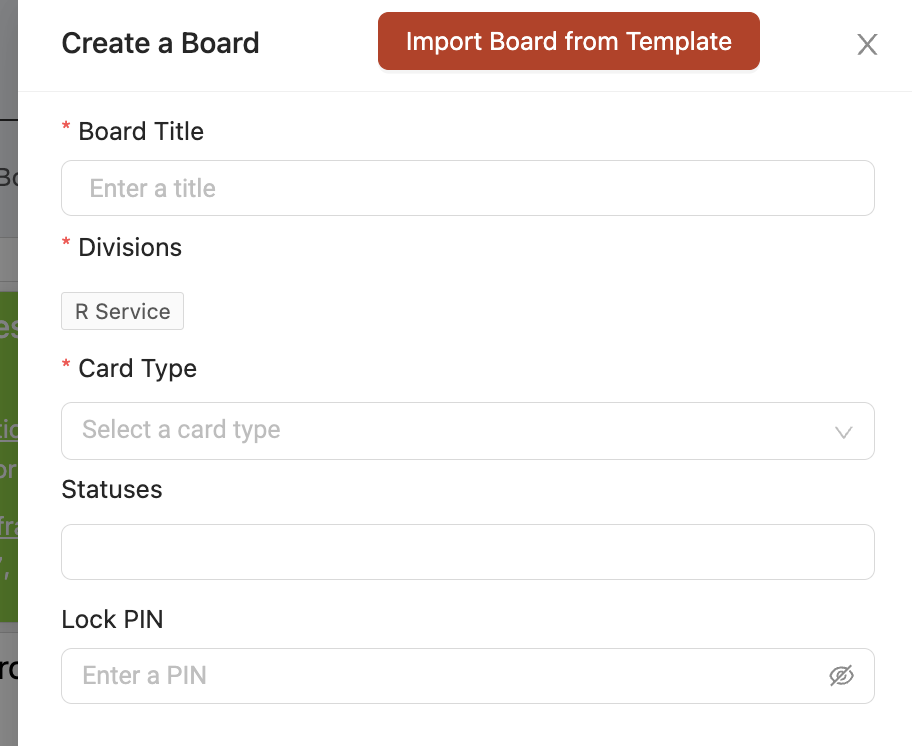
4. Start by giving your board a name under 'Board Title'. Then, under 'Card Type', select your card design that you'd like to use for this board.
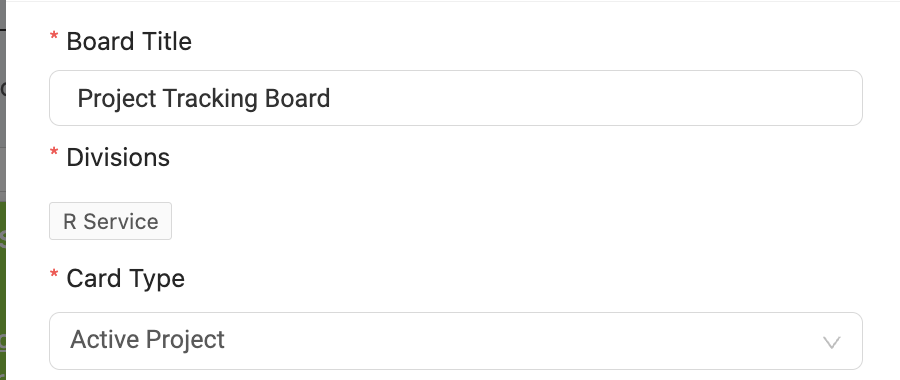
5. Under 'Statuses', this is where you can enter the custom names of each status or column in your board. Type in the name of each status and hit Enter/Return on your keyboard to add another.

6. Once you've added all your board statuses, click 'Submit' to create the board.
Customizing board statuses and user permissions
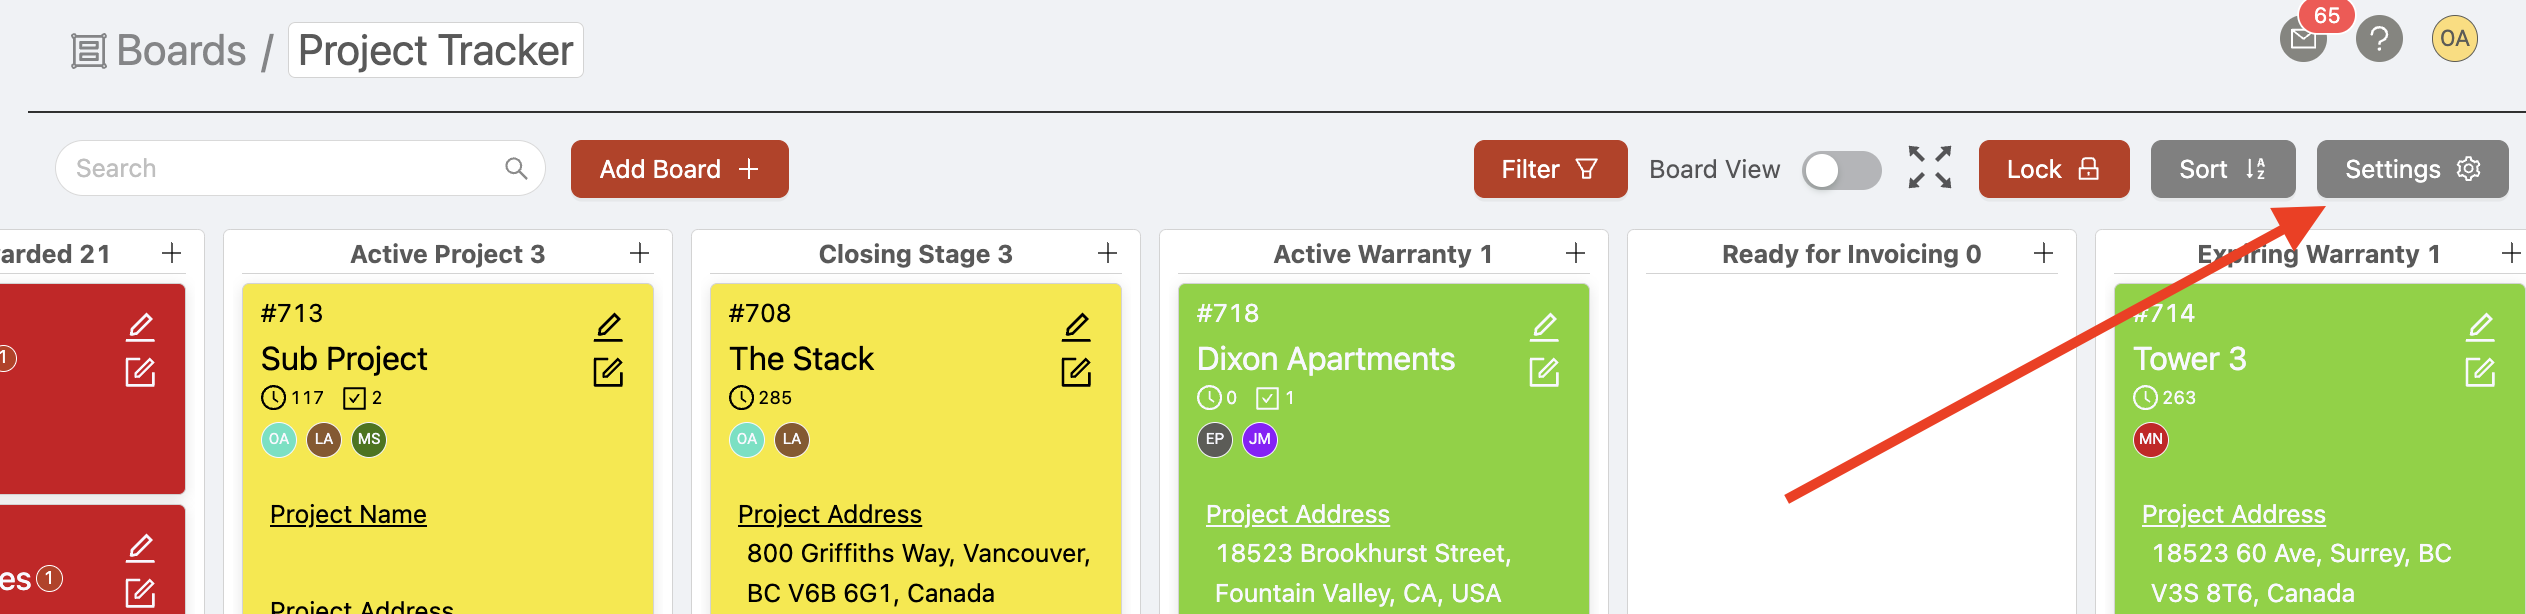
With any board that exists in your account, you can always customize the board statuses whenever you want. To customize your board statuses, simply click and open the 'Settings' slider for your board.
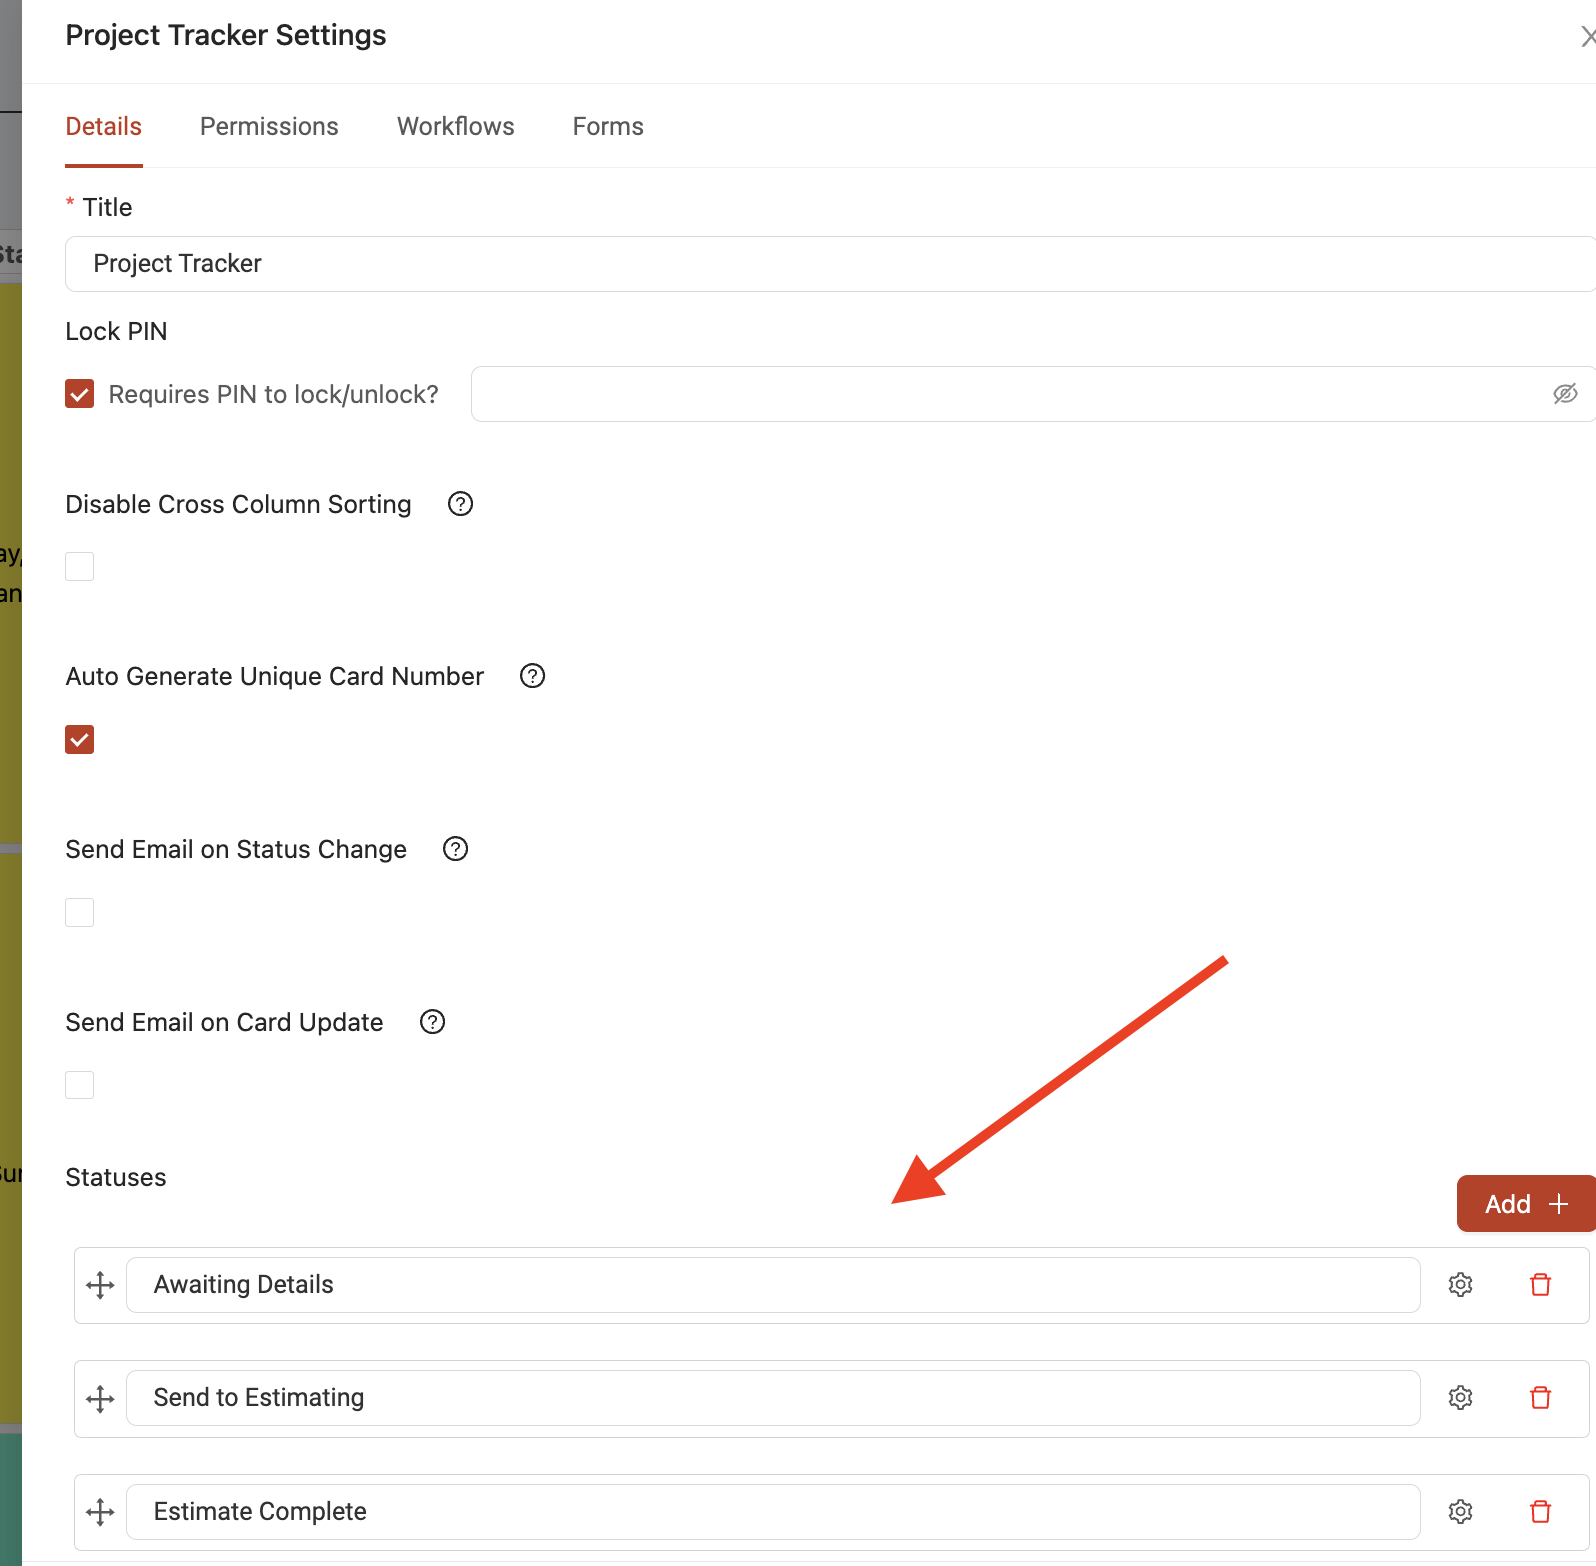
To change your board statuses, you can make your change under the 'Statuses' section of the 'Details' tab.
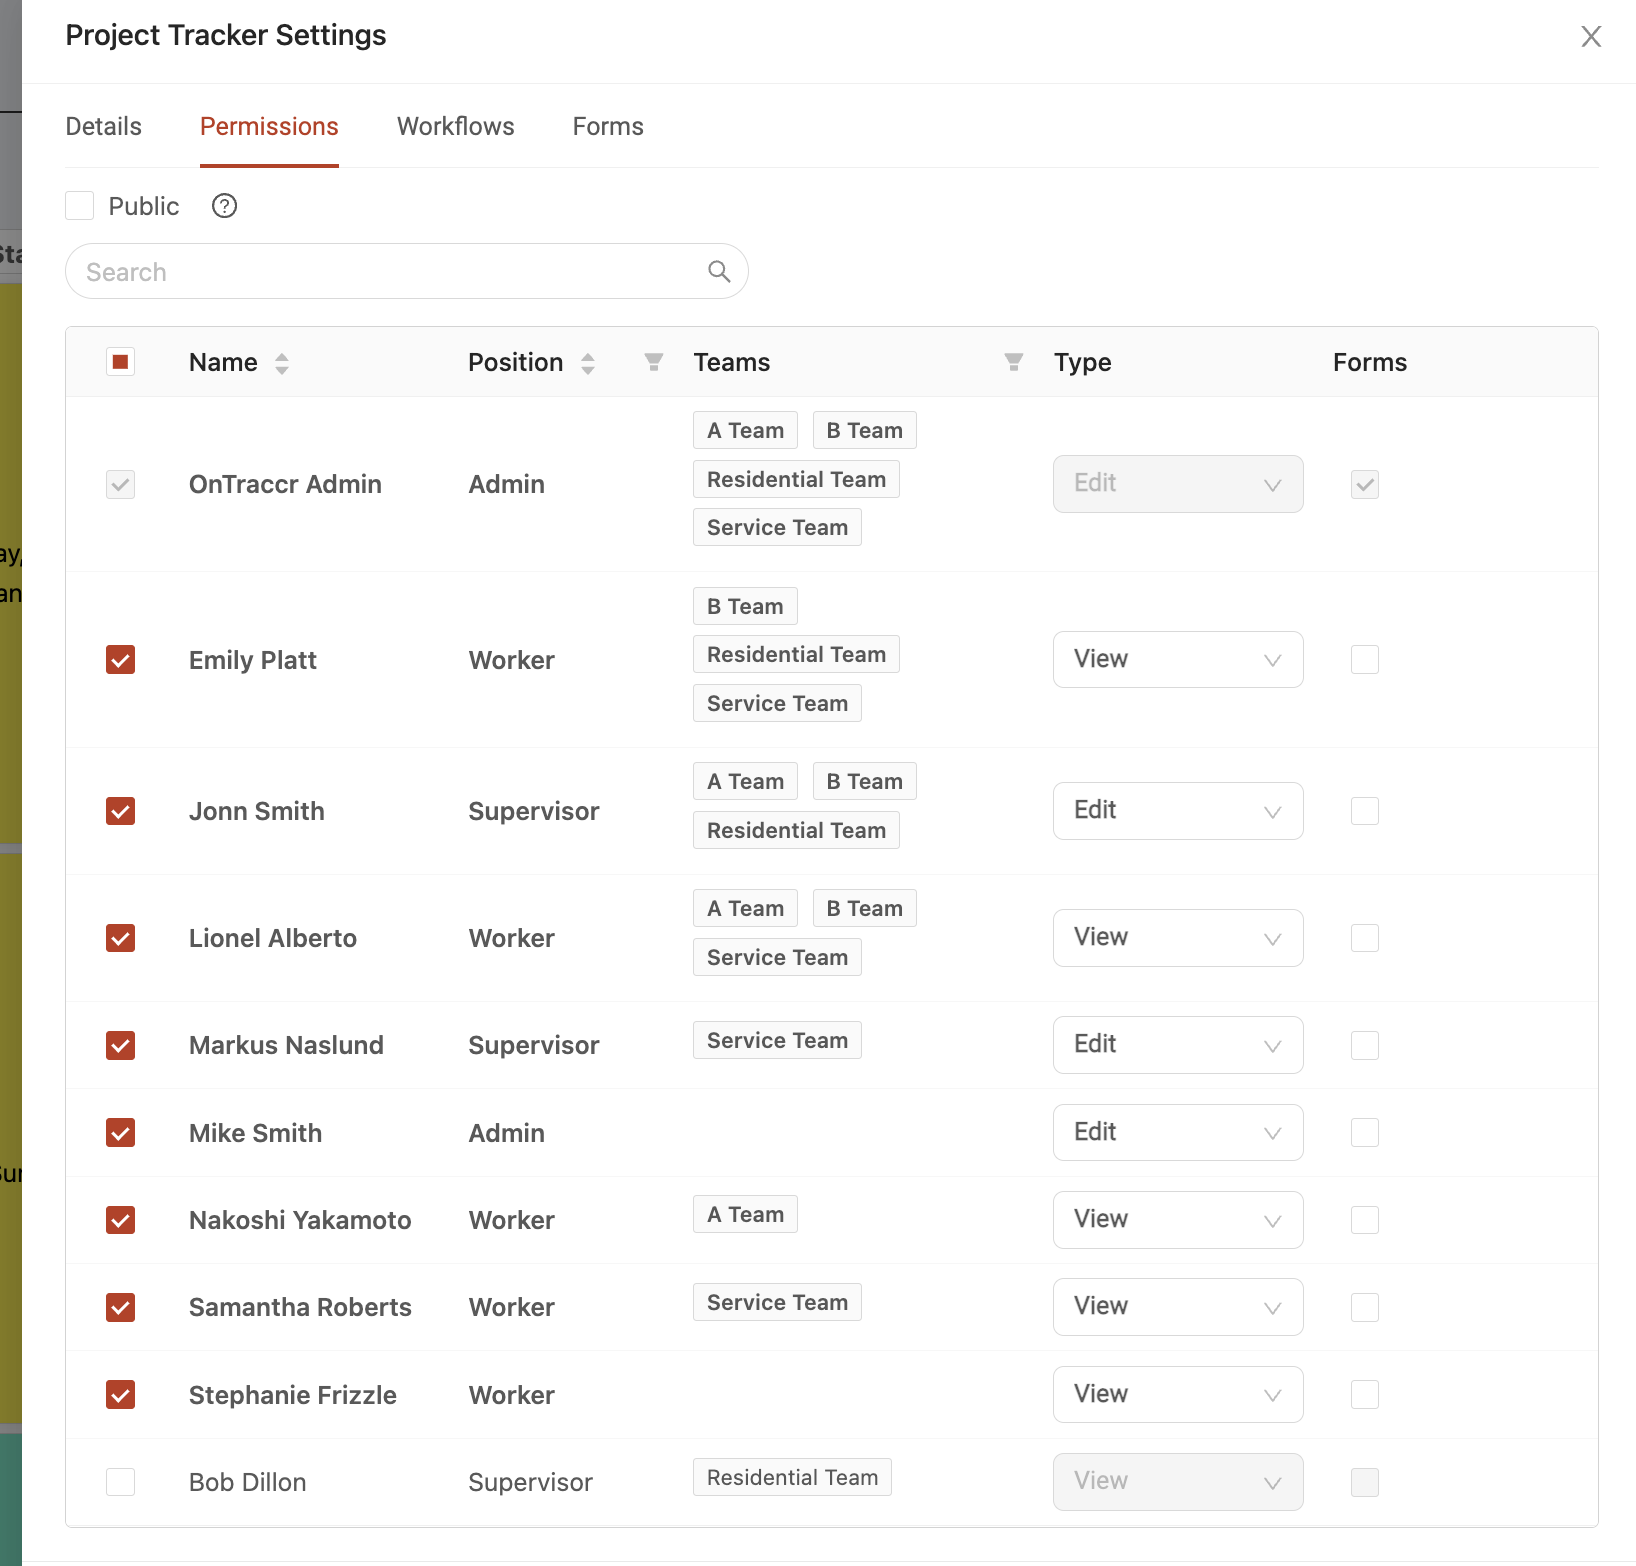
To invite other users to view your board, simply open the 'Permissions' tab in the Settings slider. Simply check the box next to any user(s) you'd like to add to the board, this will give them access to the board in their account. Under the 'Type' column, you can decide whether the user should be allowed to only view or fully edit the details in the cards.
Adding and moving cards
To add a new card into your board, simply click the 'Add' icon next to the specific status in the board you'd like to create the card in.
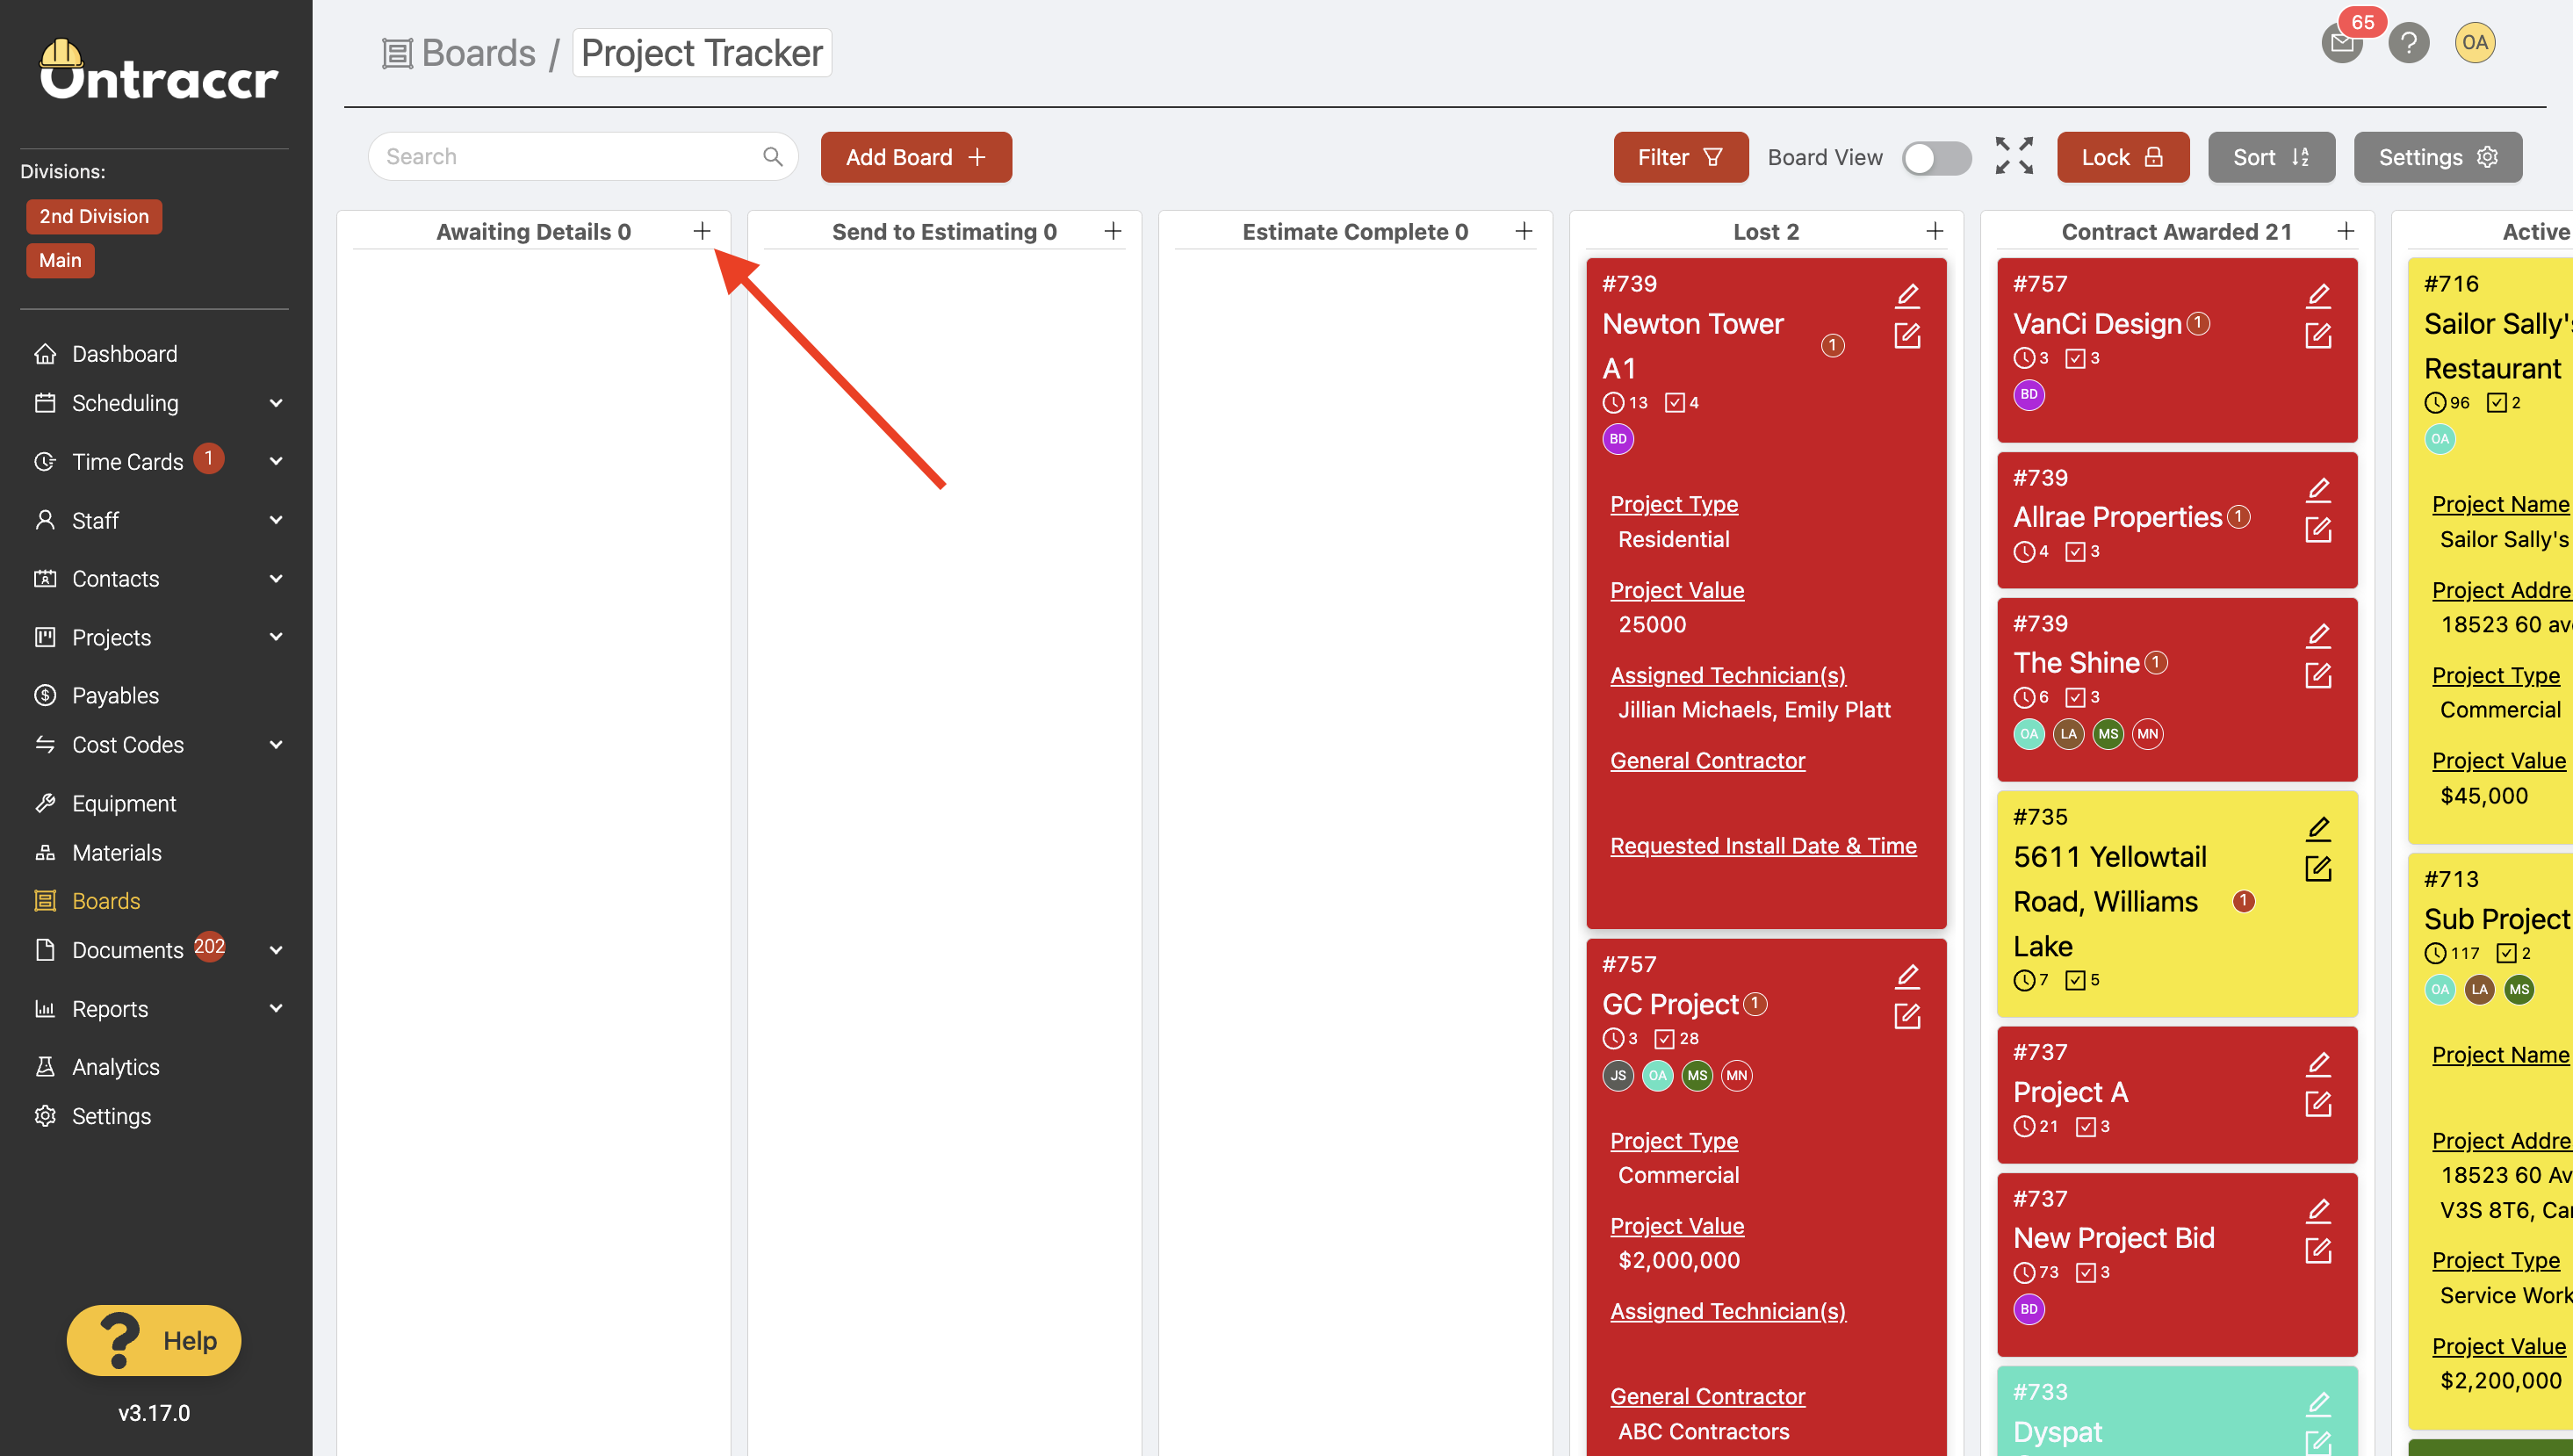
To move a card between status, simply click and drag the card to the new status.
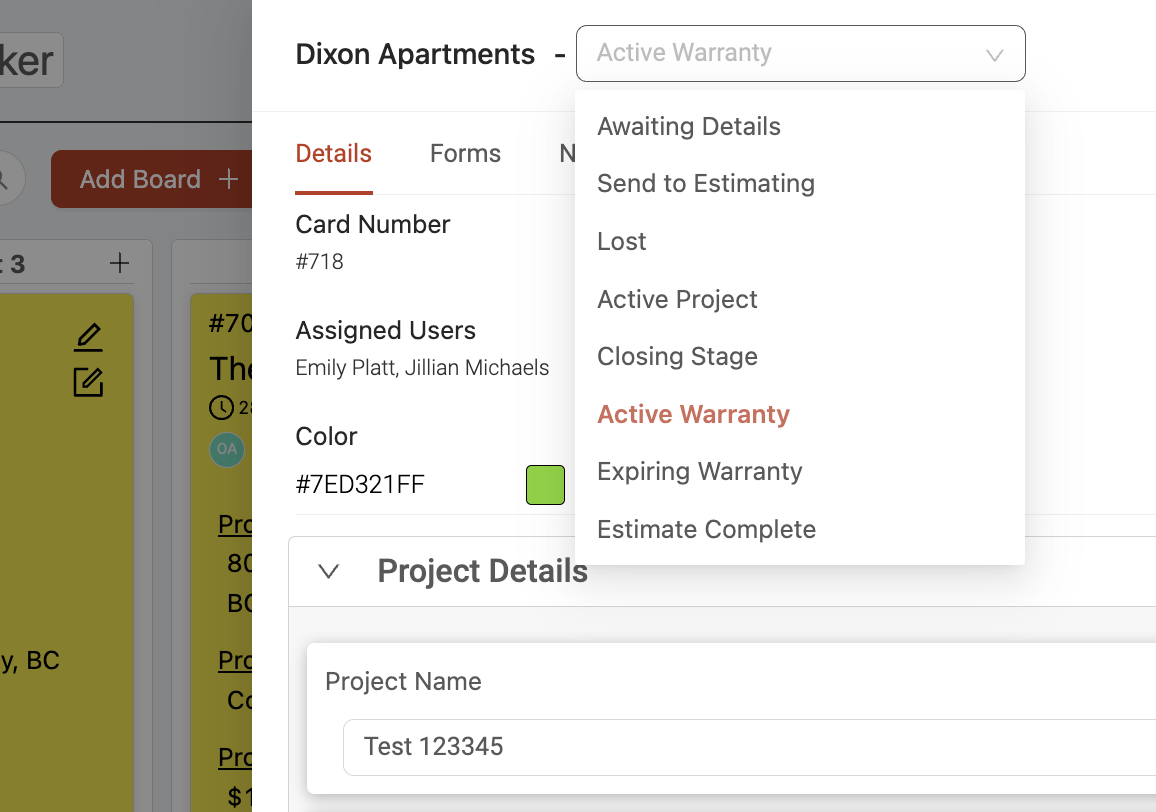
You can also change a card's status by opening the card details and changing the status directly within the card.
There are many advanced automations you can set up with your boards to do things like:
- Transfer cards between boards
- Create tasks when moving cards into specific statuses
- Changing card colours
- Creating cards automatically when adding a profile elsewhere in Ontraccr.
For more details on boards, simply visit the Boards section of the Learning Center!