Service/dispatching system example
In this example, we will walk through how you can create a full dispatching system using a few key components. The goal of this system is to build a simple, automated way of managing your service department using some of the main workflow features in Ontraccr.
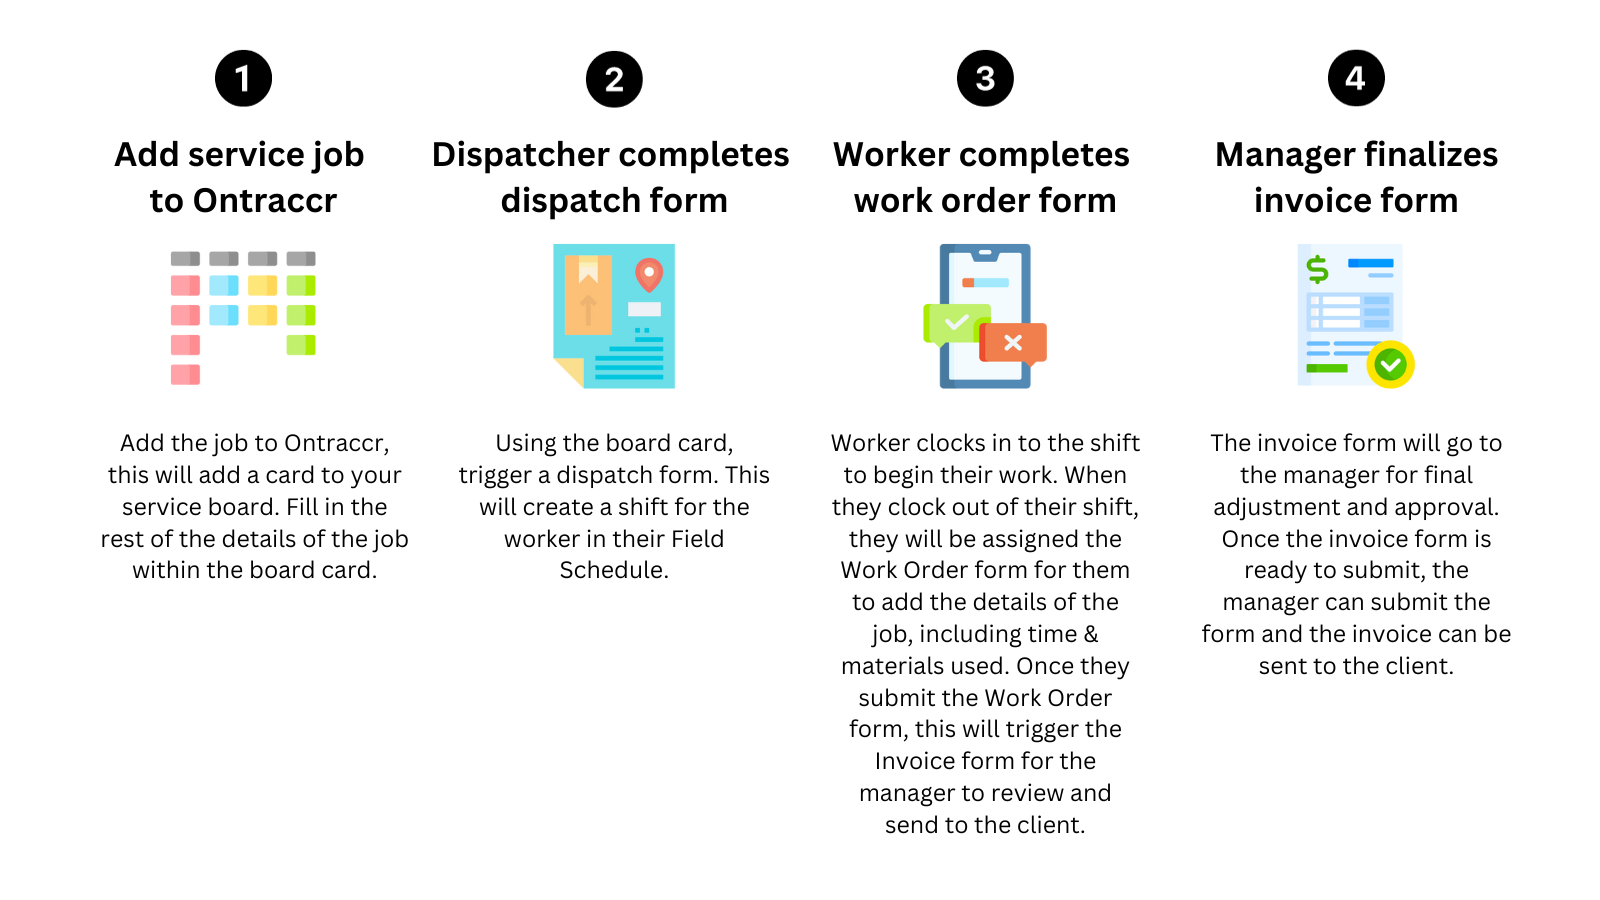
Once it's all set up, the process for this service system example is as follows:
Prerequisites
For this service dispatching system, you would need the following pieces to be set up before proceeding:
- You must have a basic dispatching form set up in your account.
- You must have a work order form set up in your account.
- You must have an invoice form set up in your account.
- You must have a basic board set up for your service department.
When you are creating these forms and boards, it's important to understand that your field types really matter. Essentially, you want to make sure that you use the same types of data fields in your forms in order for the data to flow from one form to the next correctly.
We will now walk through some examples of how you can set these forms up and the specific field types you can use to get started.
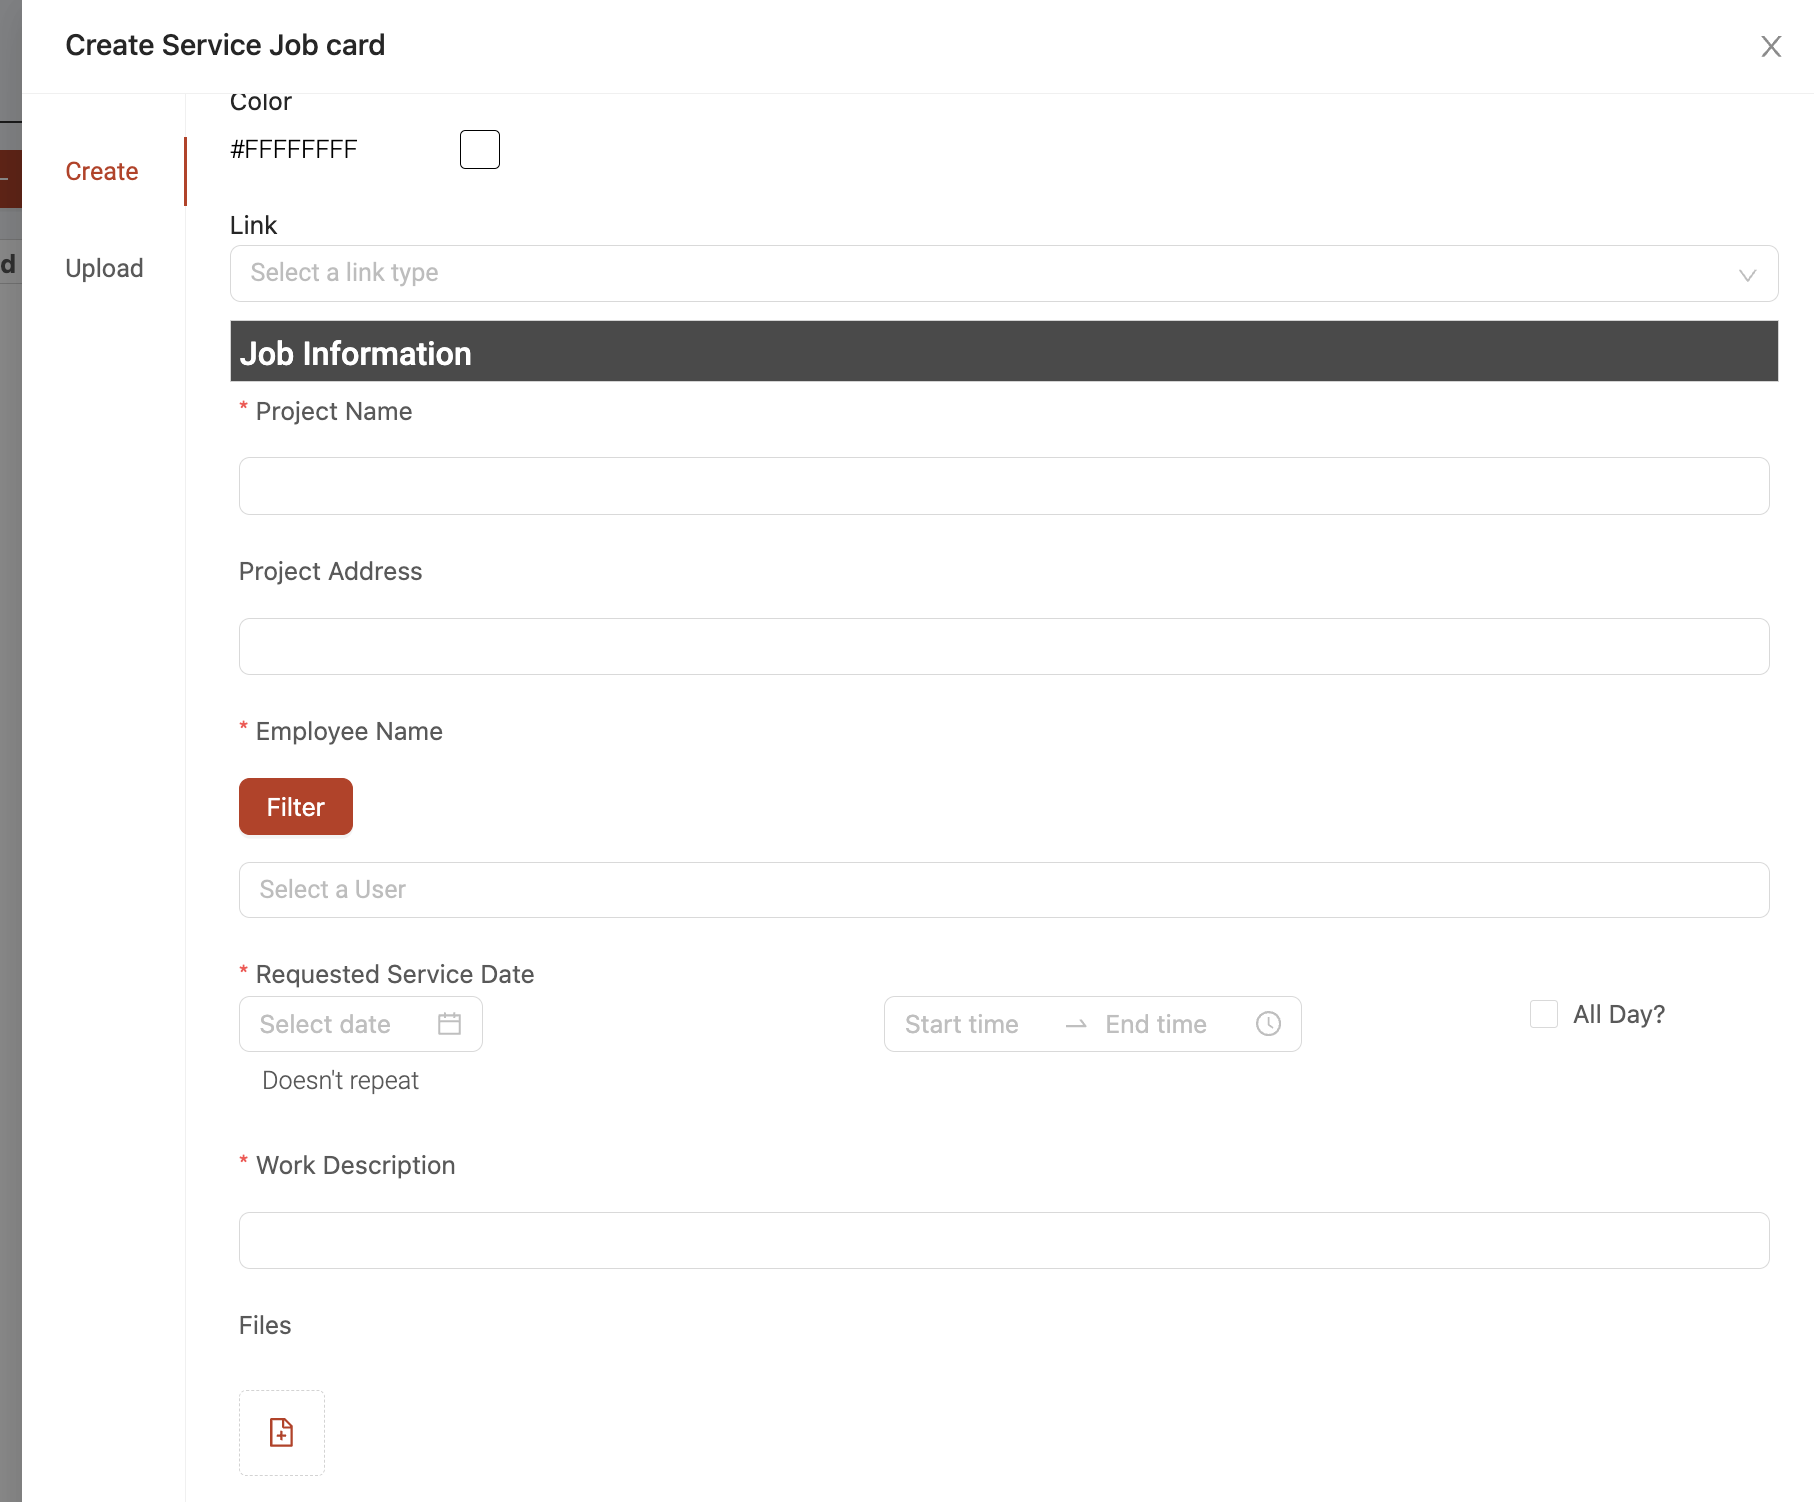
Dispatching form example
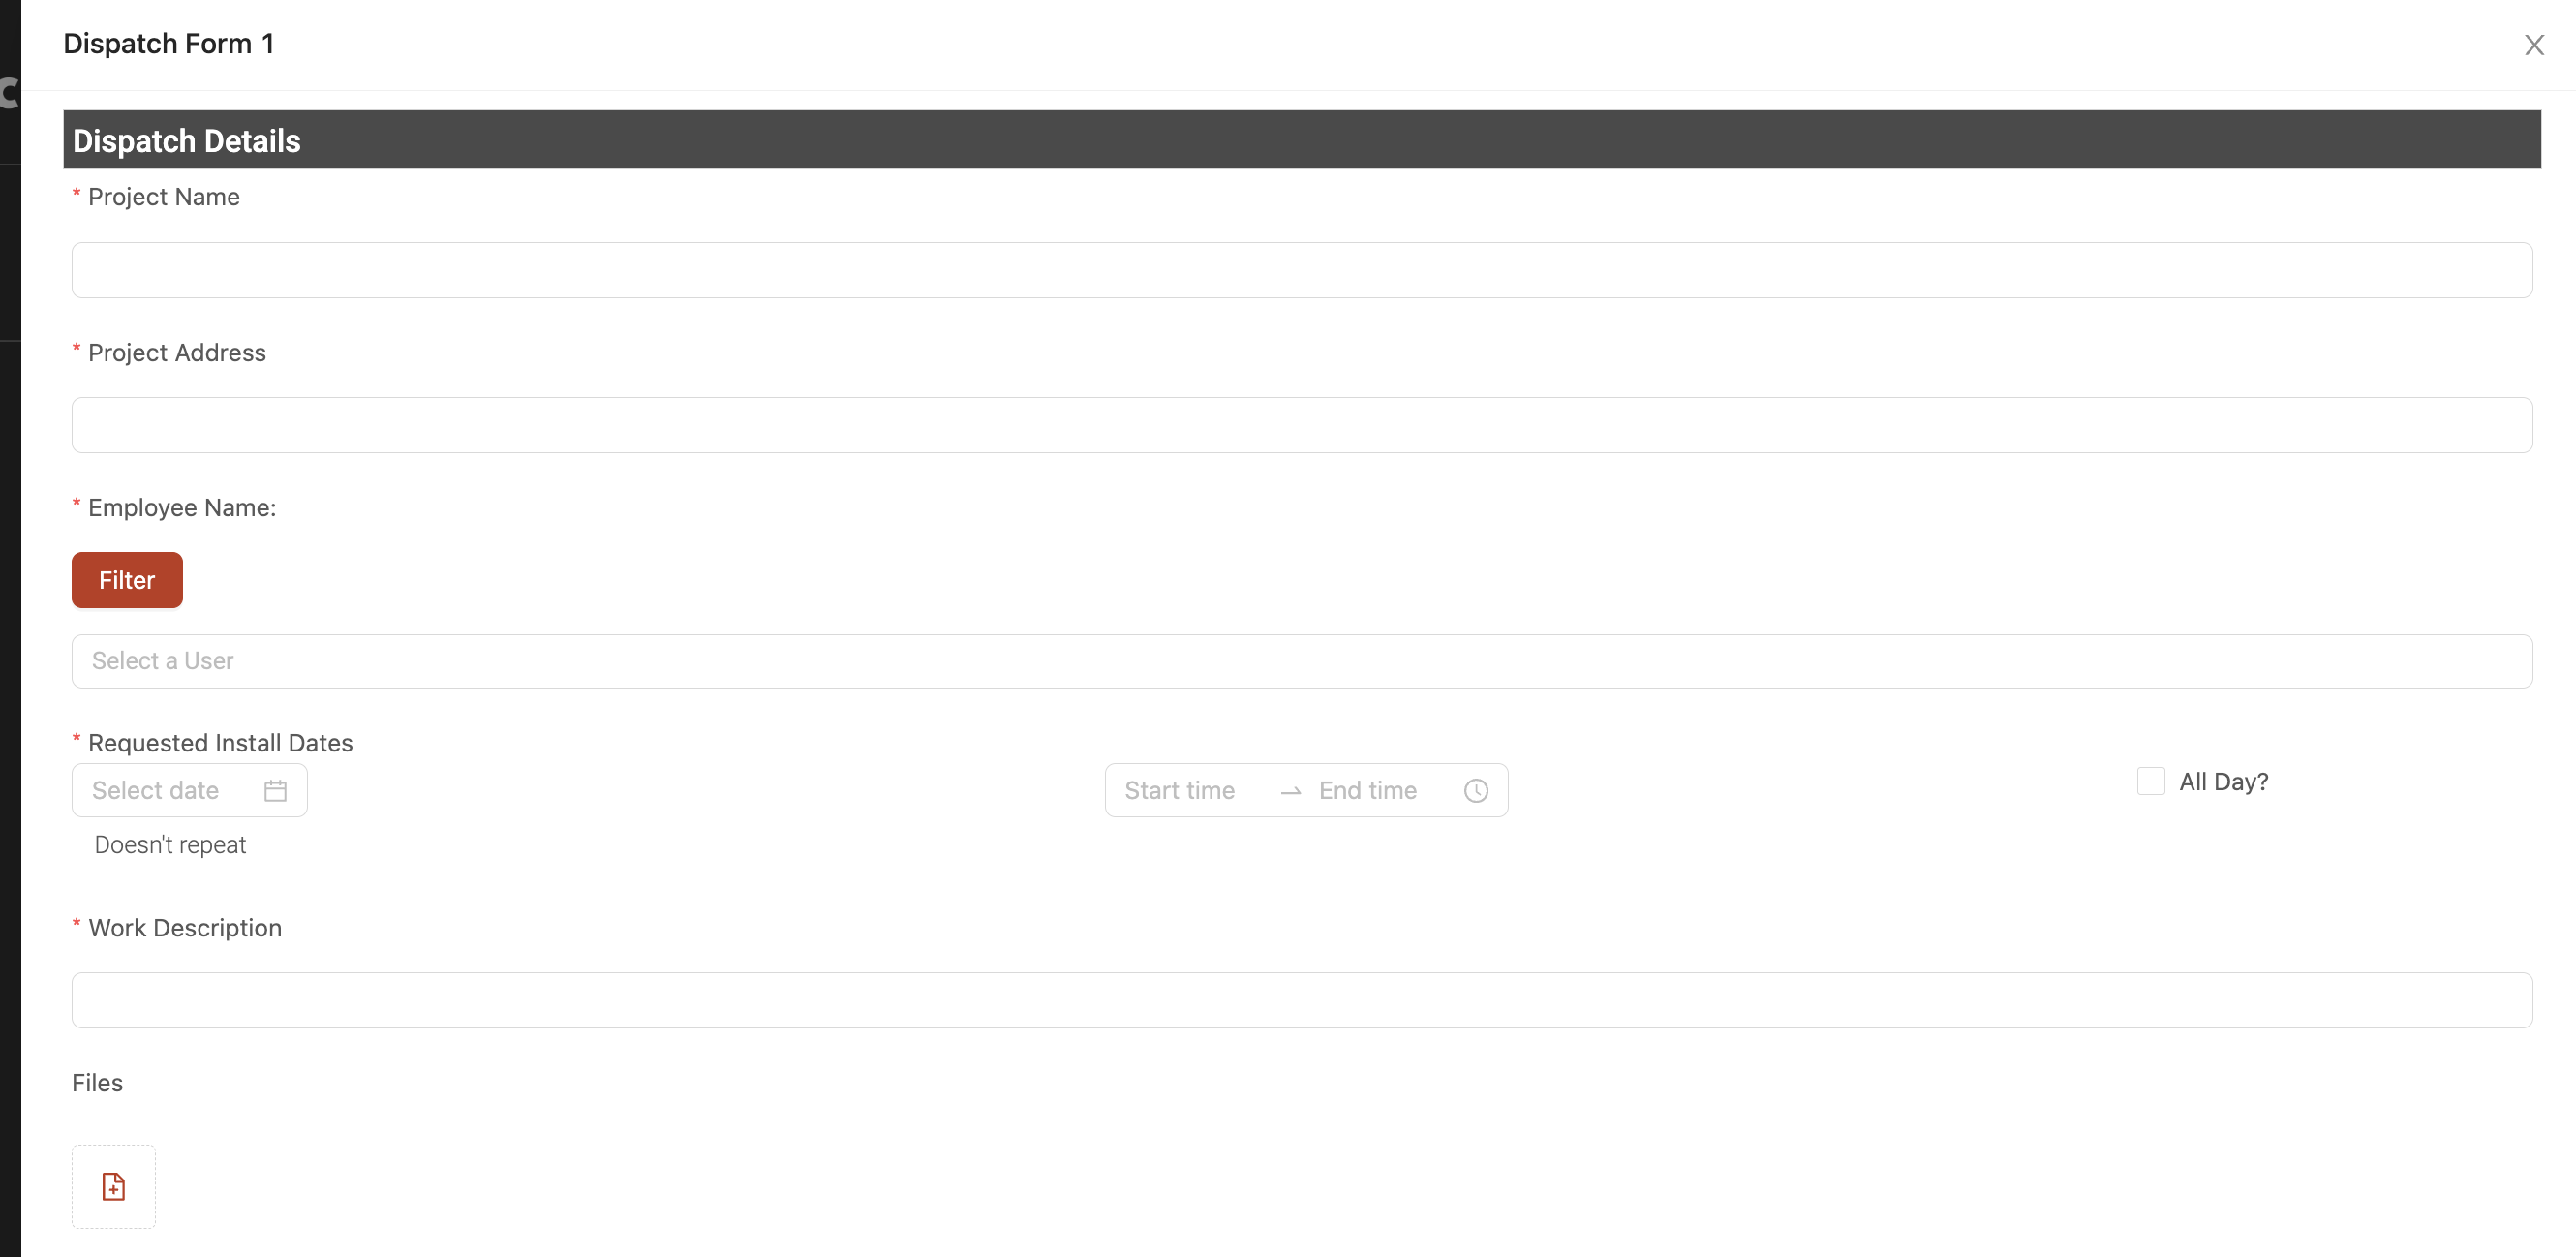
The dispatch form is what you can use to easily set up the basic details of the service job and assign your field user(s) for dispatch. The dispatch form will be used to trigger the work order form and all of the fields will map over automatically.
In this example dispatch form, you can add the following fields:
- Project Name ('Text' field)
- Project Address ('Text' field)
- Employee Name ('Choose one or more' > 'Users' field)
- Requested Service Date ('Date/Time Range' field)
- Work Description ('Text' field)
- Files ('Attachments' field)
Work Order form example
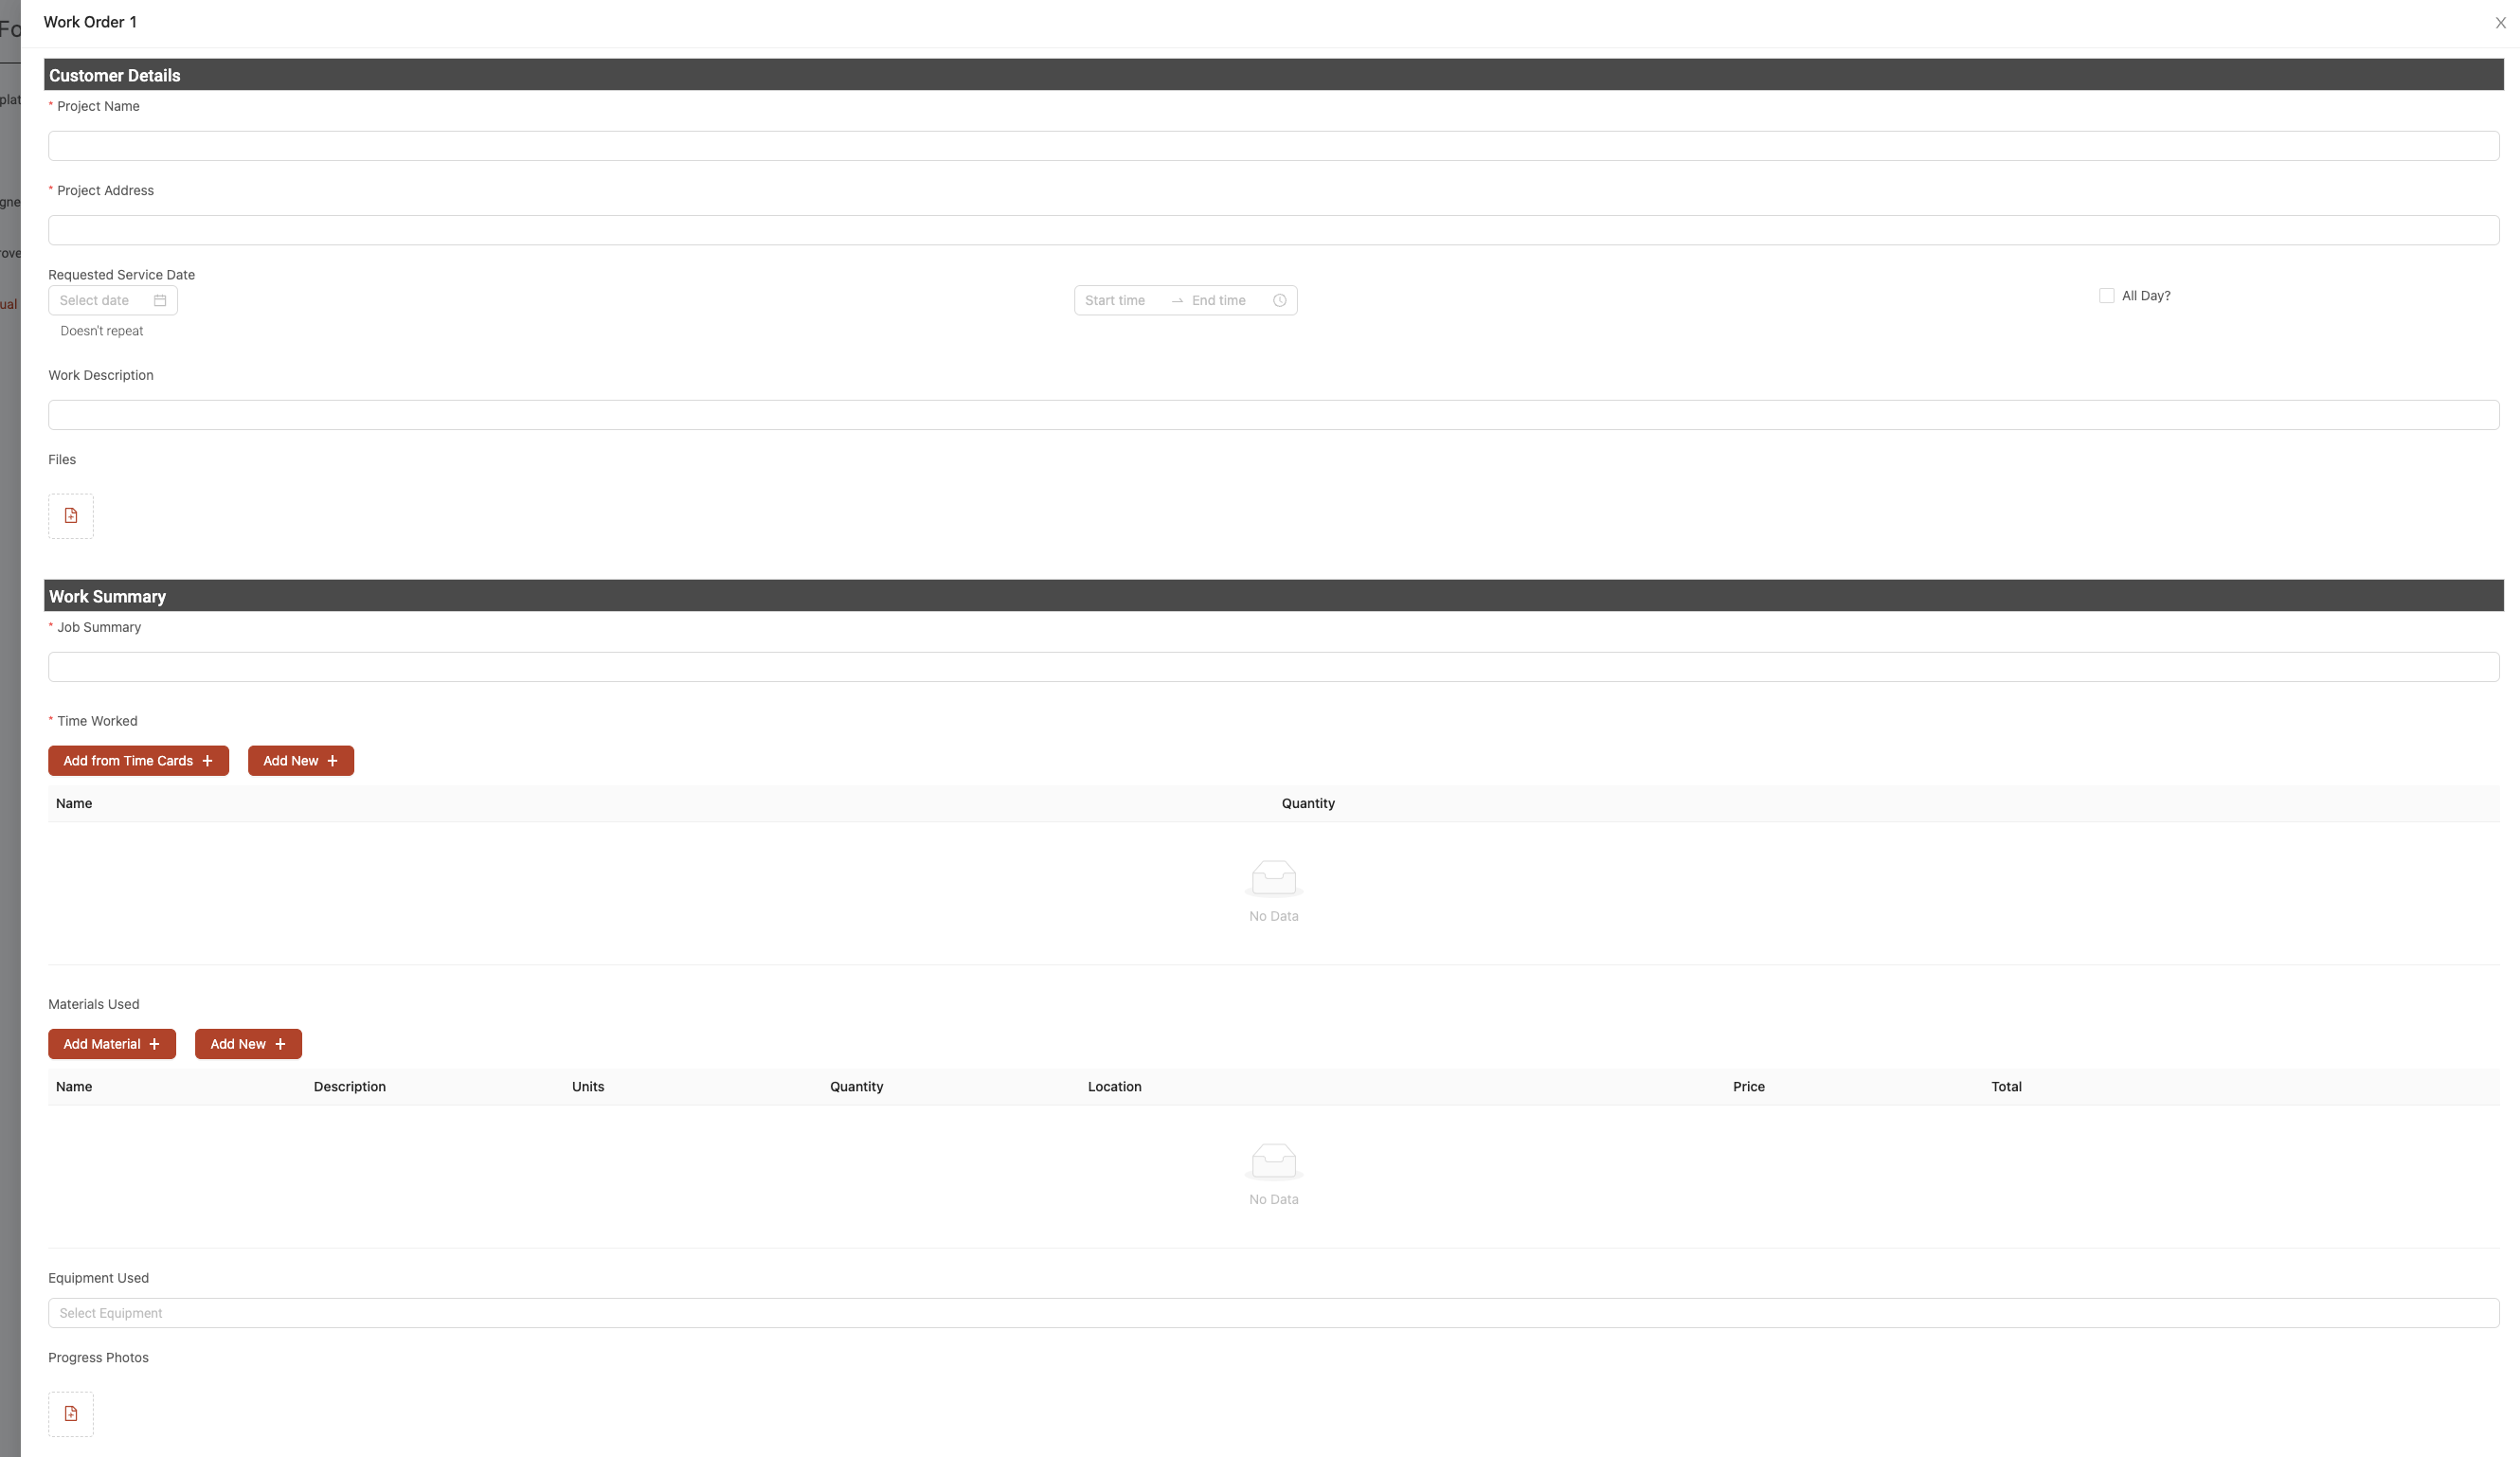
The work order form is the form you can assign to your field user(s) for them to complete the details of the job, including inputting their time & materials details. The work order form will be used to trigger the invoice form and all of the fields will map over automatically.
In this example work order form, you can add the following fields:
- Project Name ('Text' field)
- Project Address ('Text' field)
- Requested Service Date ('Date/Time Range' field)
- Work Description ('Text' field)
- Files ('Attachments' field)
- Job Summary ('Text' field)
- Time Worked ('Table' > 'Labour Hours' field)
- Materials Used ('Table' > 'Materials' field)
- Equipment Used ('Choose one or more' > 'Equipment' field)
- Progress Photos ('Attachments' field)
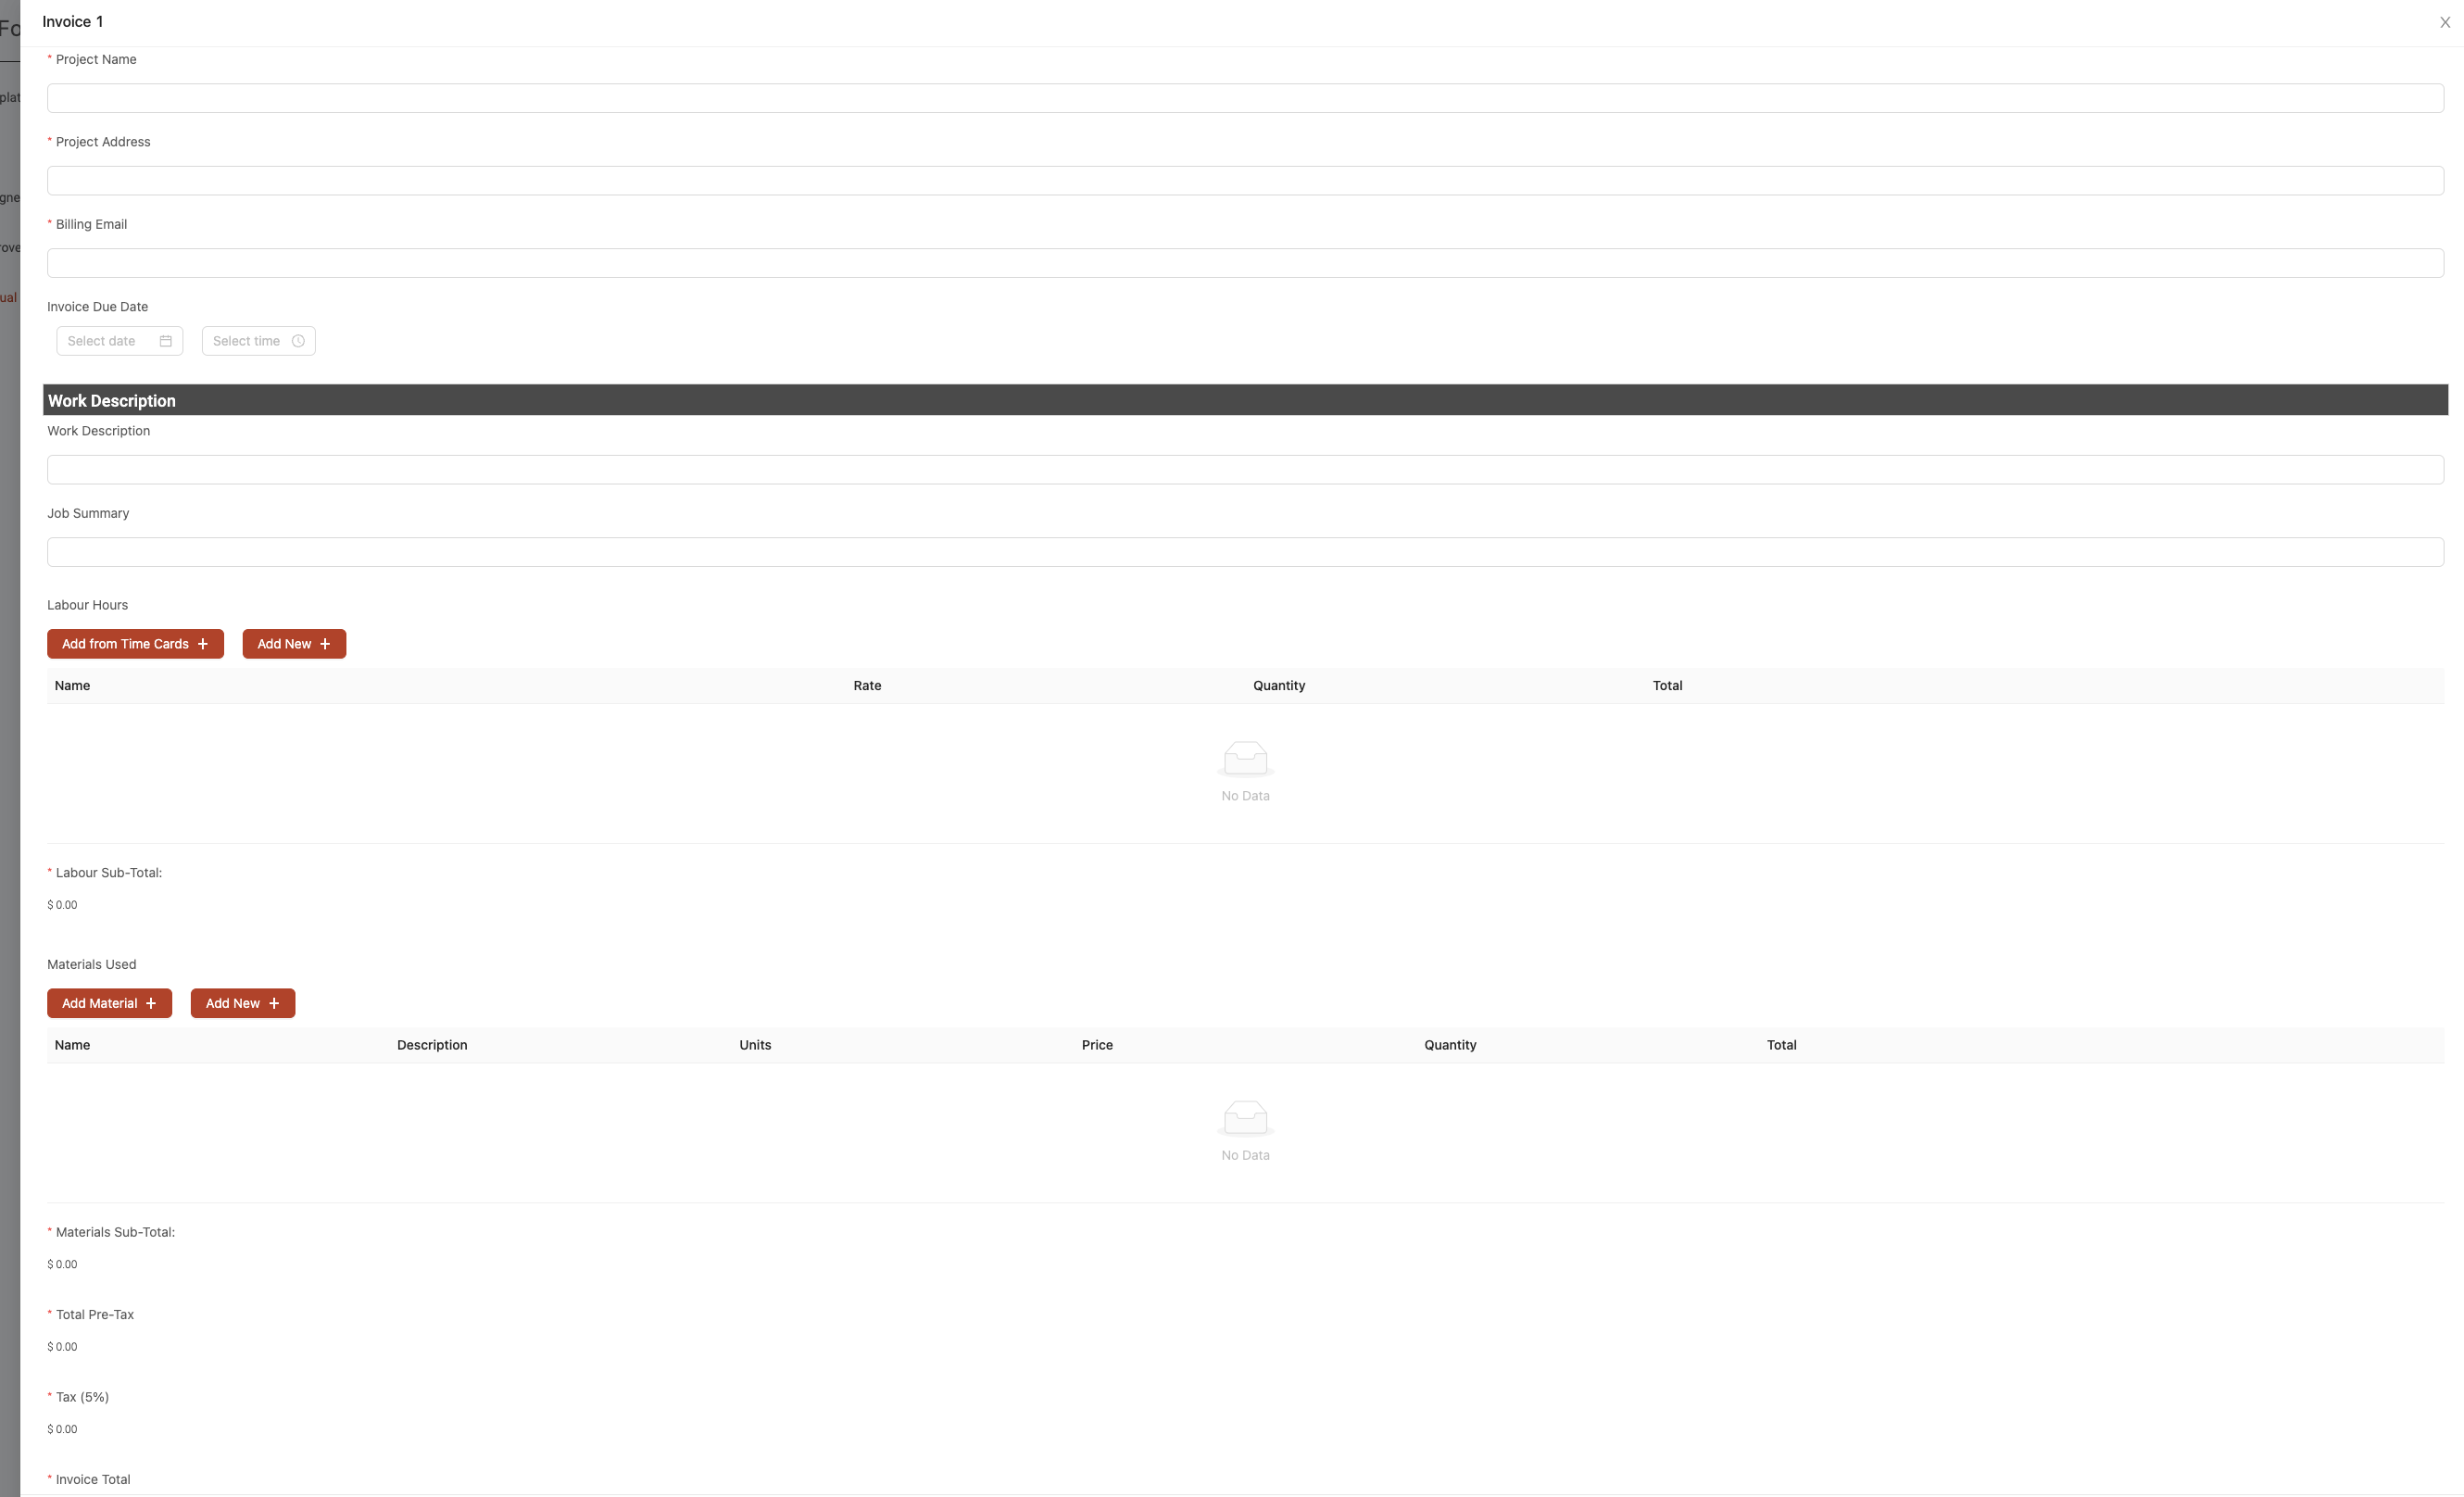
Invoice form example
The invoice form is the final bill for the job. All of the details from the field user's submitted work order will map into the invoice automatically so it's ready for a simple review and final adjustments before sending it to the client.
In this example invoice form, you can add the following fields:
- Project Name ('Text' field)
- Project Address ('Text' field)
- Billing Email ('Text' field)
- Invoice Due Date ('Date/Time' field)
- Work Description ('Text' field)
- Job Summary ('Text' field)
- Labour Hours ('Table' > 'Labour Hours' field)
- Labour Sub-Total ('Calculation' field)
- Materials Used ('Table' > 'Materials' field)
- Materials Sub-Total ('Calculation' field)
- Total Pre-Tax ('Calculation' field)
- Tax ('Calculation' field)
- Invoice Total ('Calculation' field)
Service board example
The service board can act as you high-level tracking system for your entire service department. This is a great way to visualize the status of all your service jobs and you can also run a number of reports & analytics on the board to gather insights into your service efficiency.
The cards in your service board can have the following fields (these are the exact same fields as your dispatch form):
- Project Name ('Text' field)
- Project Address ('Text' field)
- Employee Name ('Choose one or more' > 'Users' field)
- Requested Service Date ('Date/Time Range' field)
- Work Description ('Text' field)
- Files ('Attachments' field)
You service board could have the following statuses/columns:
- Queued
- Scheduled
- In Progress
- Completed
- Invoiced
- Paid
- Follow Up

Once you have these key forms and your service board ready to go, the rest of this article will walk you through how to add some advanced automations to integrate everything together into one seamless service dispatching system.
Configuring the dispatching system
There are four main workflows you will need to configure in order to piece all these forms and boards together to create the end-to-end dispatching system:
1. Add a card creation workflow to your service board
2. Link your dispatch form to your service board
3. Add 'dispatch' and 'form trigger' steps into your dispatch form workflow
4. Add a 'form trigger' step into your work order form workflow
Adding a card creation workflow to your service board
The first step in your dispatching system will be automating the creation of a service job card into your service board. This will happen when you first add the job into your 'Projects' page.
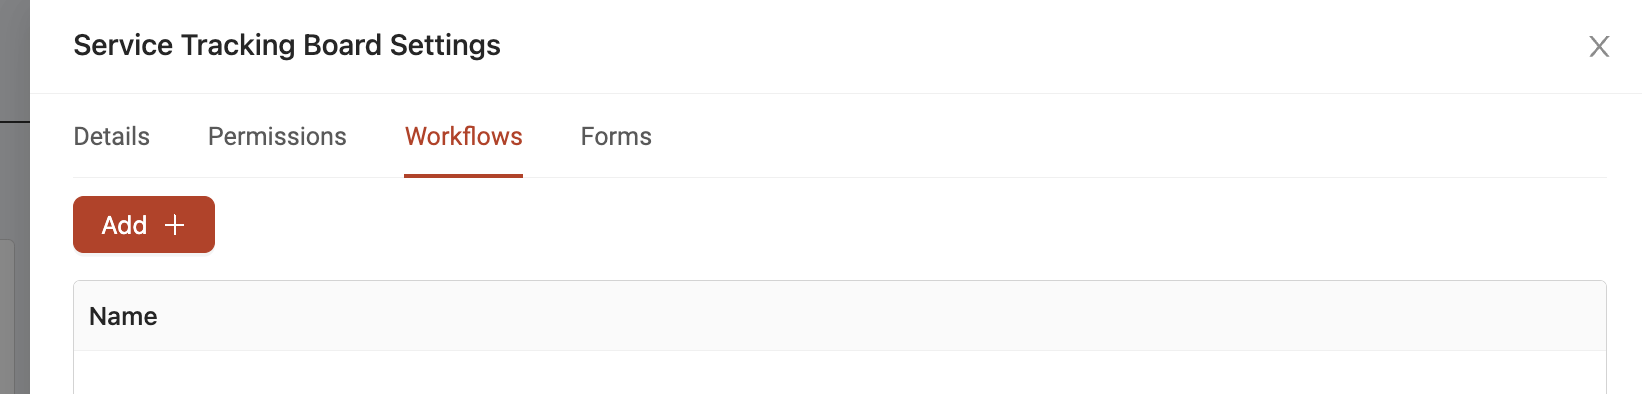
To add the auto card creation workflow into your service board, open your service board's 'Settings' slider. Click to open the 'Workflows' settings tab for the board.
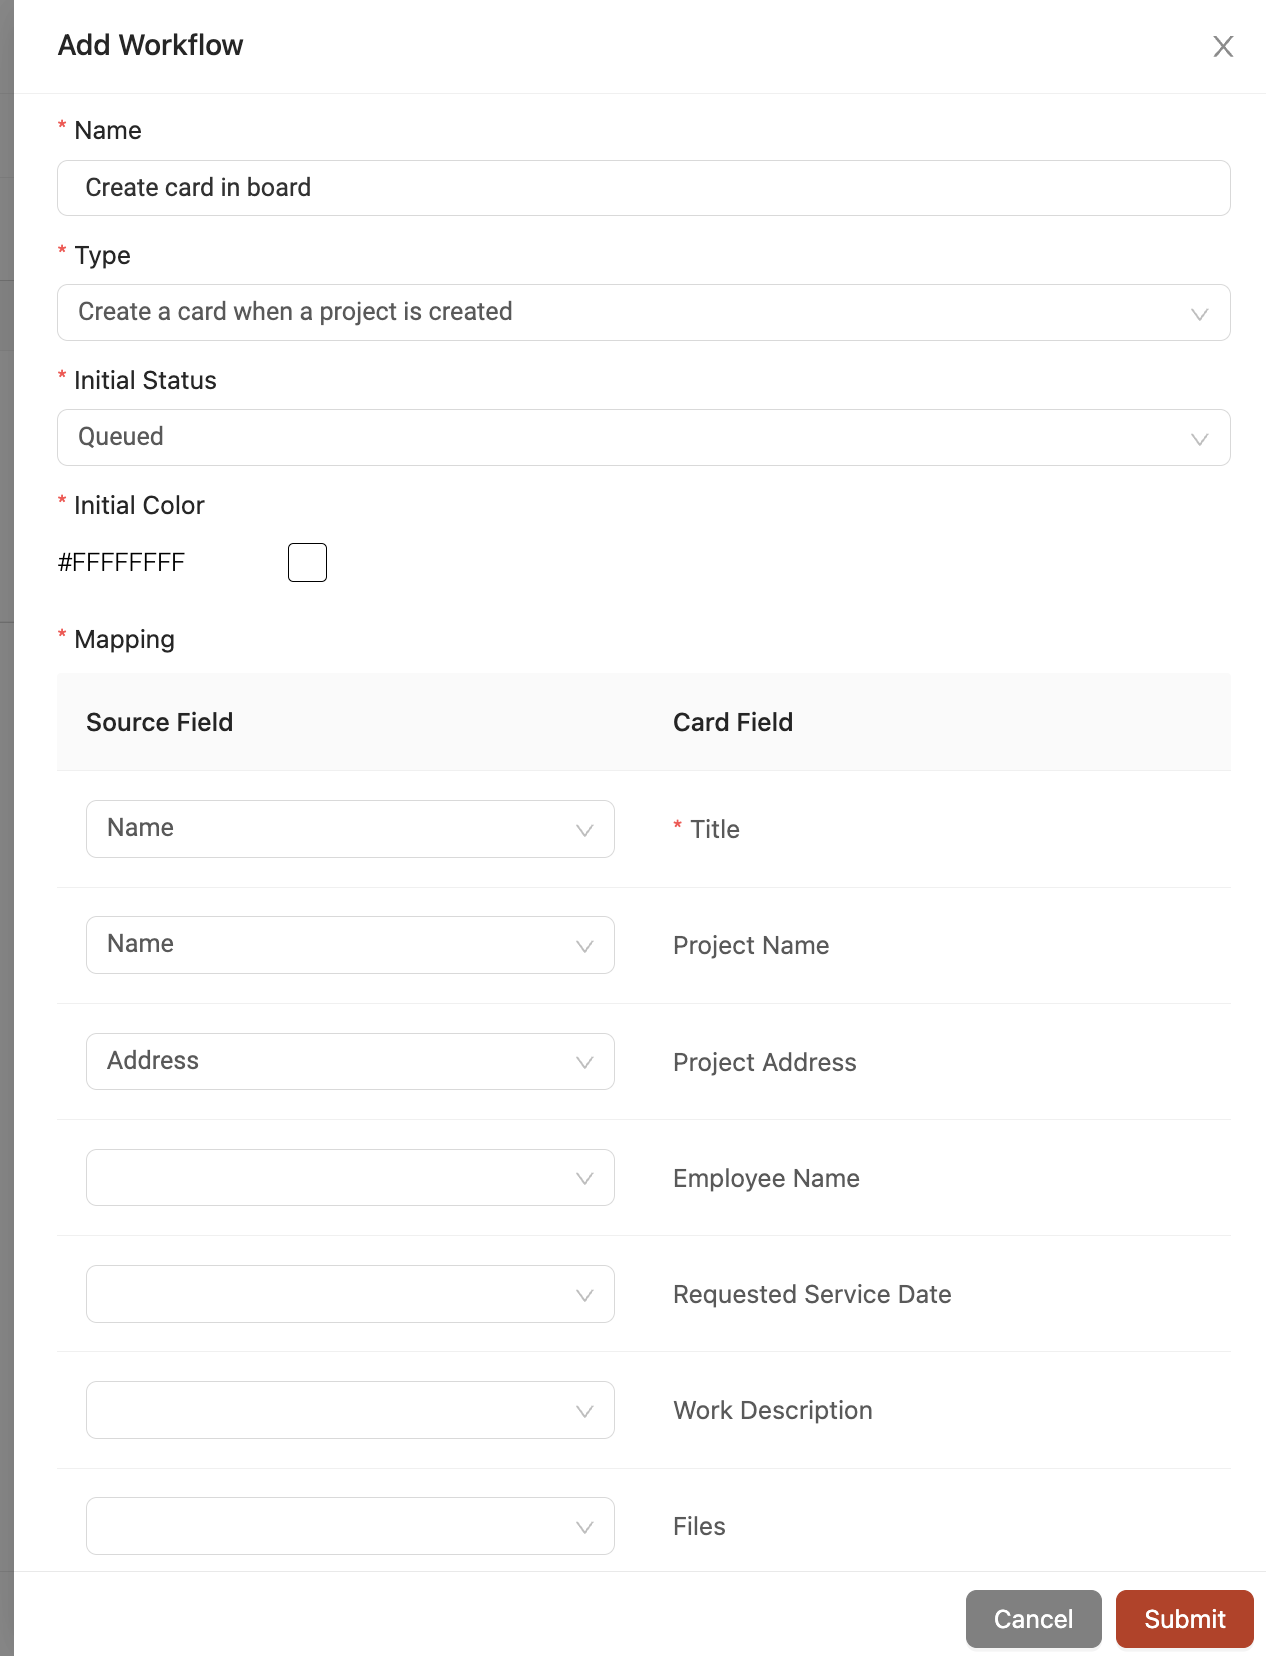
Next, click 'Add' to start adding your card creation workflow to your board. Give your workflow a name and select 'Create a card when a project is created' in the 'Type' drop-down. Select the initial status for the card when it is added in the board (e.g. 'Queued' status). You will see the available field mappings. Map the 'source' fields from your project profile into the 'target' fields of the board card. Click 'Submit' when you're finished mapping the fields.
Linking your dispatch form to your service board
By linking your dispatch form to your service board, you can seamlessly dispatch the service job and eliminate double entry in your dispatching process. The key consideration here is that you want your board card to have the same fields and field types as your dispatch form. This will allow the data in your board card to automatically map into your dispatch form.
To link your dispatch form to your service board, start by opening your service board's 'Settings' slider. Click to open the 'Forms' settings tab for the board.
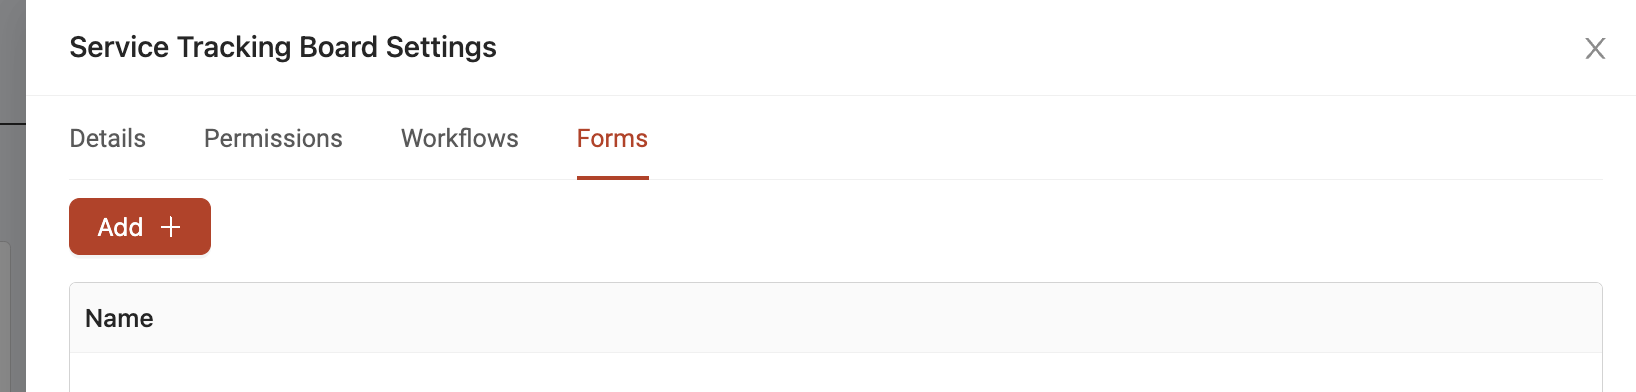
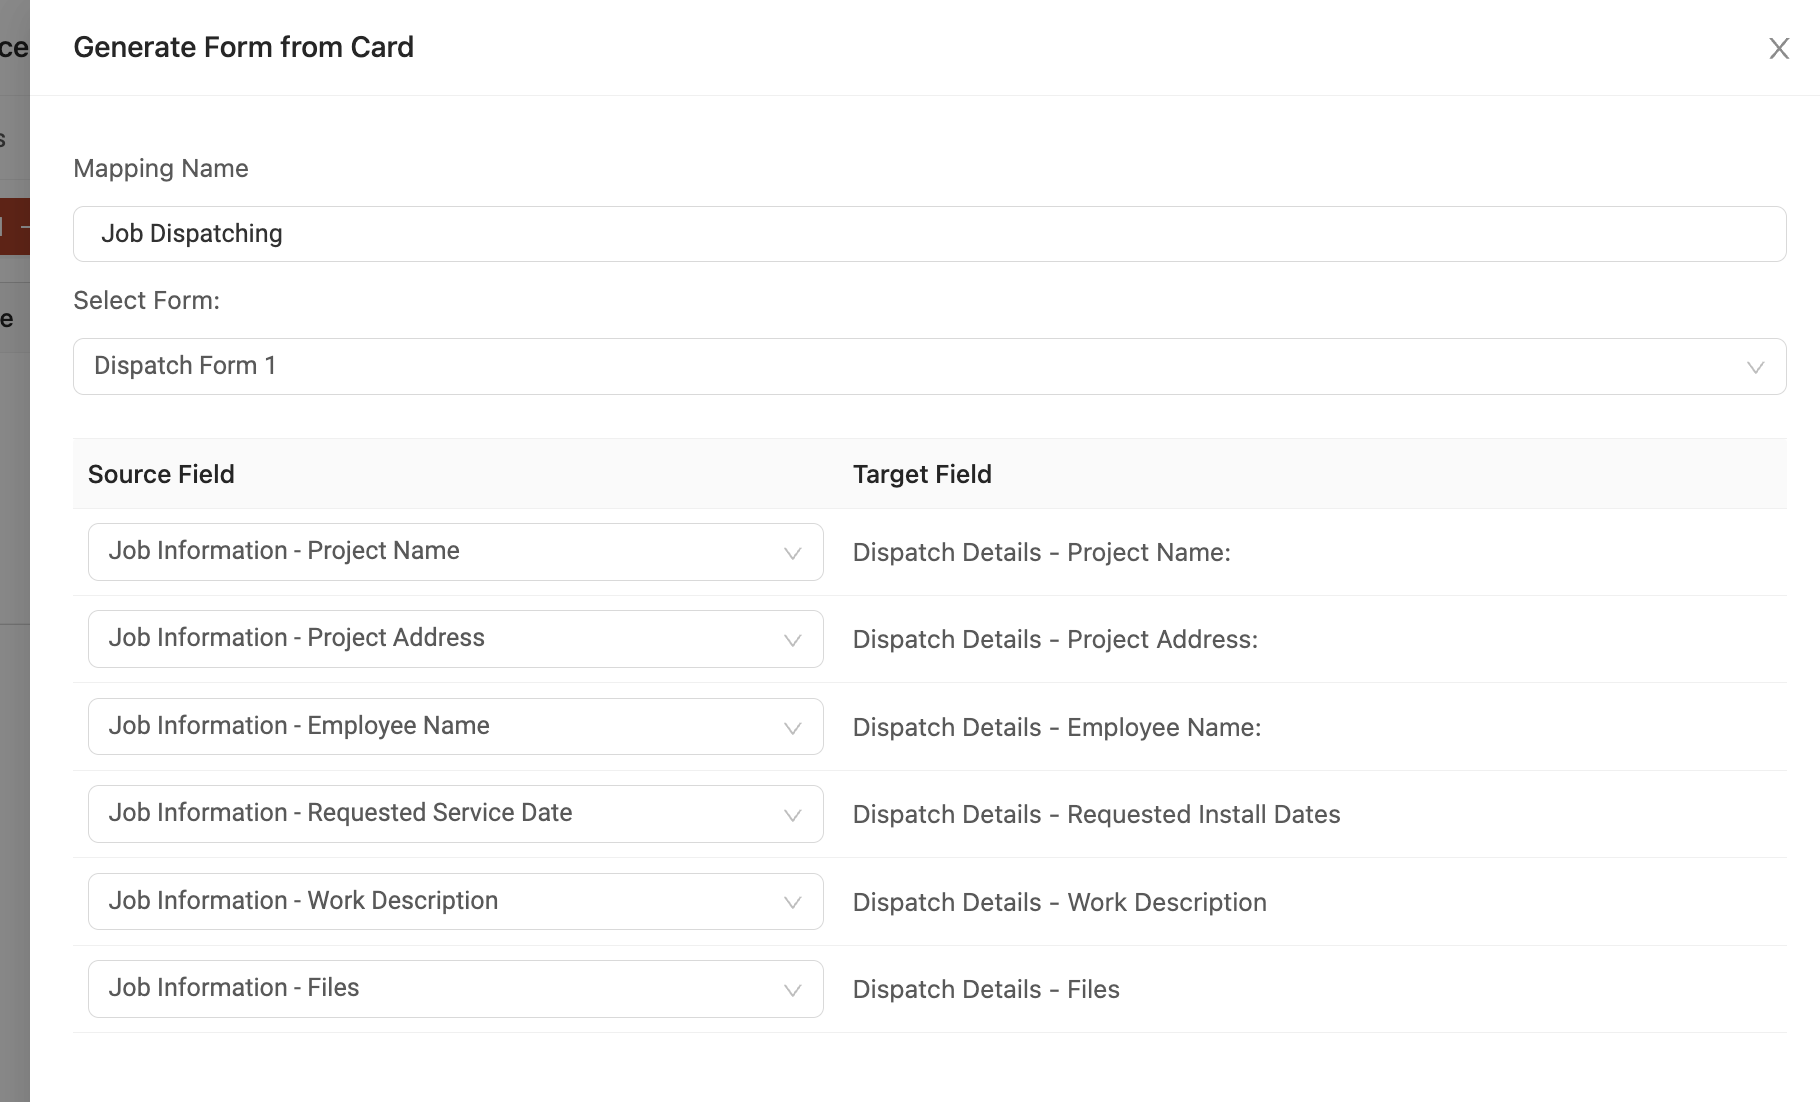
Next, click 'Add' to start adding your dispatch form. Give your workflow a name and select your dispatch form in the 'Select Form' drop-down. Once you select your dispatch form, you will see the available field mappings. Map your 'source' fields from your board card into the 'target' fields in the dispatch form. Click 'Submit' when you're finished mapping the fields.
Adding 'dispatch' and 'form trigger' steps into your dispatch form workflow
In your dispatch form's workflow, the key piece to add is the 'dispatch' step. This workflow step links directly to the Field Schedule and can create shifts automatically as soon as the dispatch form is submitted.
To start, make sure you have a 'Date/Time Range' field added in your dispatch form. This will configure the form to automatically create a shift every time the form is submitted (one shift per form).
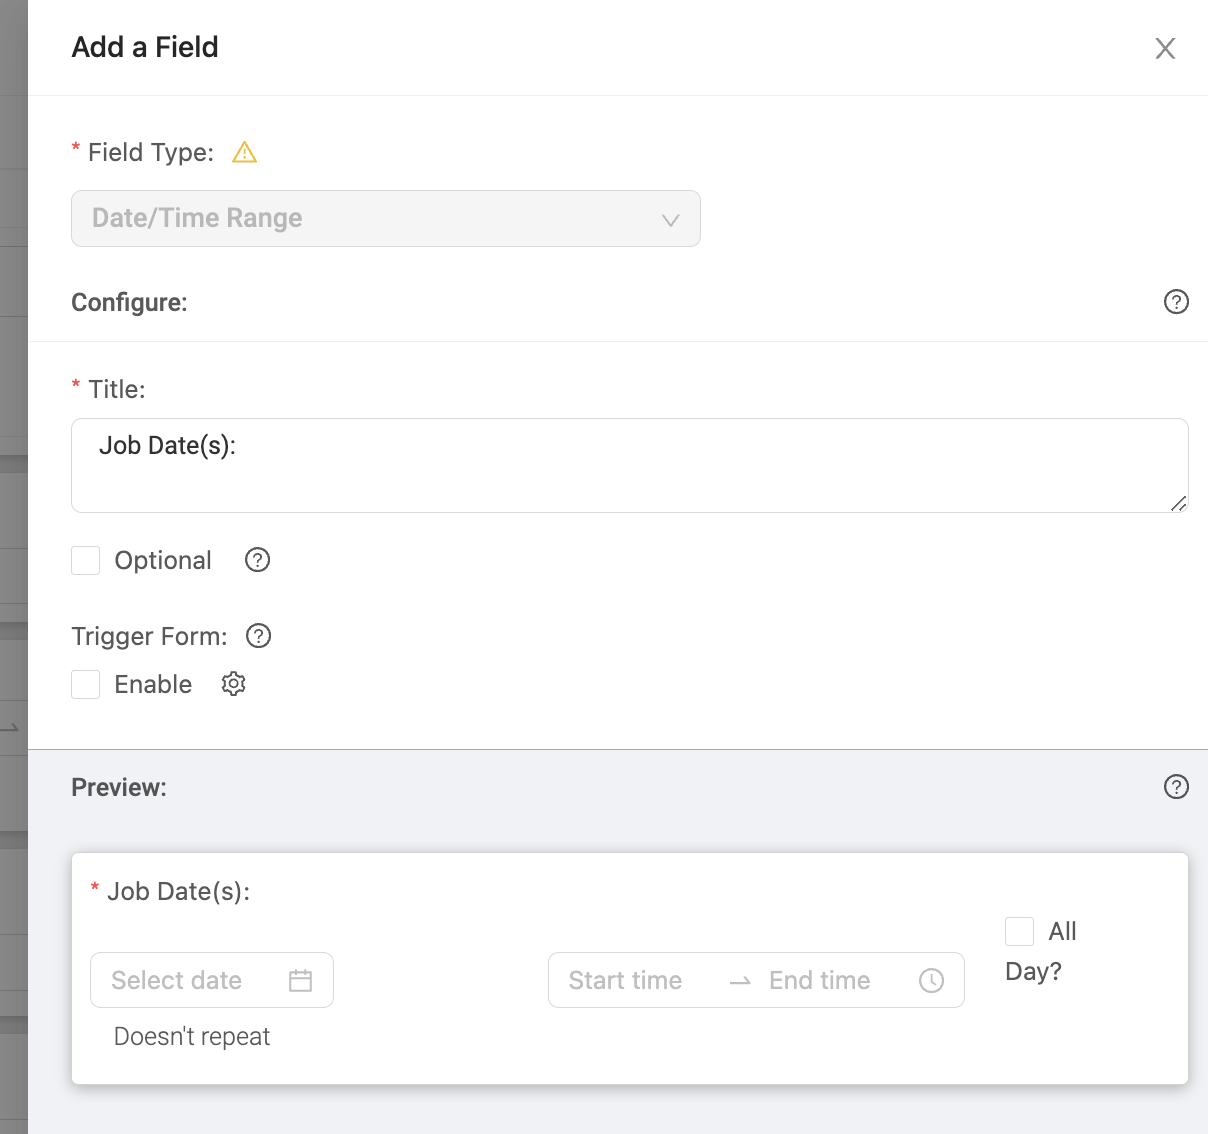
Once this field is added to your form, head over to your form's workflow and add the 'Dispatch' step.
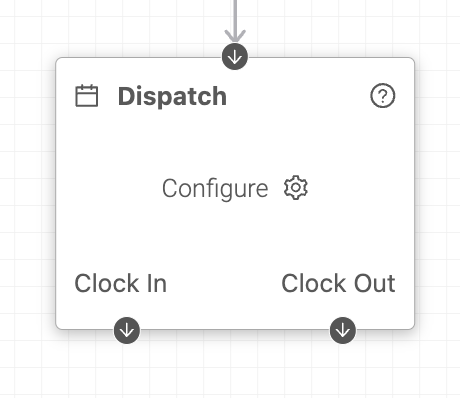
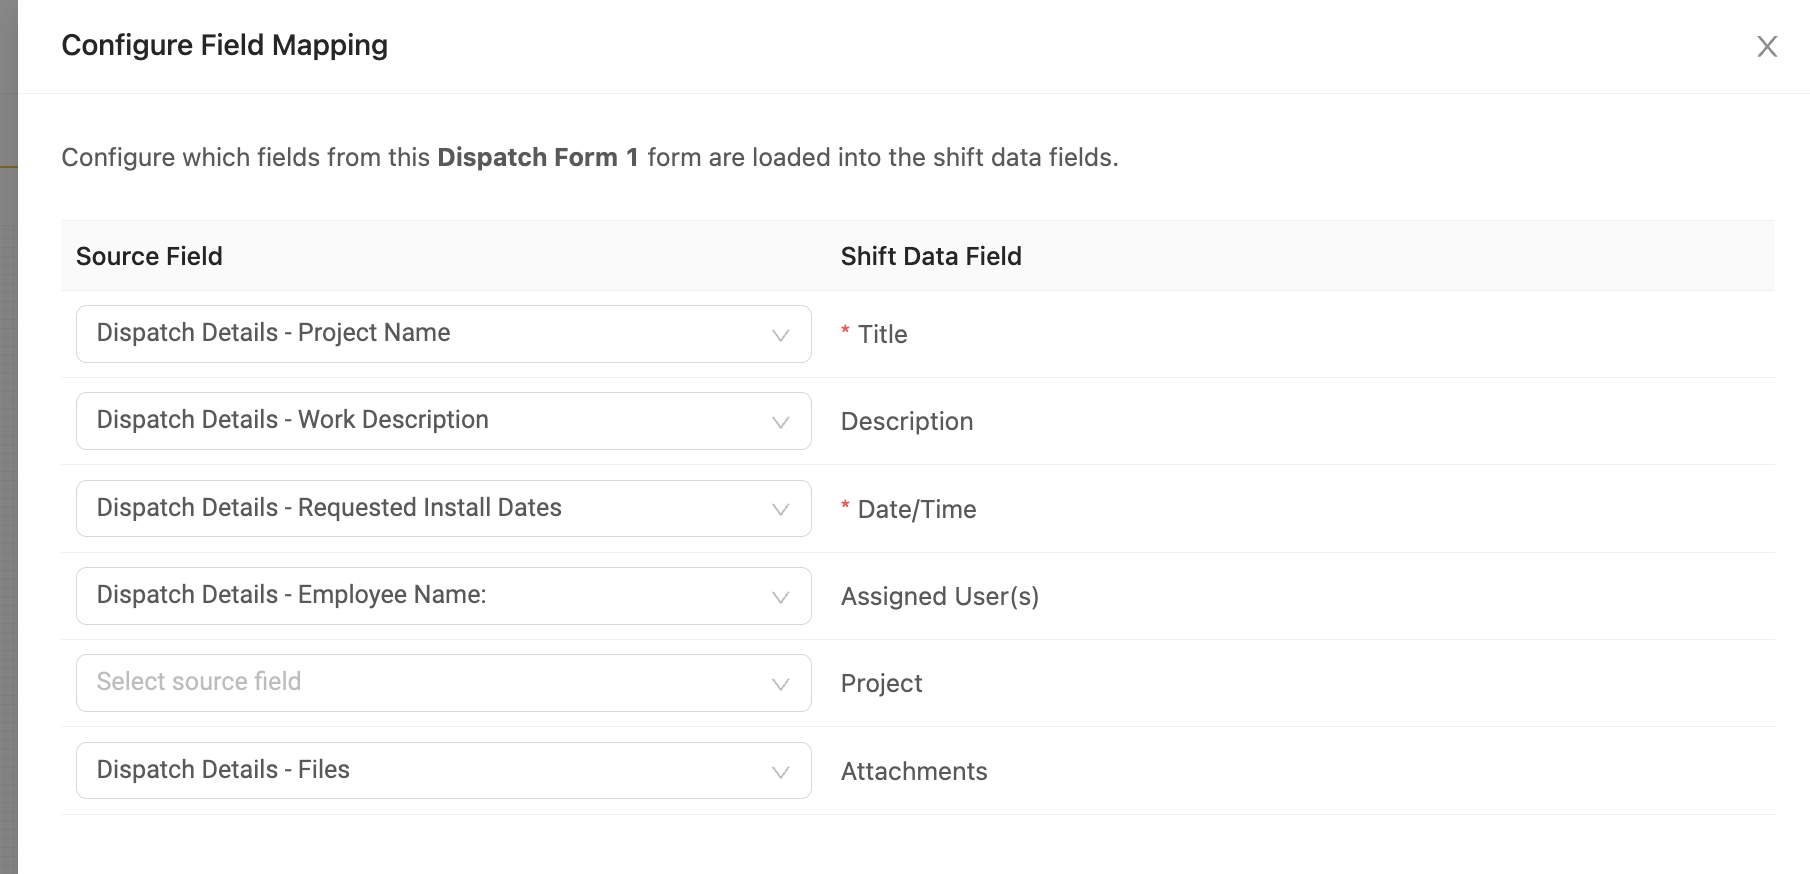
Click 'Configure' in the dispatch step to map the fields from your form into the dispatch step. This is how Ontraccr will determine the details of the shift which will be automatically added to the Field Schedule. You will see the field mapping slider, simply map the 'source' fields from your dispatch form to the shift details (fields with * are required). Map your 'Date/Time Range' field type to the 'Date/Time' field in the shift.
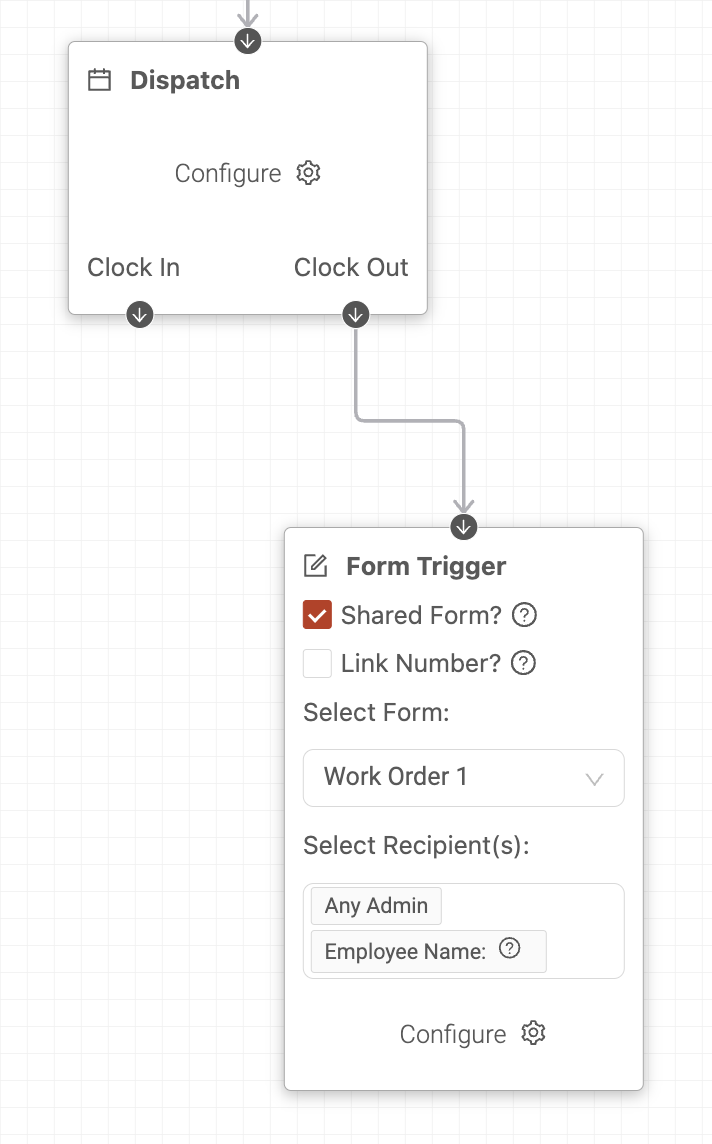
Once you've configured your field mappings in the dispatch workflow step, you can also even add automated workflow steps whenever the user then clocks in to or clocks out of the scheduled shift. This is where you should now add your work order form into your workflow. To do this, connect the work order form to the 'Clock Out' connection via a 'Form Trigger' step. Select the work order form in the 'Select Form' drop-down and choose who the work order form should be assigned to (e.g. use the employee field selection in the dispatch form).
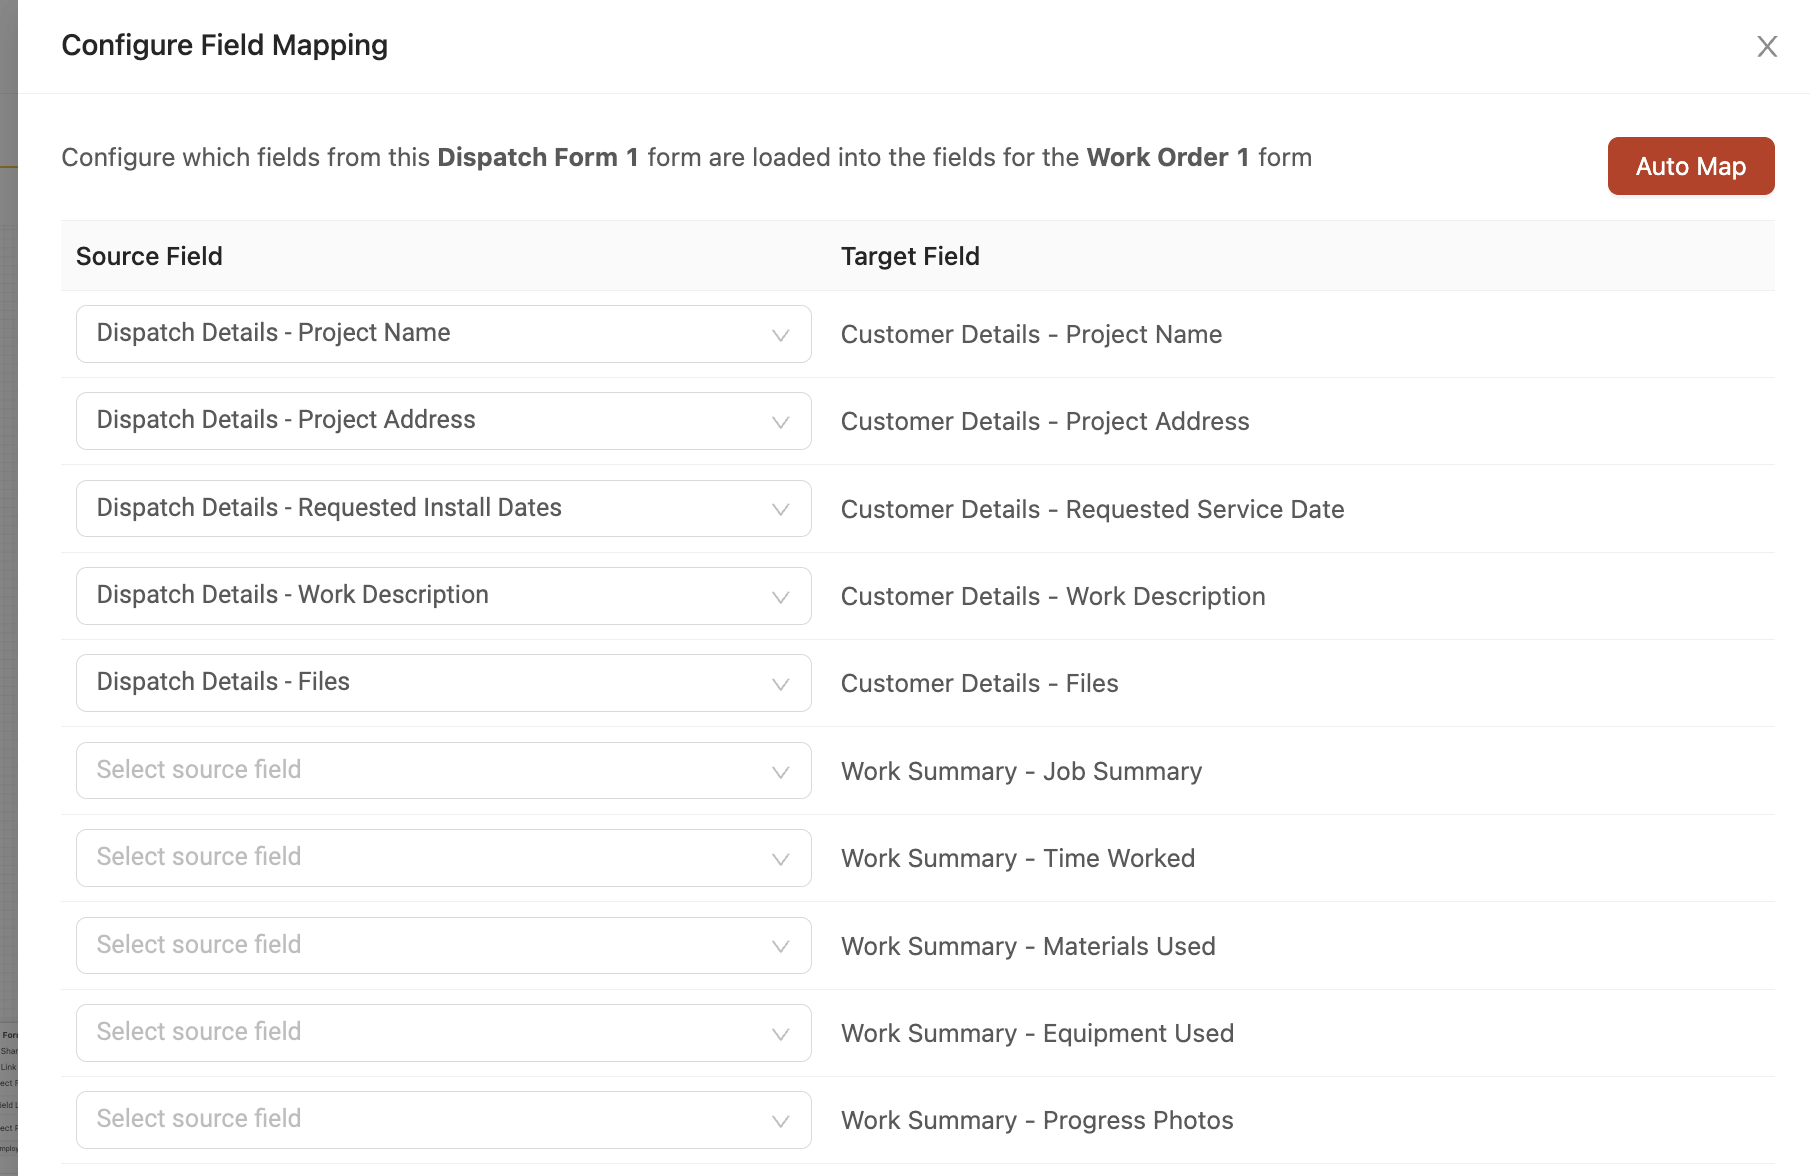
Next, click 'Configure' in the form trigger step to map the 'source' fields from your dispatch form into the 'target' fields of your work order form. You can only map fields together of the same type so you can map all of your identical fields together here. The 'Auto Map' button can help map identical field types together.
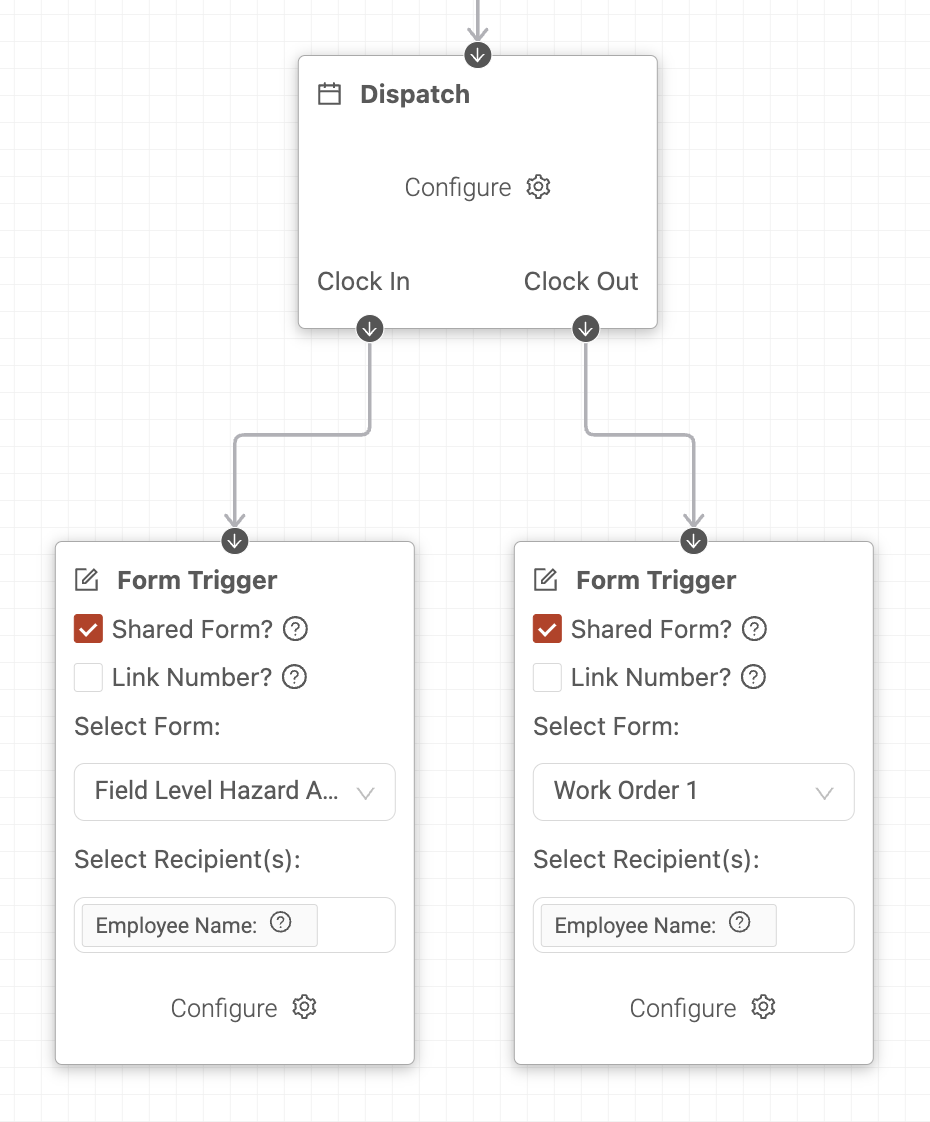
You also have the option to get the user to fill in other forms, such as a hazard assessment or inspection form, as soon as they start their shift. If you want to enable this, you can connect any other forms to the 'Clock In' connection via a 'Form Trigger' step in your workflow. Click 'Configure' to map the fields from your Dispatch form into your other desired forms here as well.
Adding a 'form trigger' step into your work order form workflow
Next, in your work order form workflow, you will want to trigger the invoice form. To set this up, connect the invoice form into the workflow via a 'Form Trigger' step. Select the invoice form in the 'Select Form' drop-down and choose who the invoice form should be assigned to.
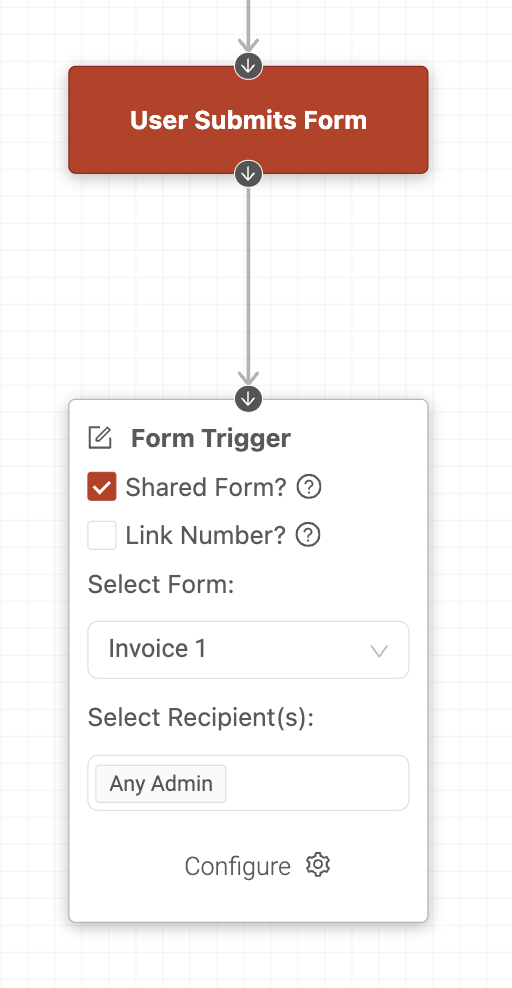
Next, click 'Configure' in the form trigger step to map the 'source' fields from your work order form into the 'target' fields of your invoice form. You can only map fields together of the same type so you can map all of your identical fields together here. The 'Auto Map' button can help map identical field types together.

Using the dispatching system
Once you've configured all the forms, boards, and workflows above, you are now ready to start using your new dispatching system! Here's how it works:
1. Whenever you need to add a new service job, simply create a project profile in the 'Projects' page. This will automatically create a card for the service job in your service board.
2. Open the card in your service board to add more details for the job and select the user you'd like to dispatch the job to.

3. When you're ready to dispatch the job, click the form trigger icon on your card. Select your dispatch form mapping in the 'Select Form Mapping' drop-down. The slider will then show you the fields that will map over from your card into your dispatch form. Click 'Continue' to move forward. This will open your dispatch form will all the fields pre-populated with information from the card. Click 'Submit' when you're ready to dispatch the job. This will notify the assigned user and automatically add a shift for the job into the Field Schedule. You can then move the job to the 'scheduled' status in your board.

4. The user will then see the shift in their 'Action Center' or 'Schedule' page in the Ontraccr mobile app. On the day of the job, they can tap the shift and click 'Clock In' to begin tracking their time for the job.
5. When the user clocks out of their shift, they will be assigned the work order form to complete the details of the job. They can find the form in the 'Assigned' section of their 'Forms' page. Once the user enters all the information into the work order form, they can tap 'Submit'. This will then trigger the invoice form.
6. The invoice form will be assigned to the user indicated in the work order form's workflow. When the assigned user opens the invoice form in their 'Assigned' forms page, it will come pre-populated with all the fields from the work order form.