Tracking time from the field
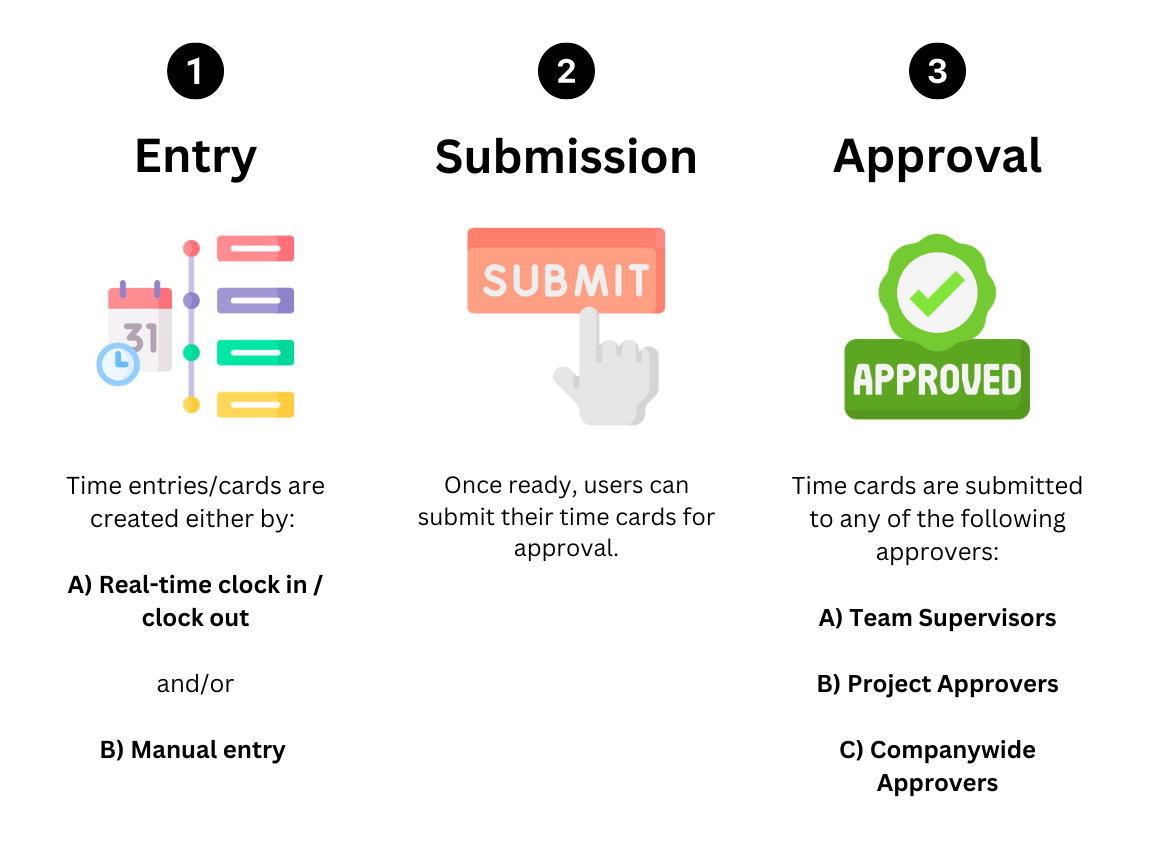
When tracking your time using the Ontraccr mobile app, there are three main stages:
Time card entry
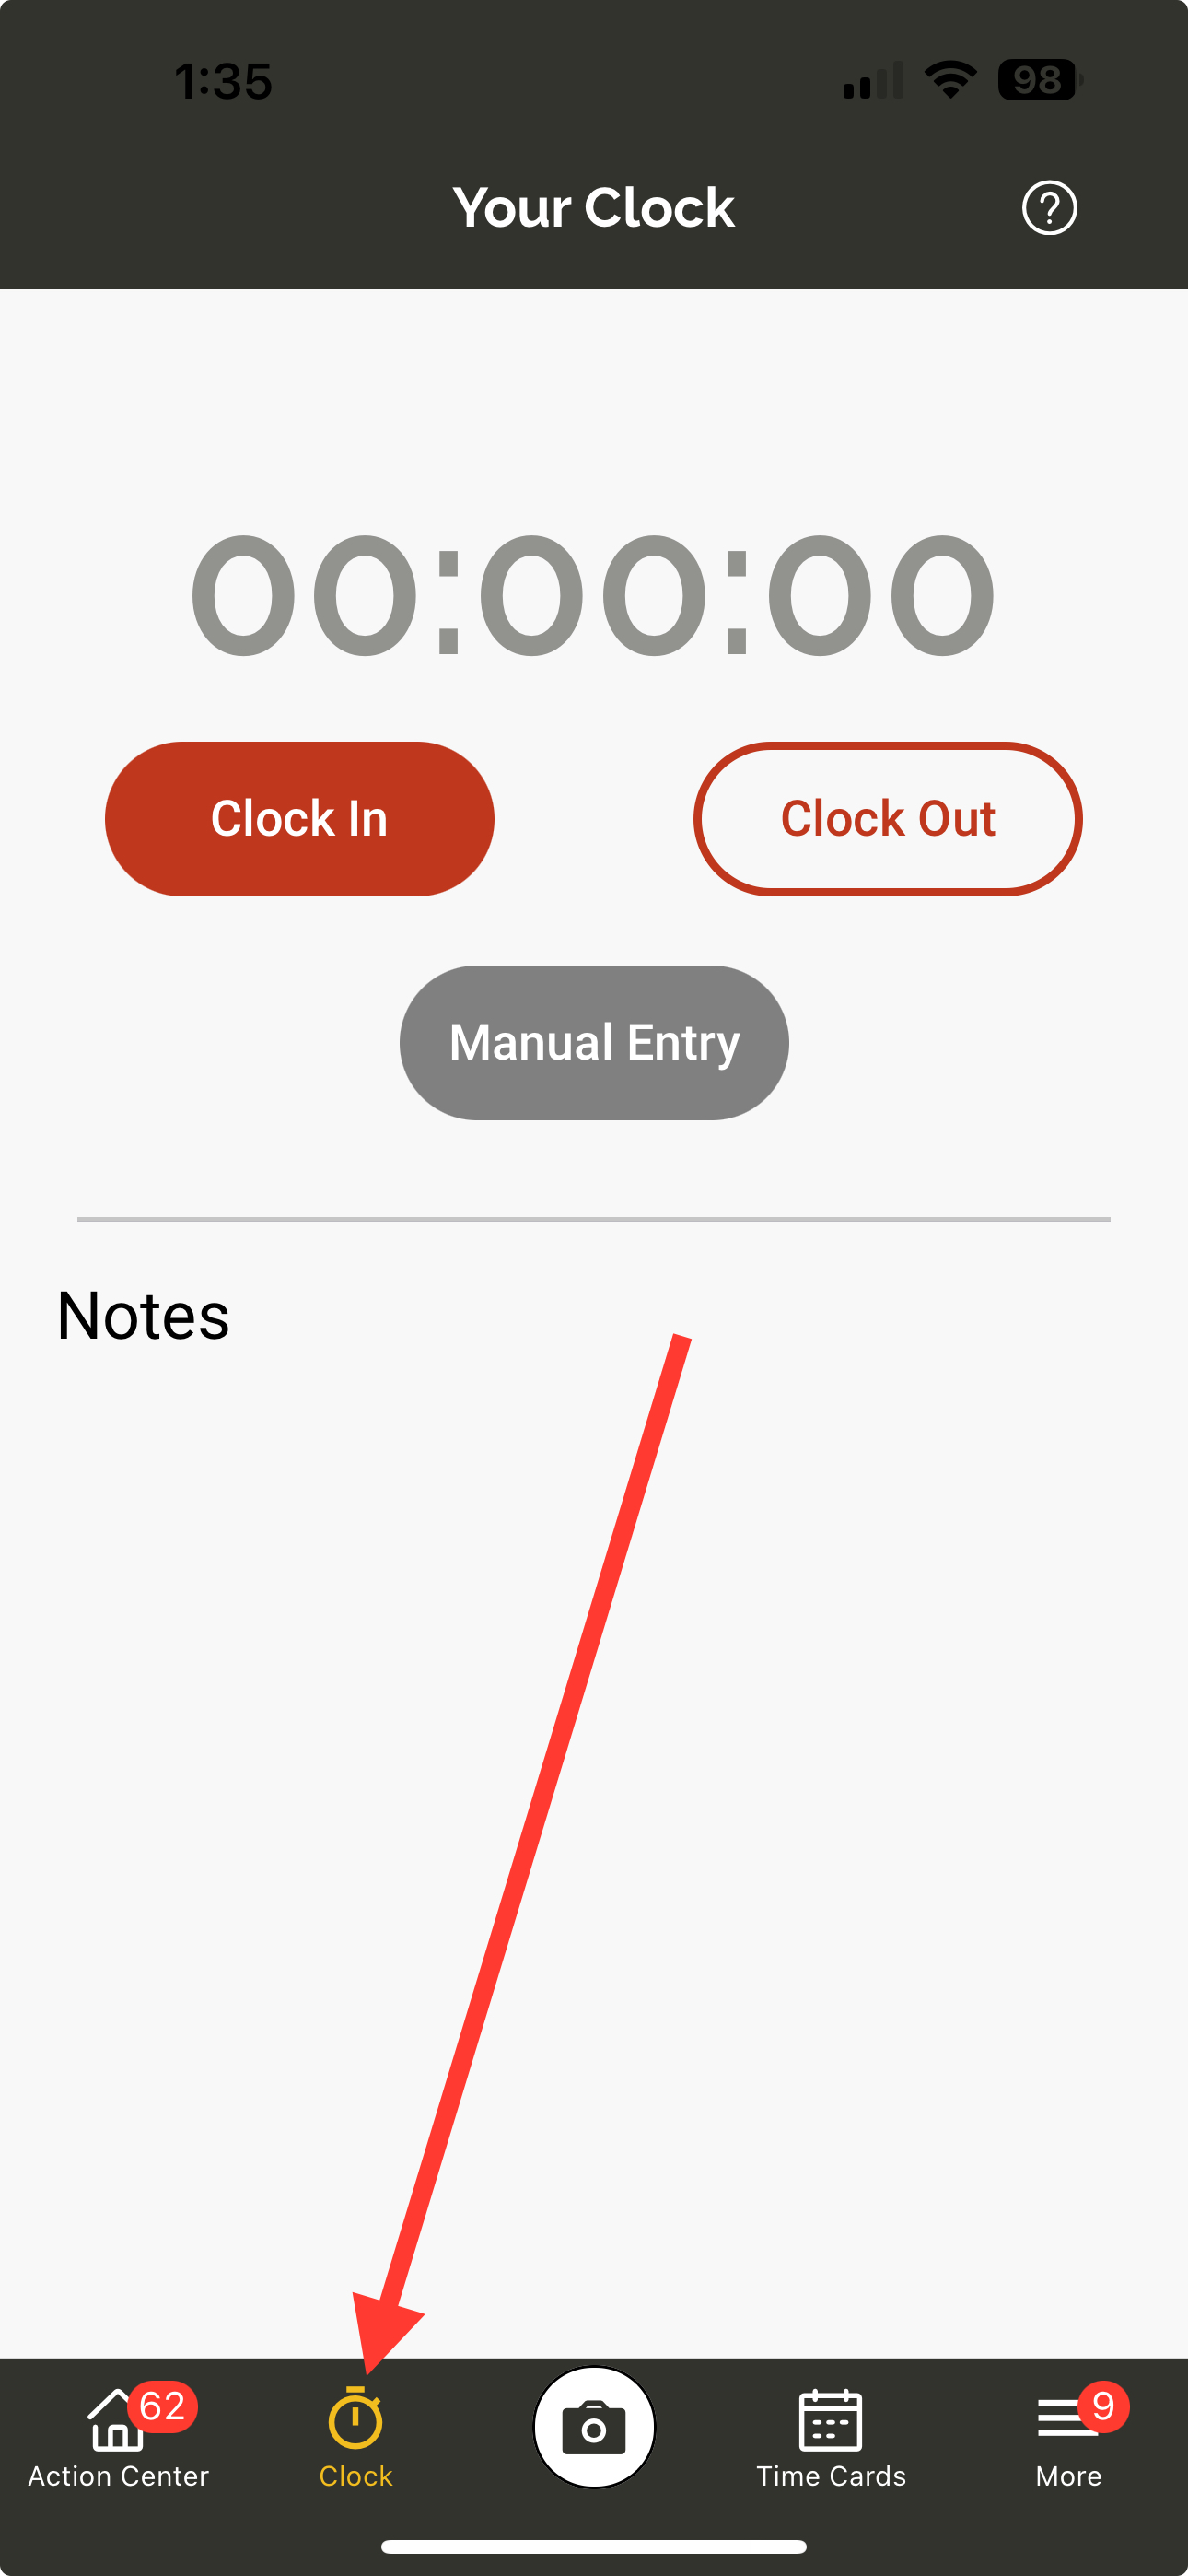
Time cards can be entered either by real-time clock in / out or by manual entry. To enter time using either method, simply open the Clock page in your Ontraccr mobile app.
Real-time clock in / out
Clocking in
To clock in and start tracking your time, tap the 'Clock In' button.

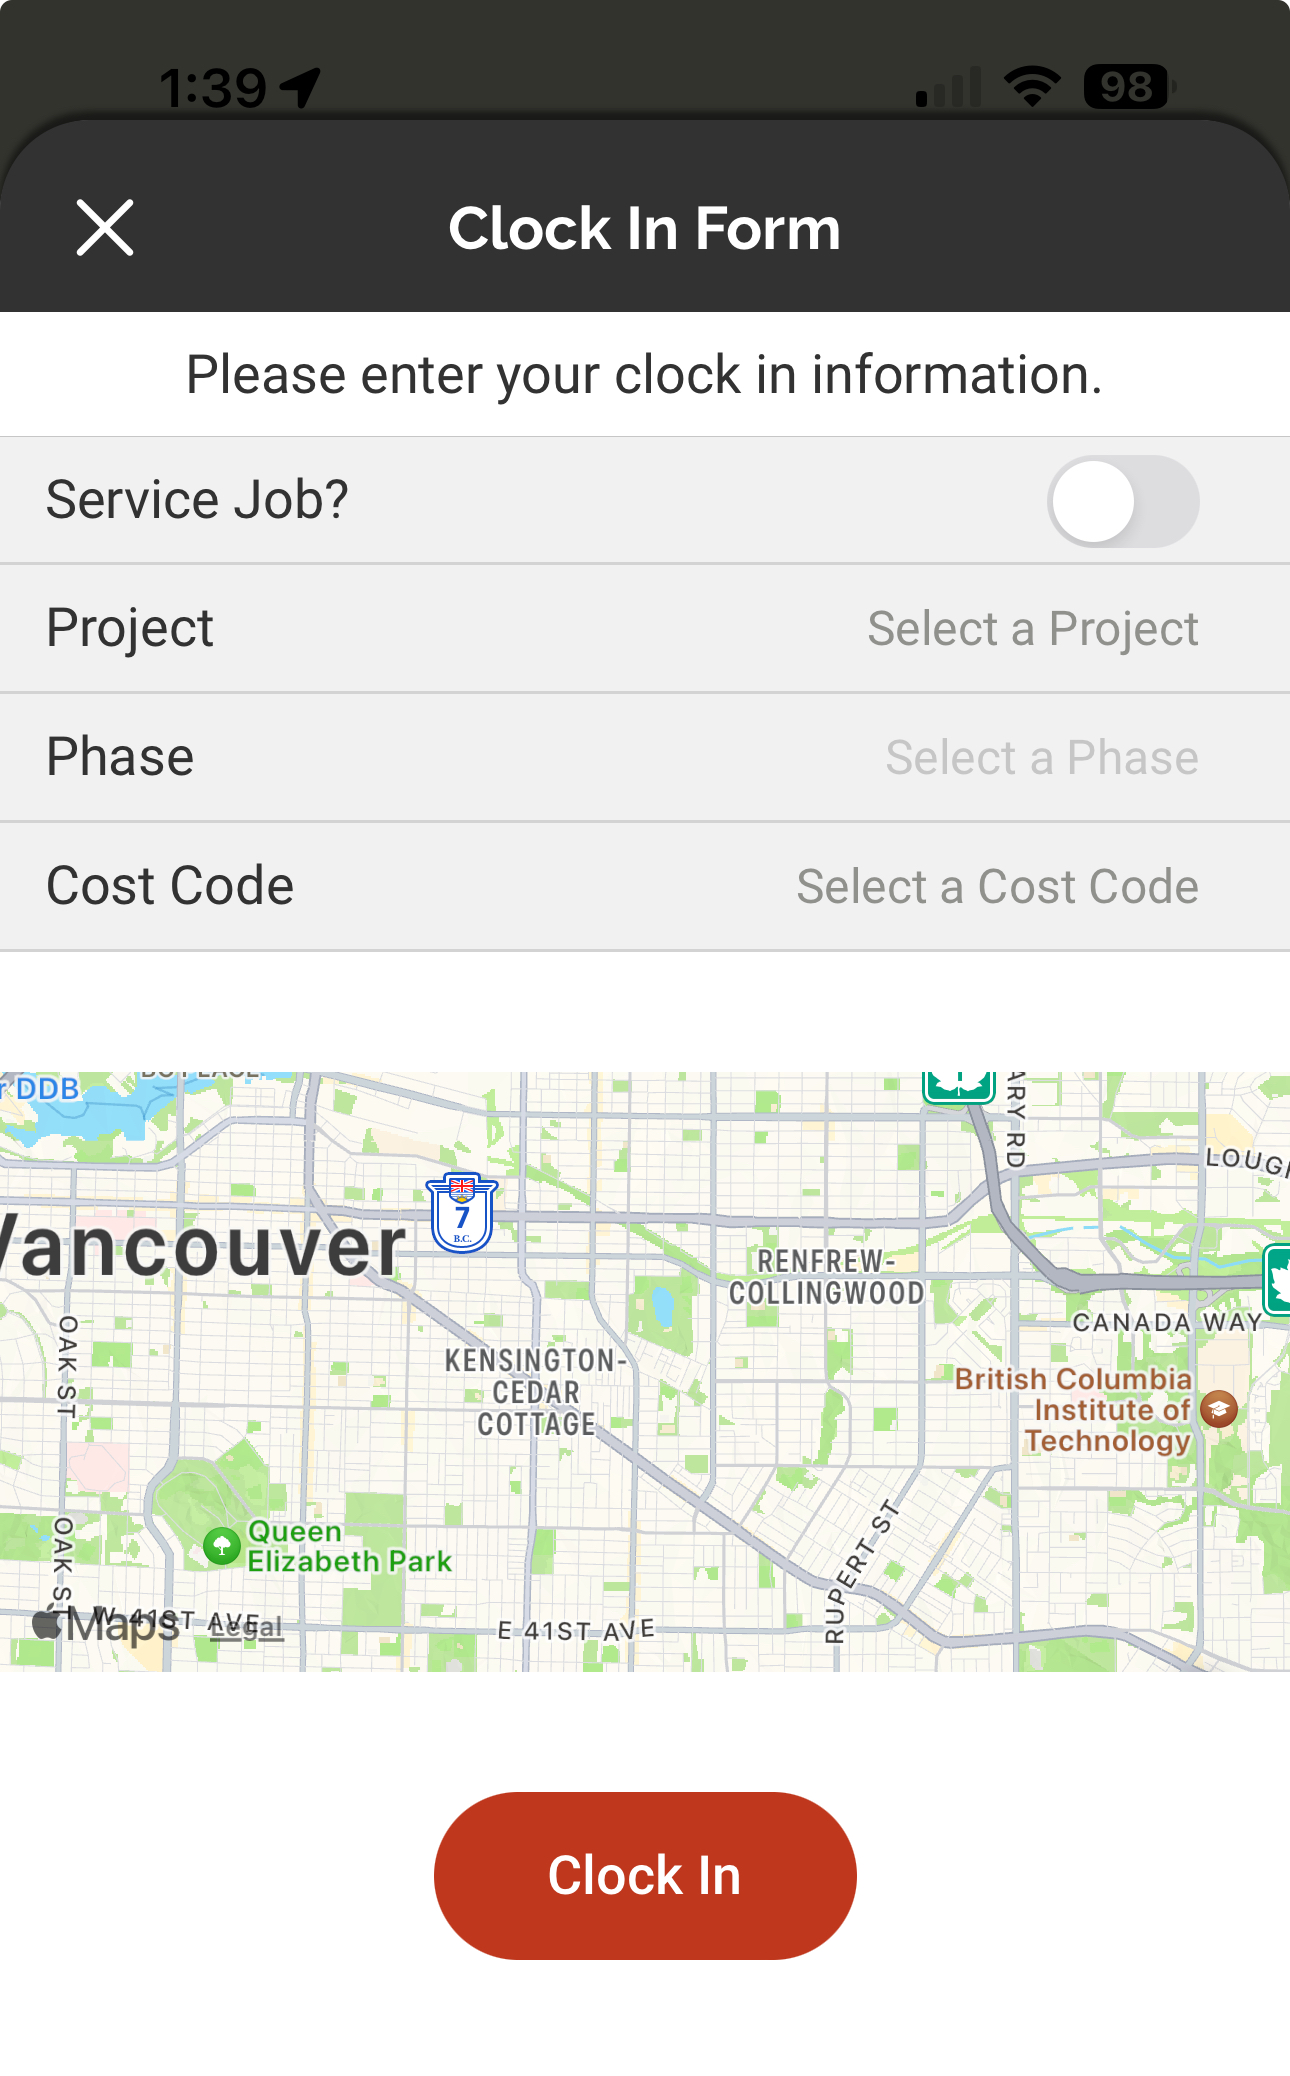
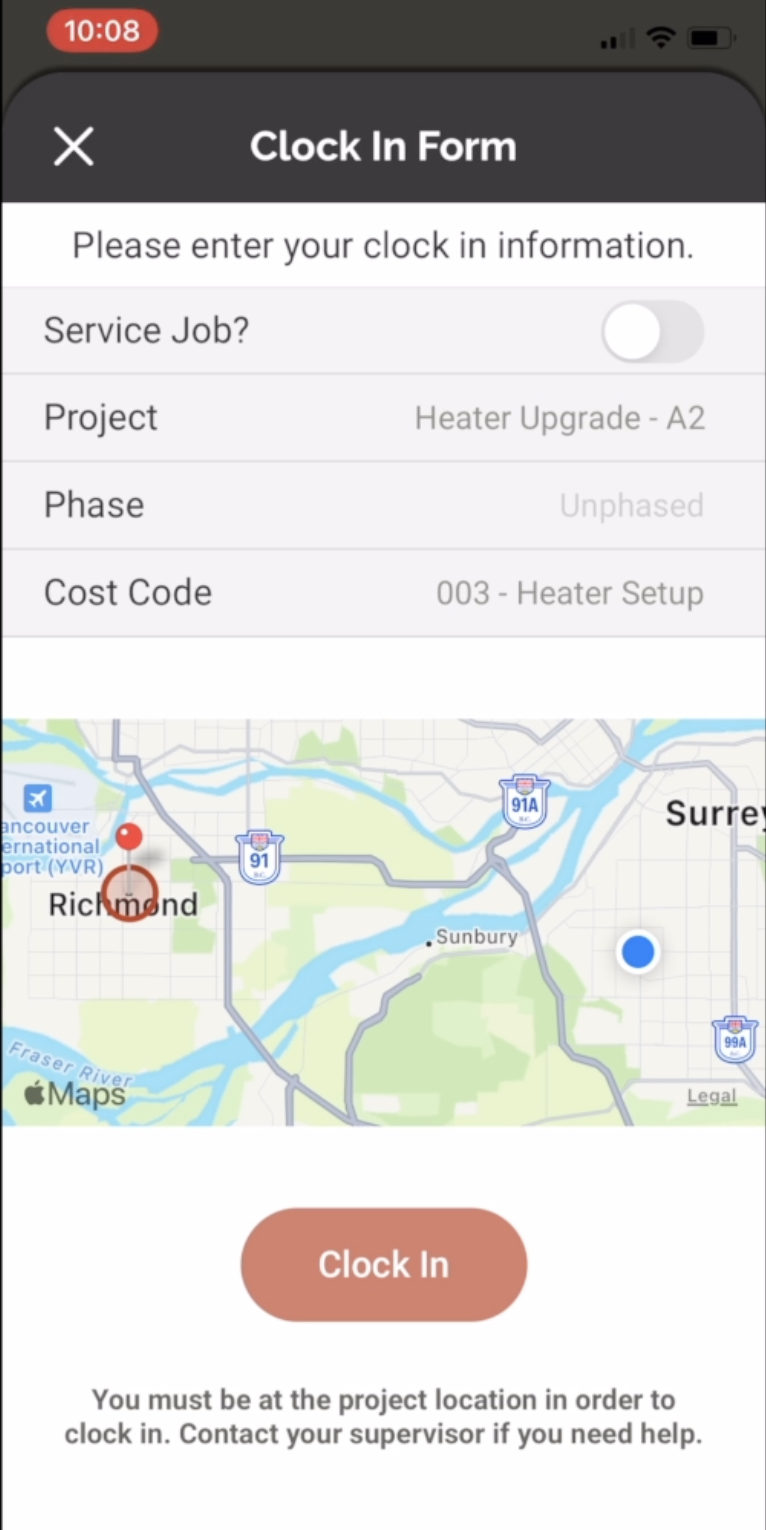
The app will then pop up a 'Clock In Form' for you to fill in some extra details, such as the project, phase, and/or cost code that you are going to work on. The required selections in this form will be dependent on your company's settings. For example, depending on your company's settings, you may be required to fill in the project only, or the project and cost code, or neither of them (if you are unsure of what's required, simply ask your account admin to clarify).
As soon as you clock in successfully, you'll see a running work timer. This timer will simply run in the background and does not require you to keep the app open.
Note: Depending on your company's settings, you may be required to complete a facial capture or be located within a GPS-based location geofence in order to clock in successfully before your work timer starts.
While you are currently clocked in, there are a few other controls you can use from here. You could record a break, switch to a different project or cost code, and also add notes to your time entries.
Tracking breaks
To take a break, simply tap the 'Take Break' button. This will pause your work timer and start a separate break timer underneath the break button. Tap 'End Break' to end your break time and you will see that your work timer will resume again.
Switching projects or cost codes
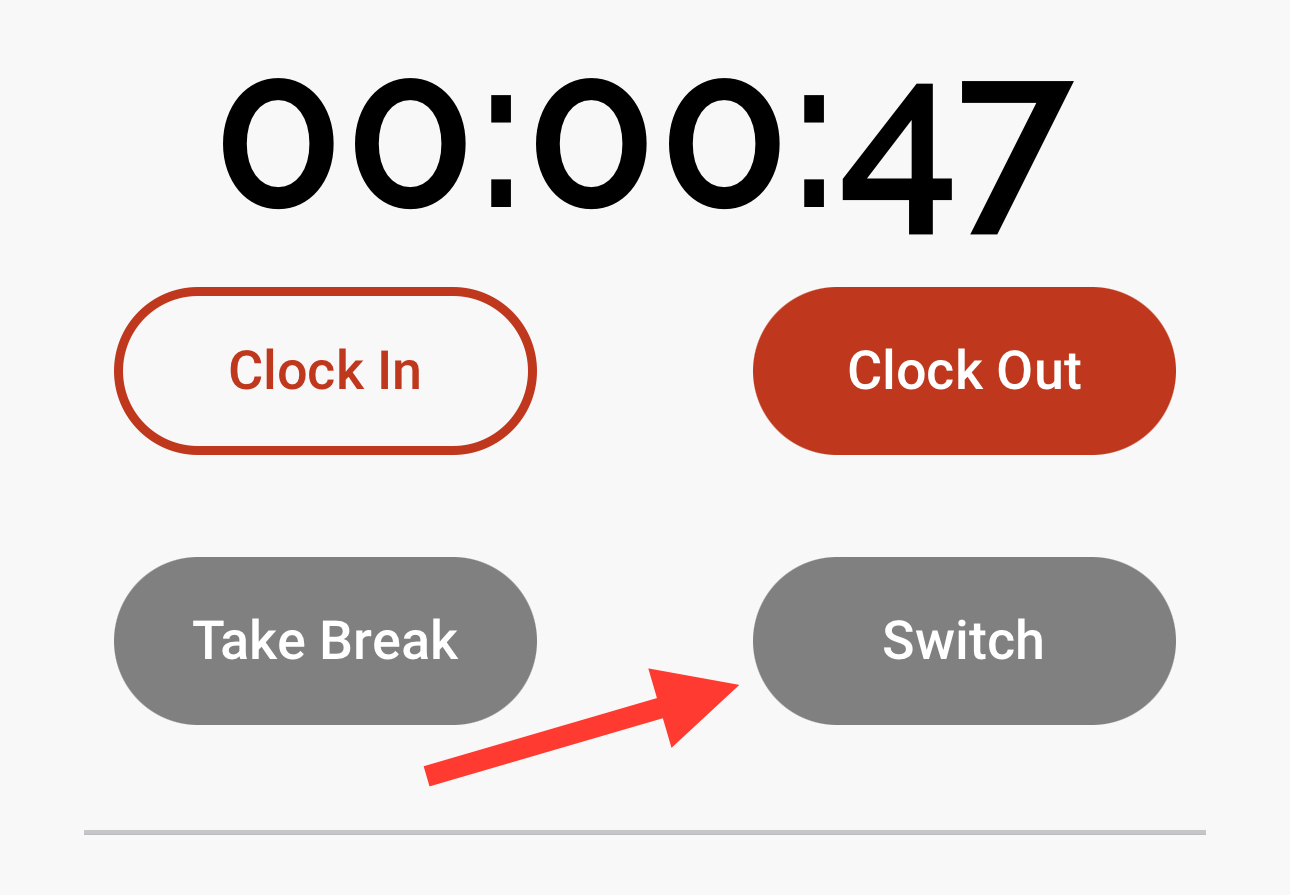
If you simply want to switch to a different project and/or cost code that you're working on, you can tap the 'Switch' button.
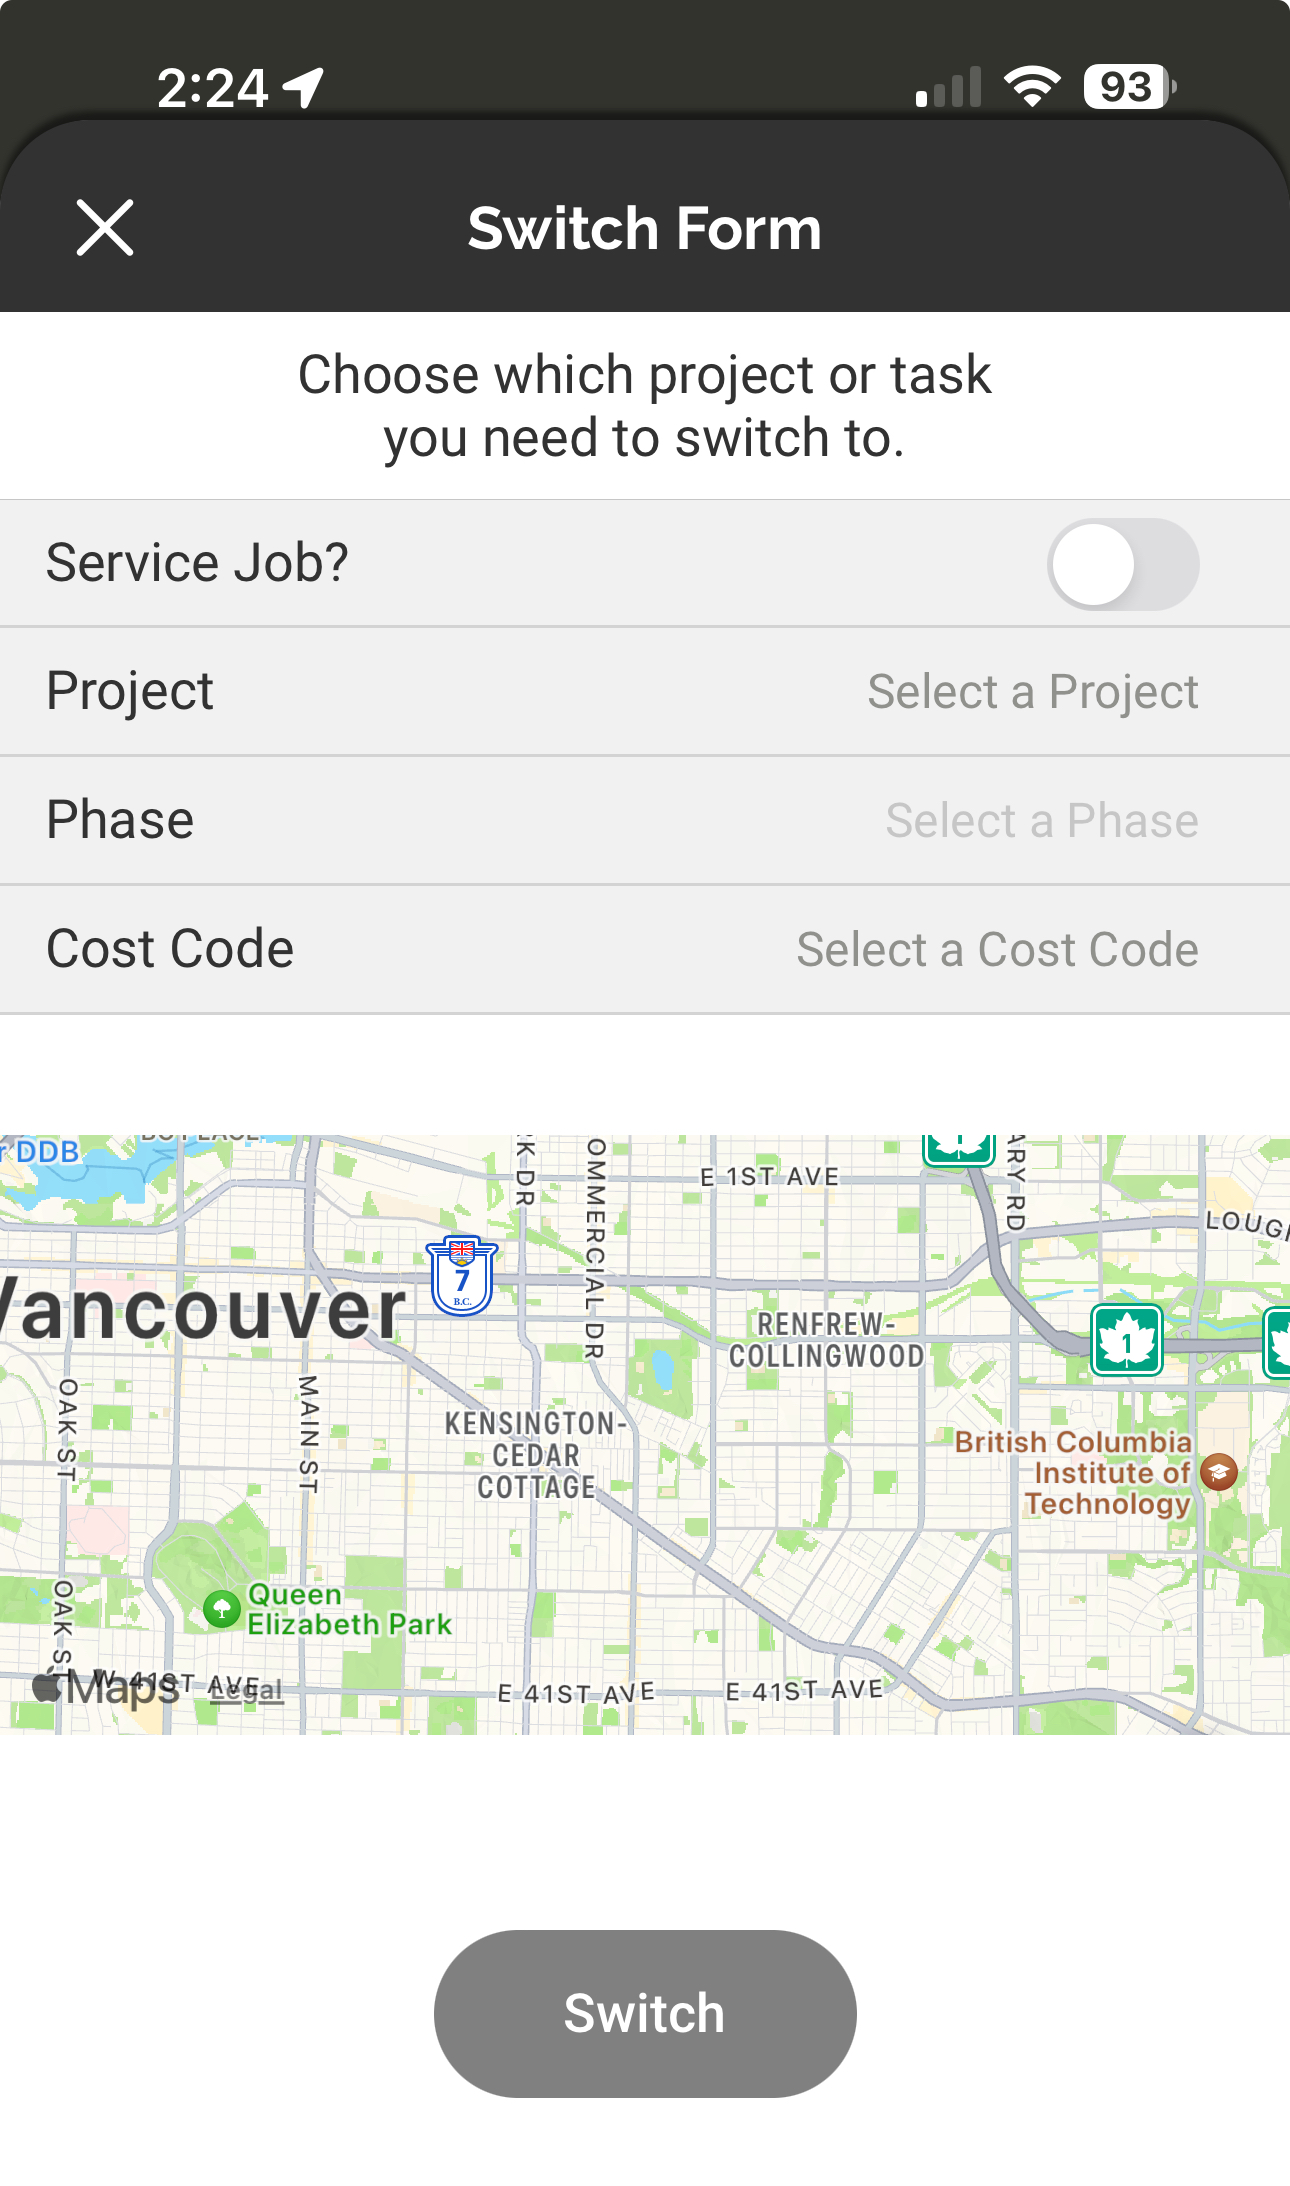
The app will then pop up a 'Switch Form' for you to fill in some extra details, such as the project, phase, and/or cost code that you are going to switch to.
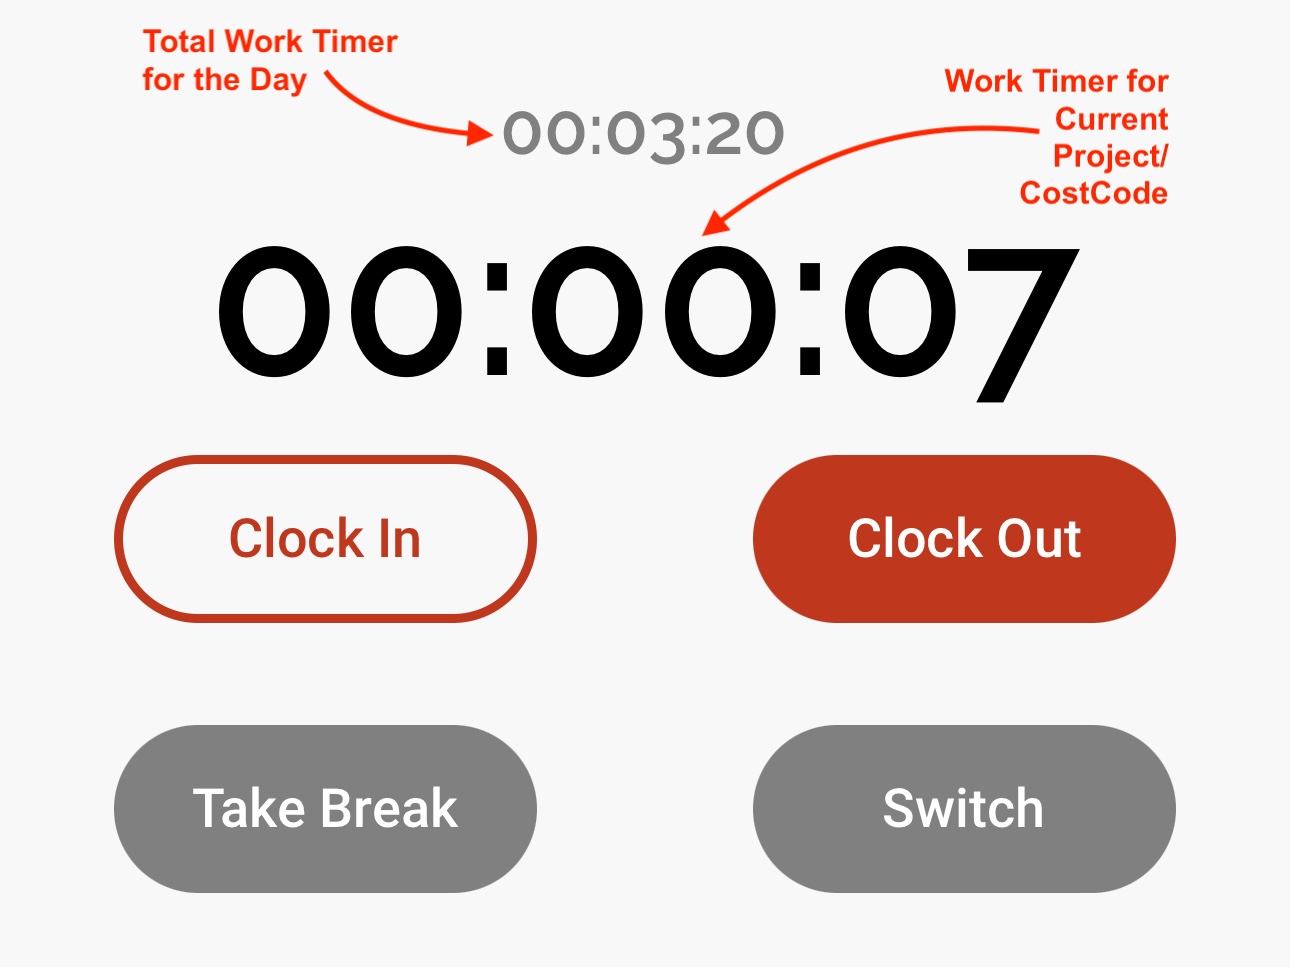
After you switch to a new project and/or cost code, you'll notice a new timer show up in your close page. The smaller timer at the top represents your total work time for the day across all projects and/or cost codes, whereas the larger timer beneath is your work timer on the current project and/or cost code that you are currently tracking time on.
Adding notes
While your work timer is running, you can also easily add notes to any of your time entries for the day by tapping into the corresponding notes box under the 'Notes' section of the Clock page. Each single time entry across your day will have it's own notes box, ensuring that you can always add the notes to the right piece of work.
Clocking out
When you're done your shift/work for the day and are ready to clock out to end your work timer, simply tap the 'Clock Out' button. This will immediately end your running work timer.
Note: Even if you clock out of your shift, you can still clock in again in case you clocked out accidentally or need to perform more work again later in the day.
Geofencing
If you are trying to clock in to a project with a location-based geofence, you will need to ensure that you are physically on-site before the app will let you clock in to start your work timer. Geofences are optional and managers may elect to set these up on a per project basis in your company's settings.
Note: Ontraccr does not track any user's persistent GPS location, it only gathers GPS snapshots ('location snapshots') whenever a user completes a clock in or clock out action.
Facial capture
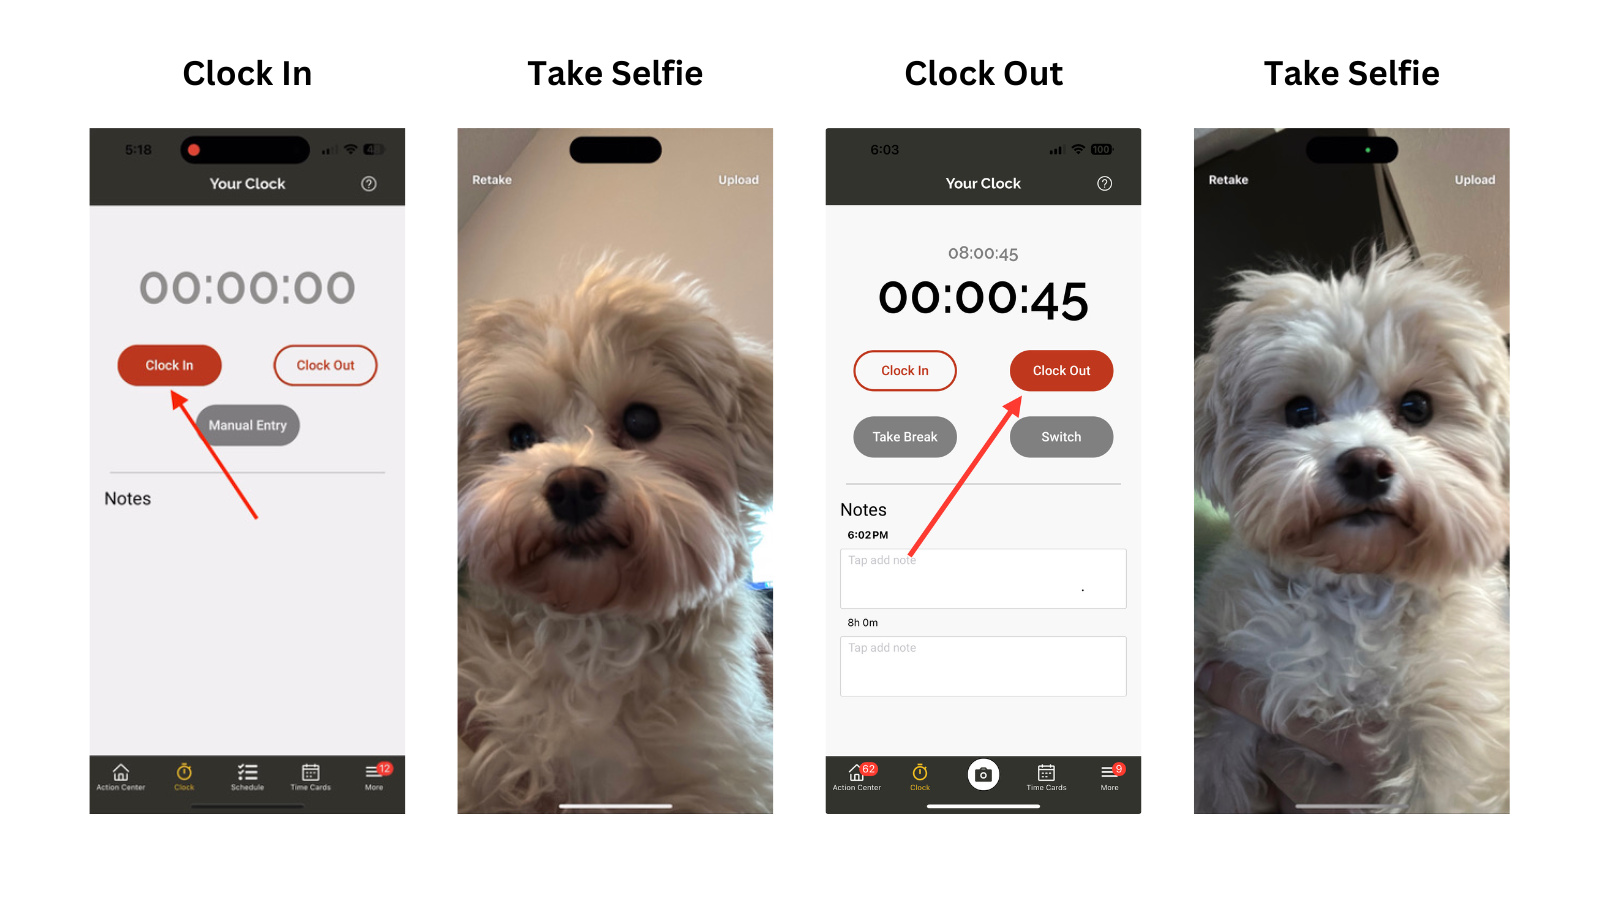
Ontraccr also has a Facial Capture feature which, if enabled in your company's settings, will ask you to take a photo of yourself when tracking your time to verify your identity. With Facial Capture enabled, simply clock in to start tracking your time as usual and a camera slider will pop up immediately for you to capture and upload a selfie in order to complete the clock in. On the other end, when you're ready to clock out of your shift, the camera slider will appear again to capture another selfie photo.
Here’s an example of our Chief Canine Officer, Zoe, performing a facial capture:
Manual time card entry
Instead of tracking your time by clocking in/out and using a running timer, depending on your company's settings, you may also be able to add time entries using a simple form to add hour totals quickly.
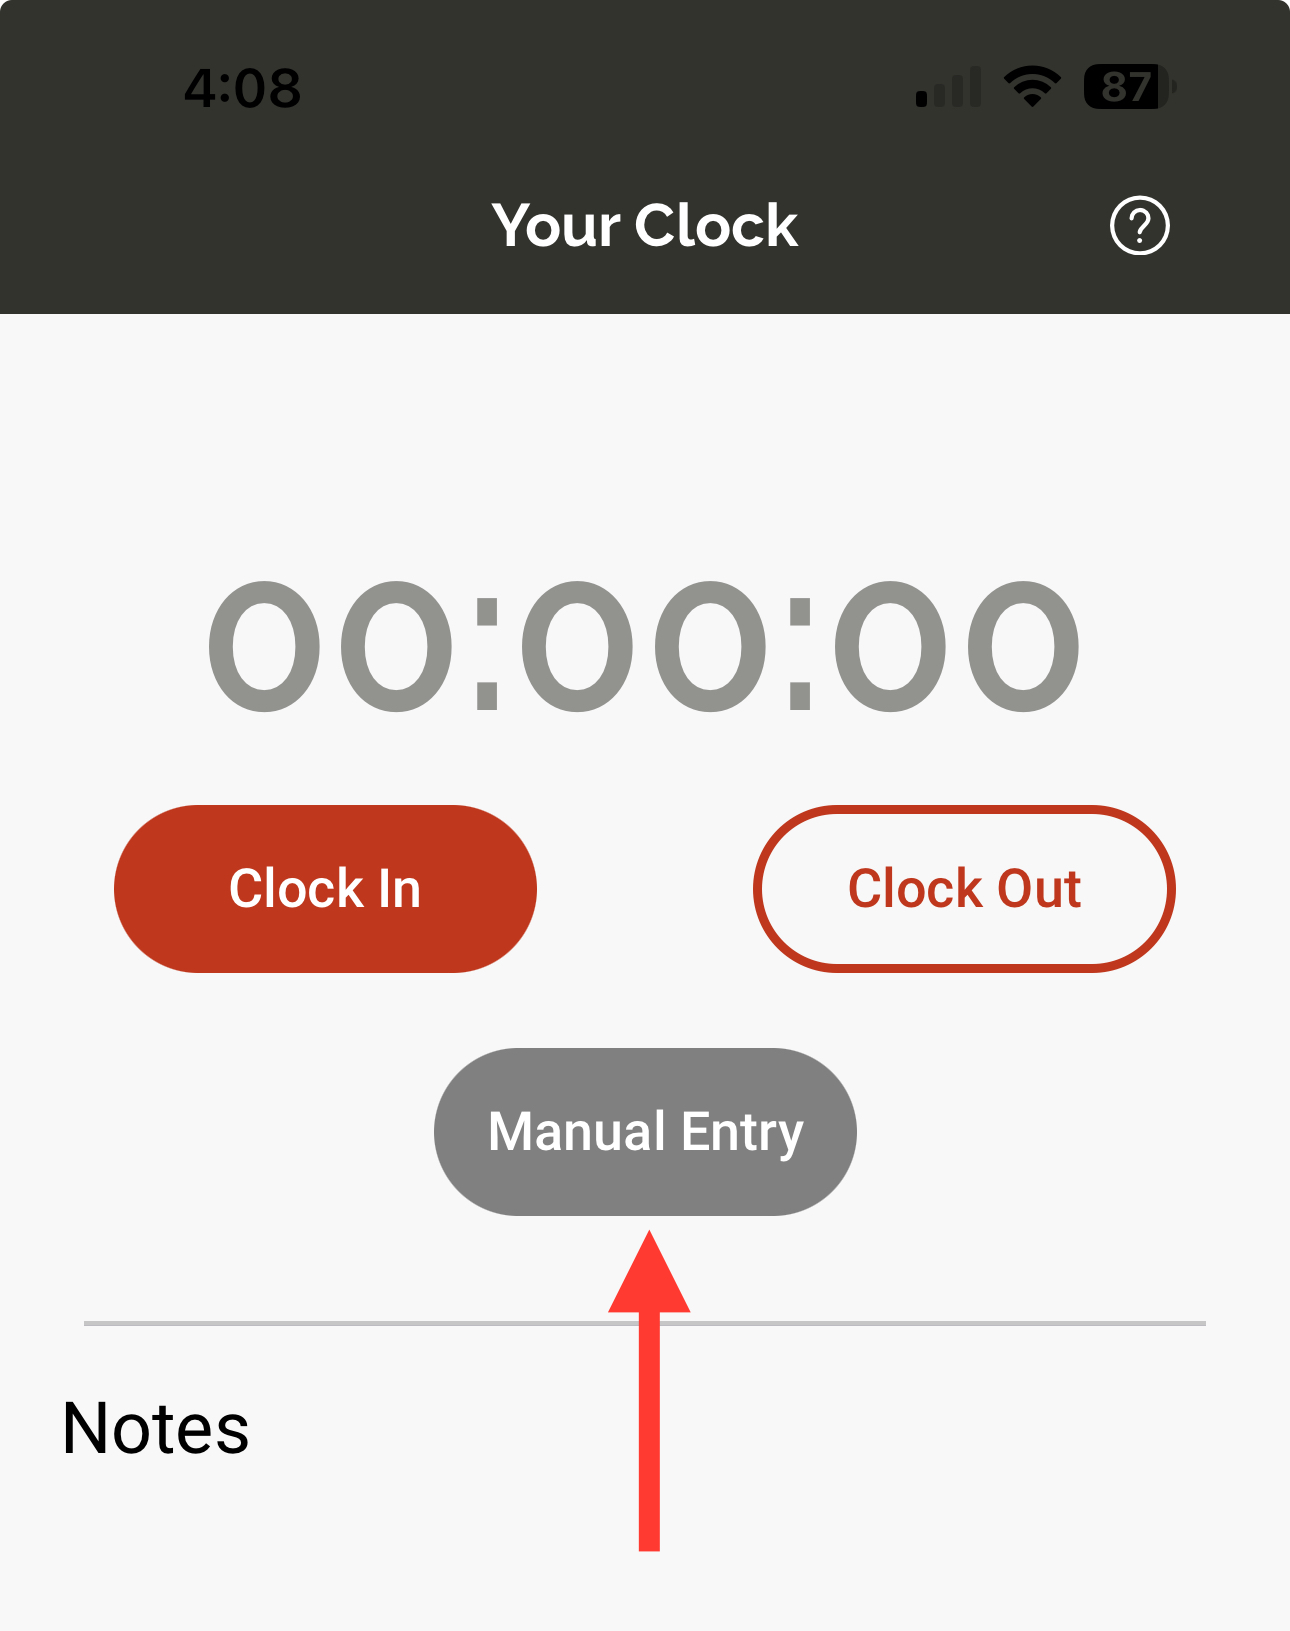
To add a manual time card entry, tap the 'Manual Entry' button in the Clock page.
The app will then pop up an 'Entry Form' for you to fill in some extra details, such as the project, phase, and/or cost code that you are going to work on. The required selections in this form will be dependent on your company's settings. For example, depending on your company's settings, you may be required to fill in the project only, or the project and cost code, or neither of them (if you are unsure of what's required, simply ask your account admin to clarify).
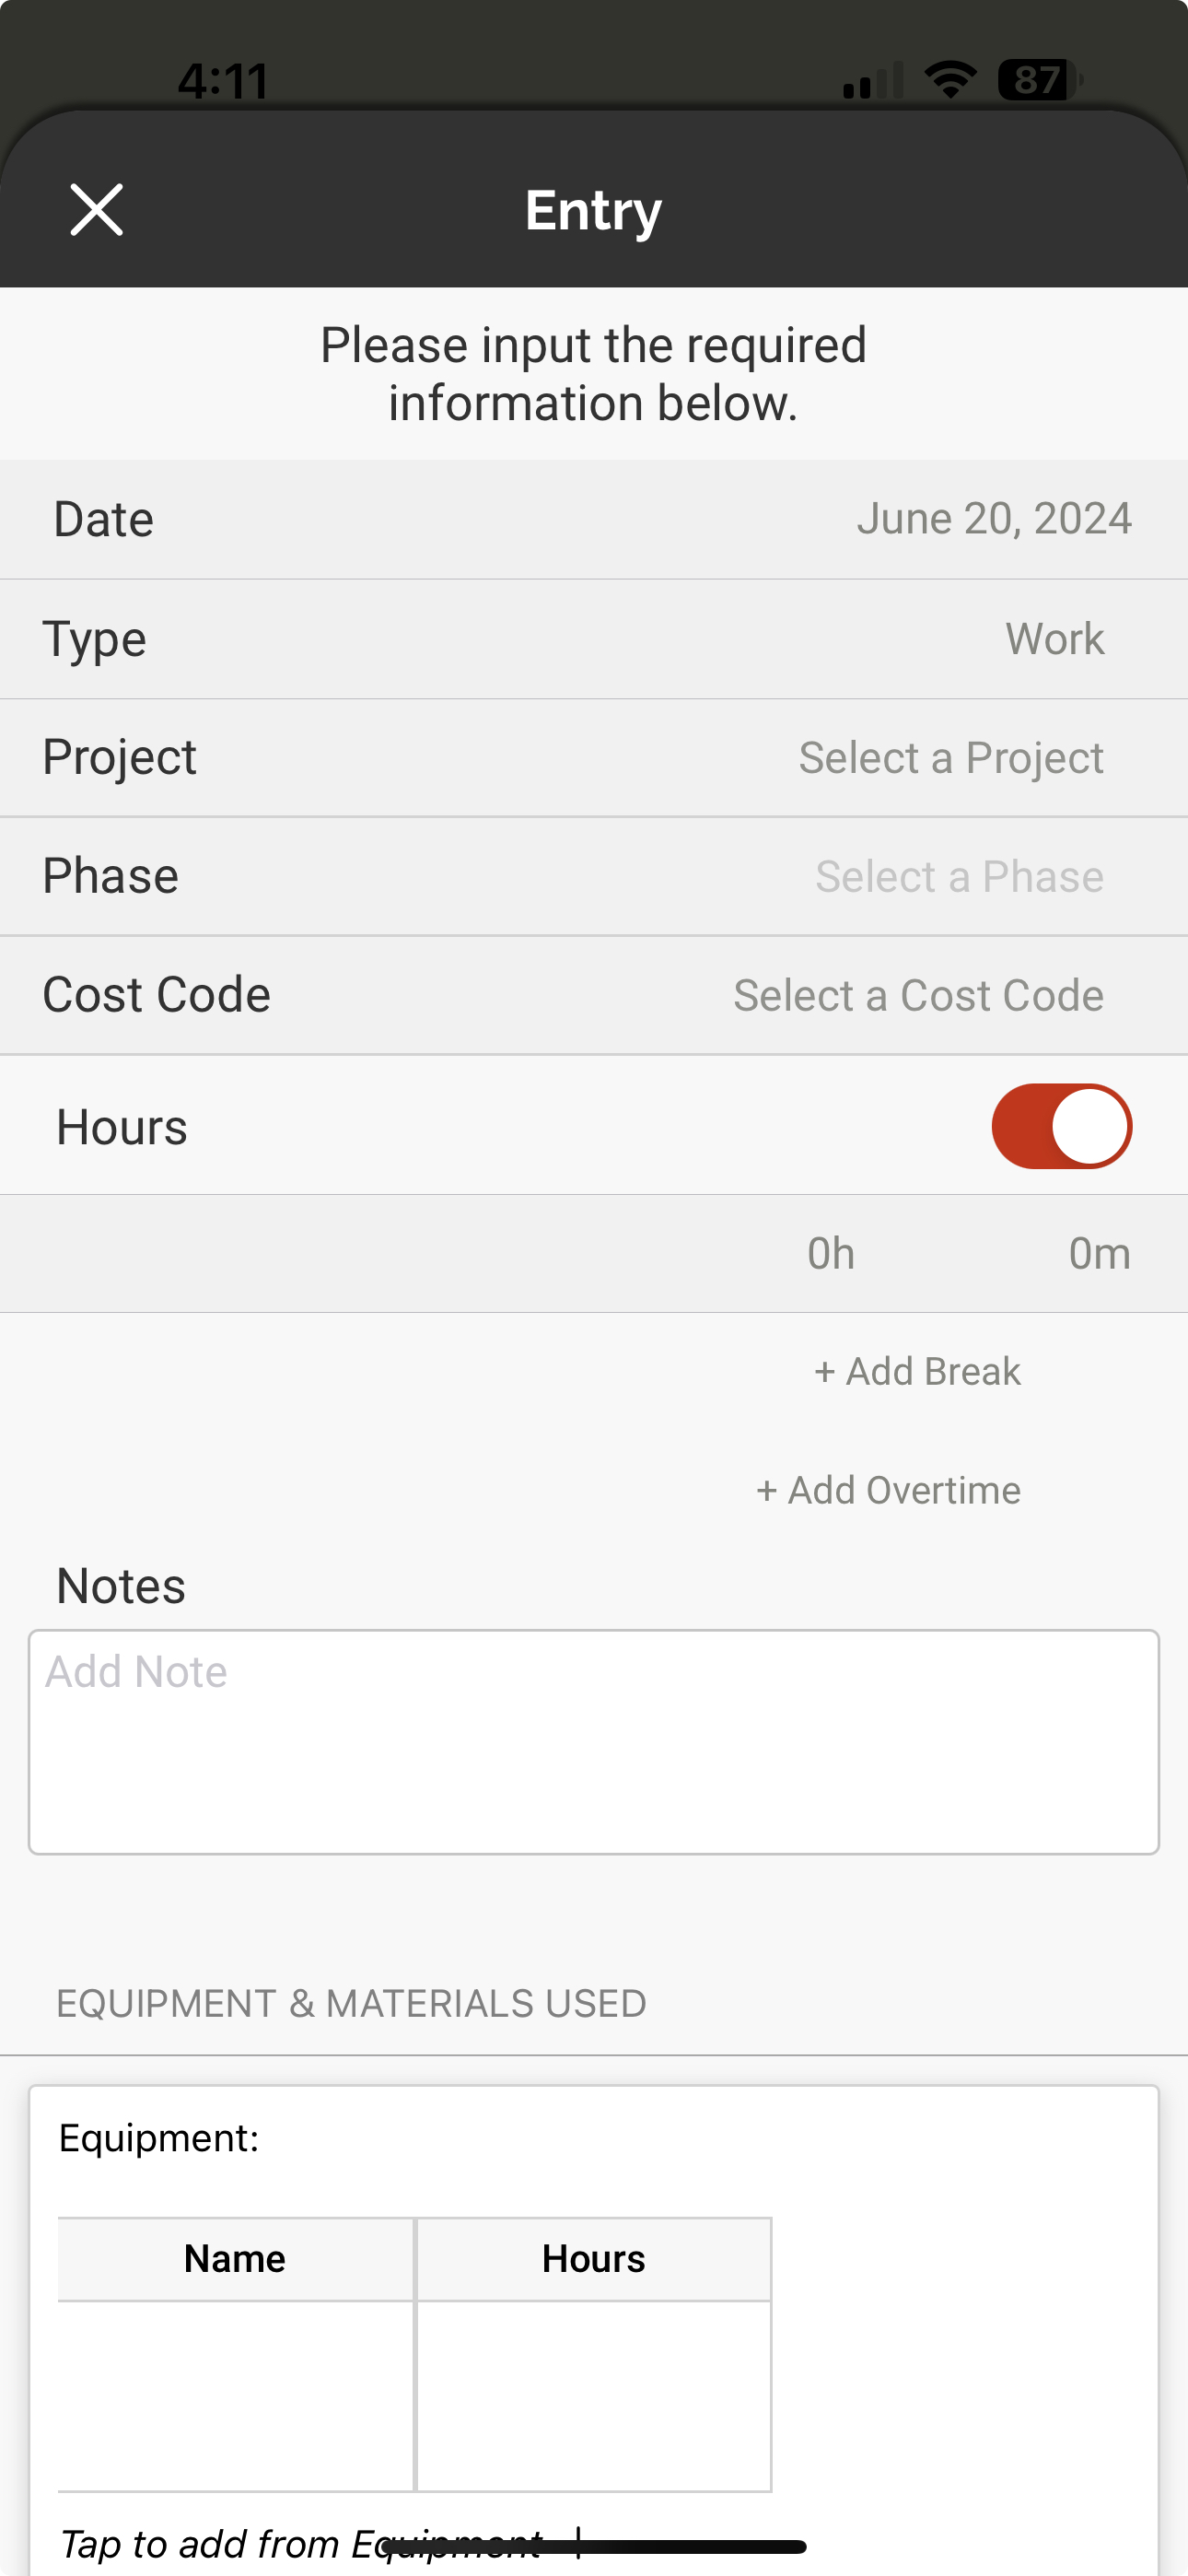
Once you’re finished, tap ‘Done’ to add your entry.
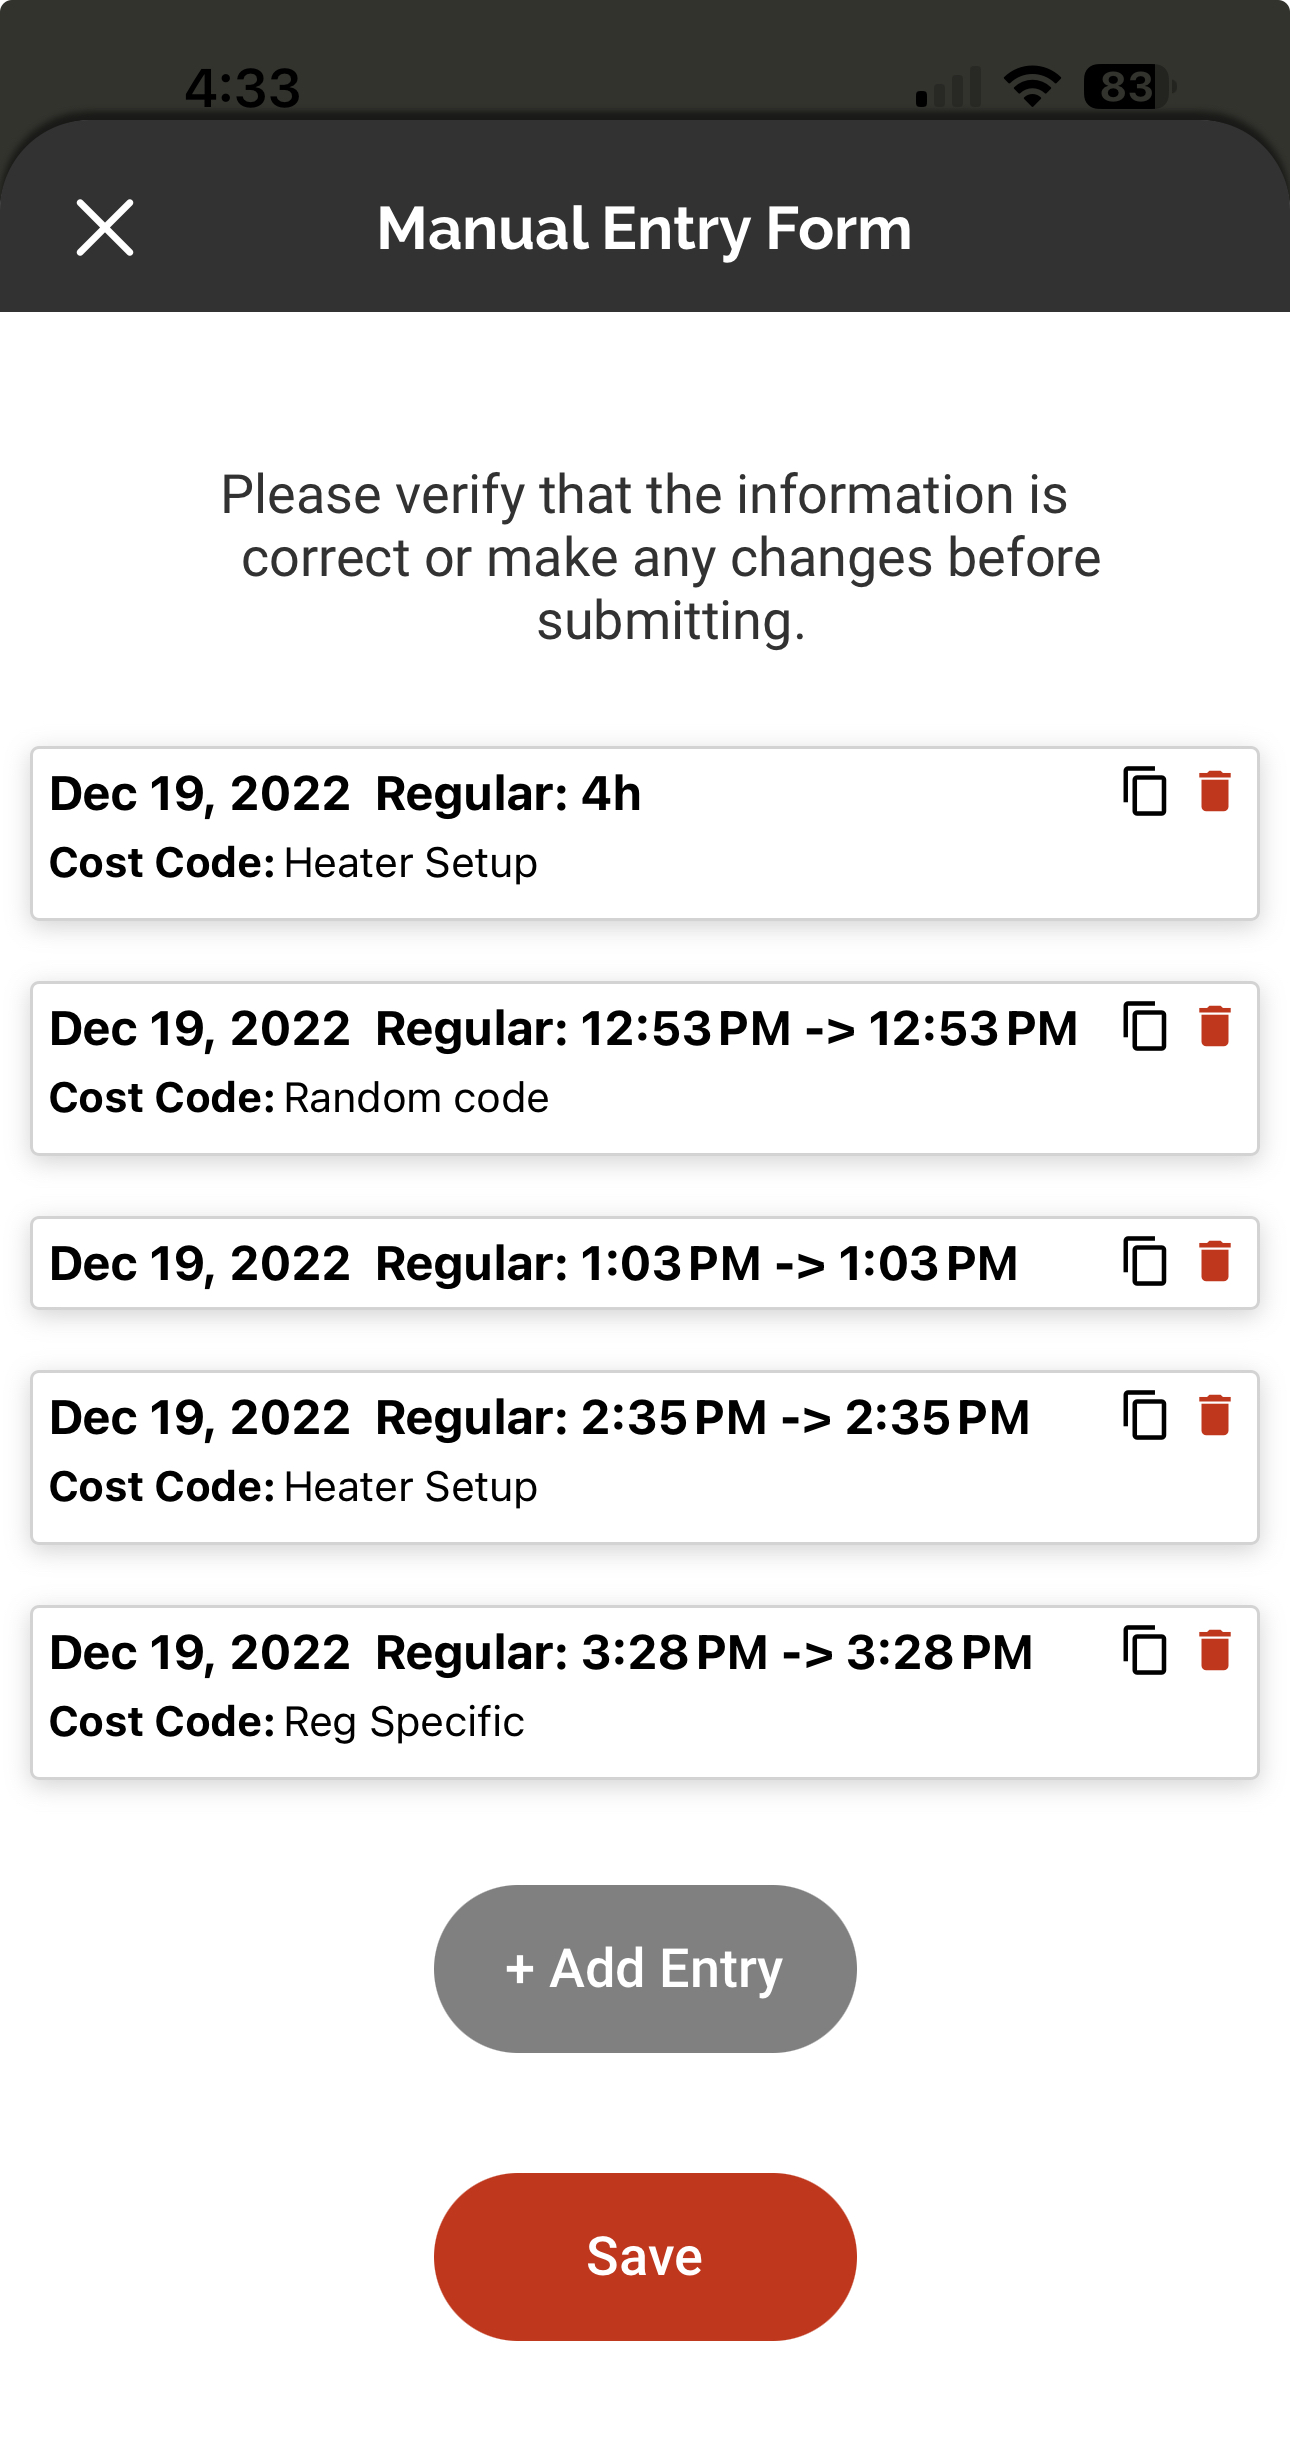
This will take you to your manual entry summary for the time card. From here, you can always add more entries by tapping ‘Add Entry’ or you can edit or delete the details of any other entries.
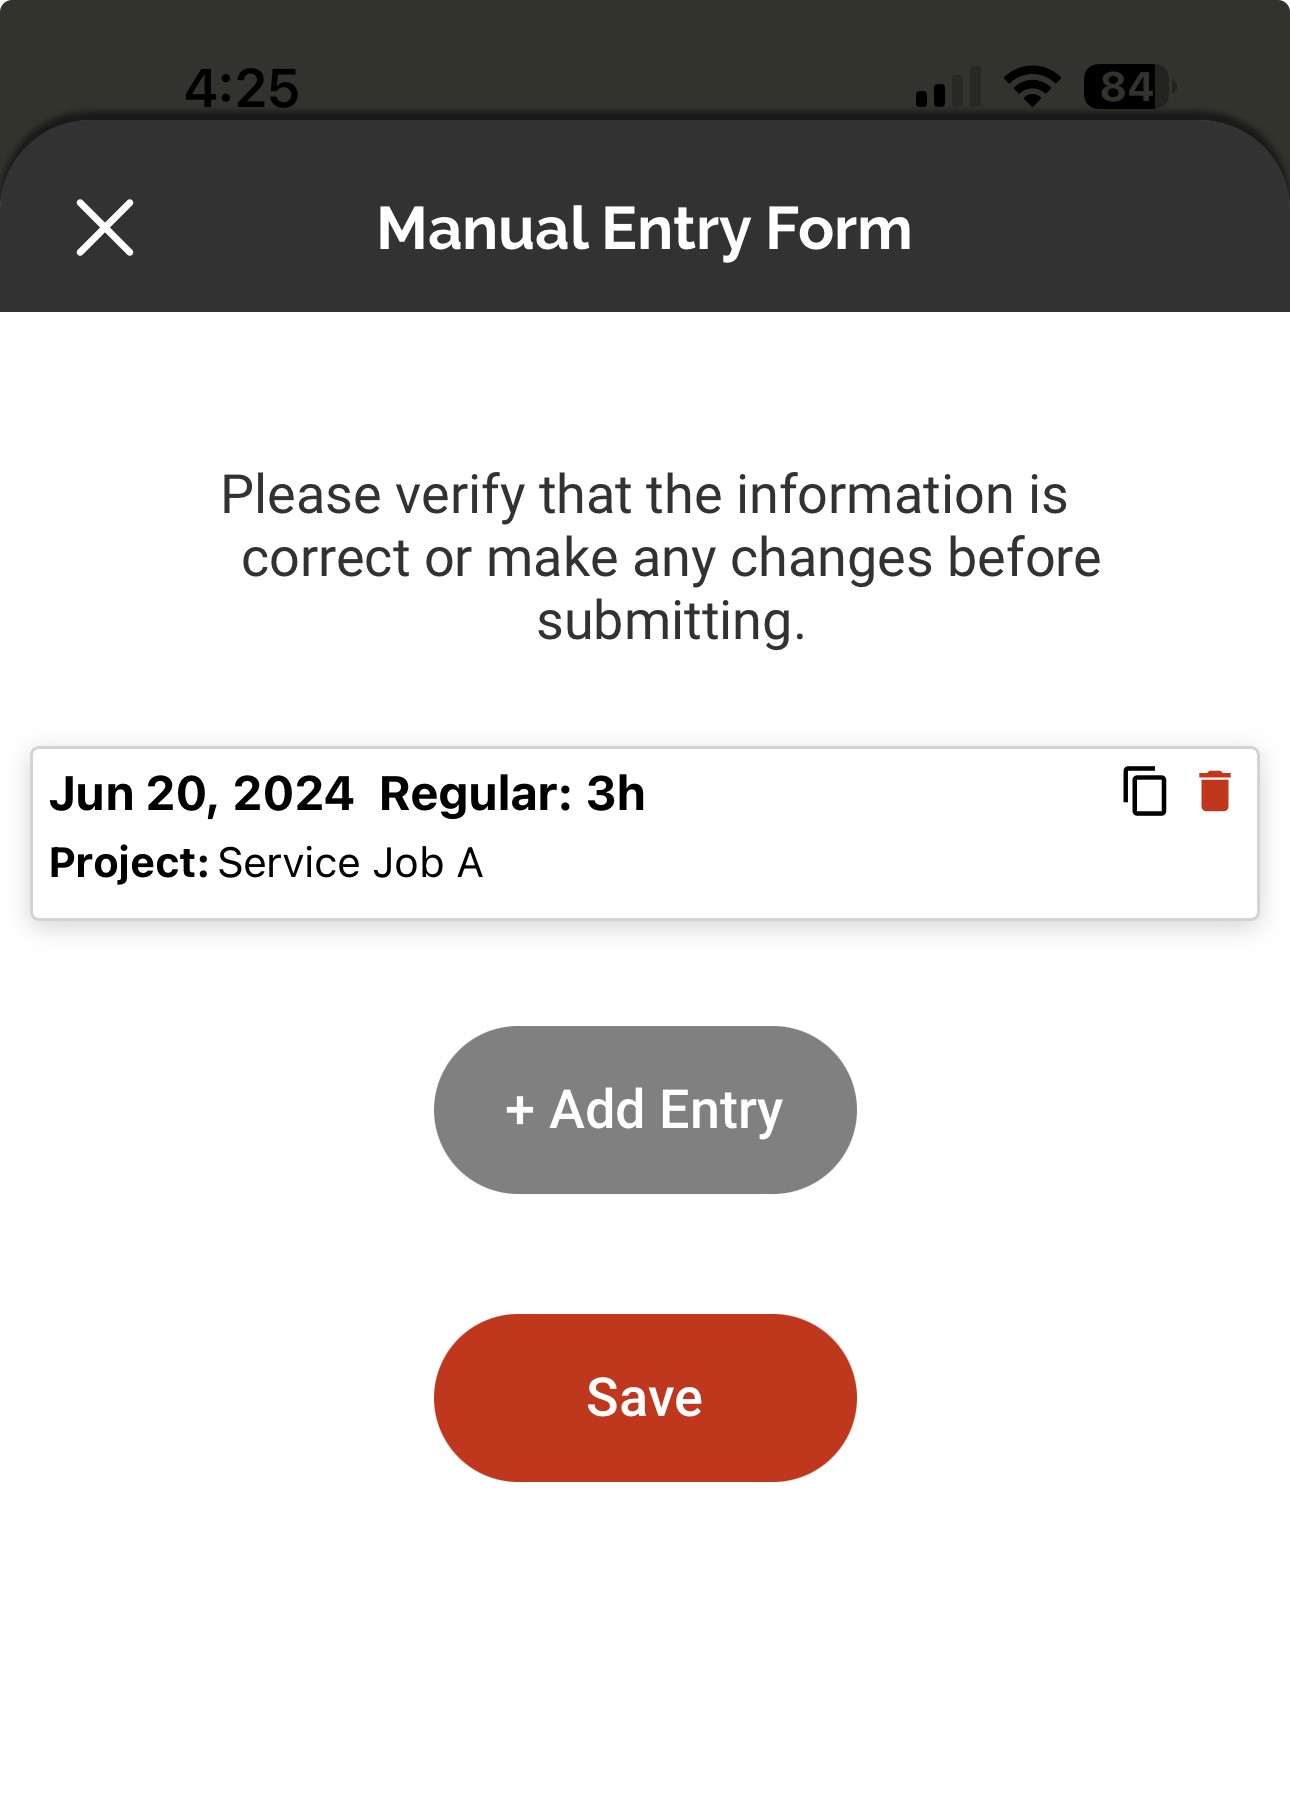
Tap ‘Save’ when you’re ready to save the manual entry/entries.
Reviewing & editing time cards
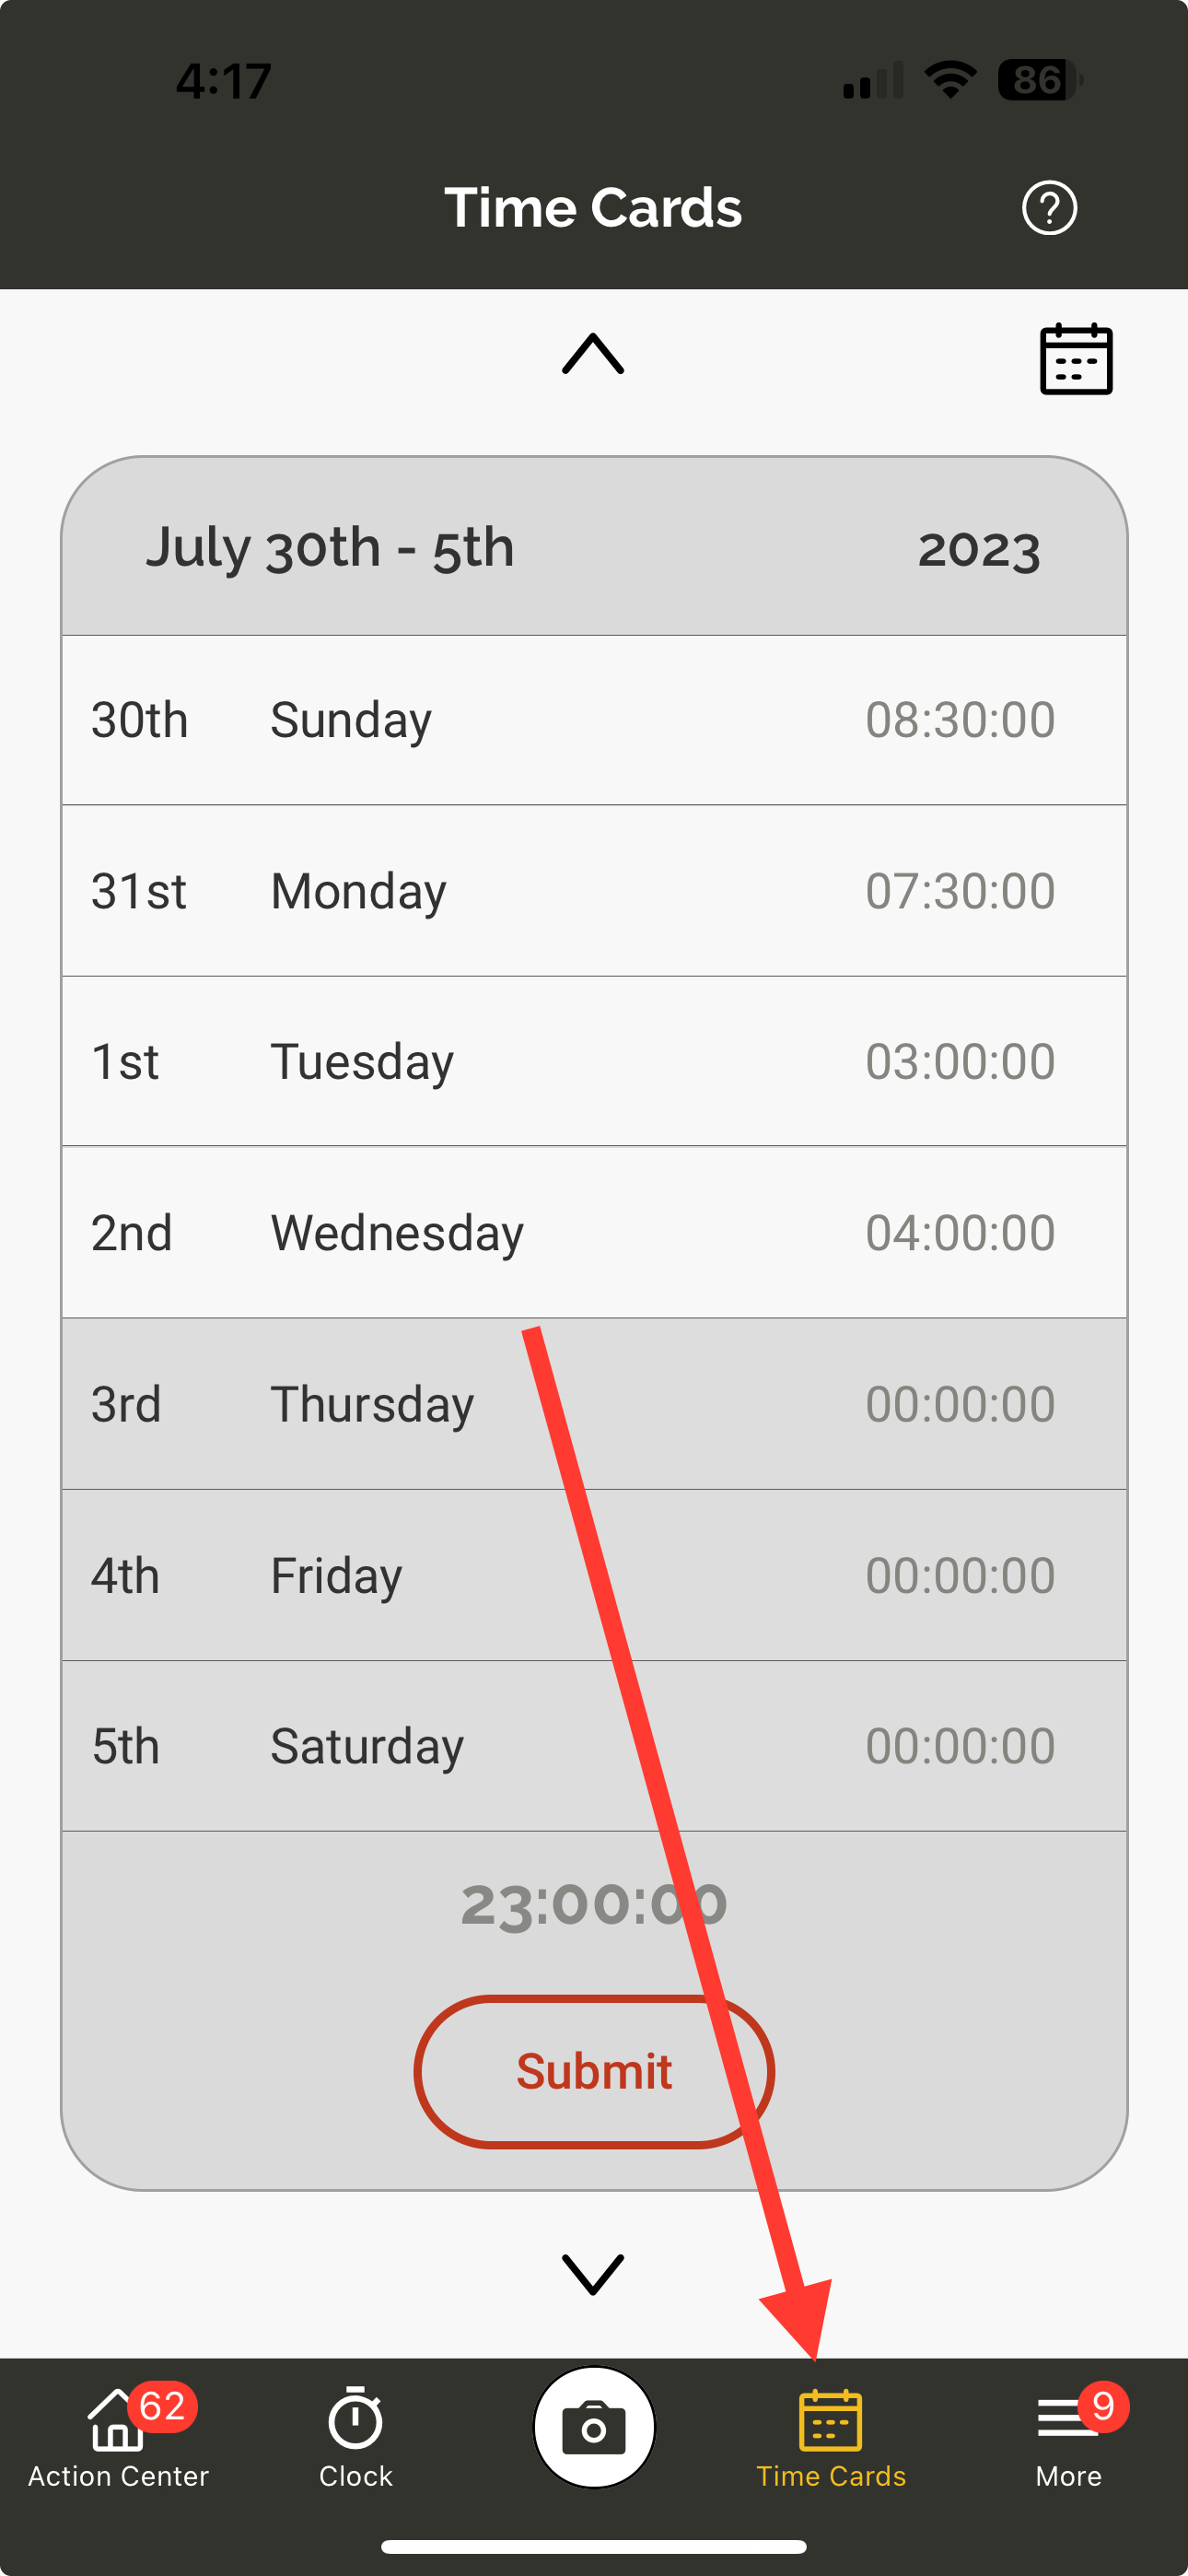
To manage all your time cards, go to the Time Cards page. Here you will see your weekly timesheets which show your daily time cards throughout the week. To flip between weeks, you can just swipe up or down on the timesheet. To find a specific day, tap the Calendar icon to view the calendar.
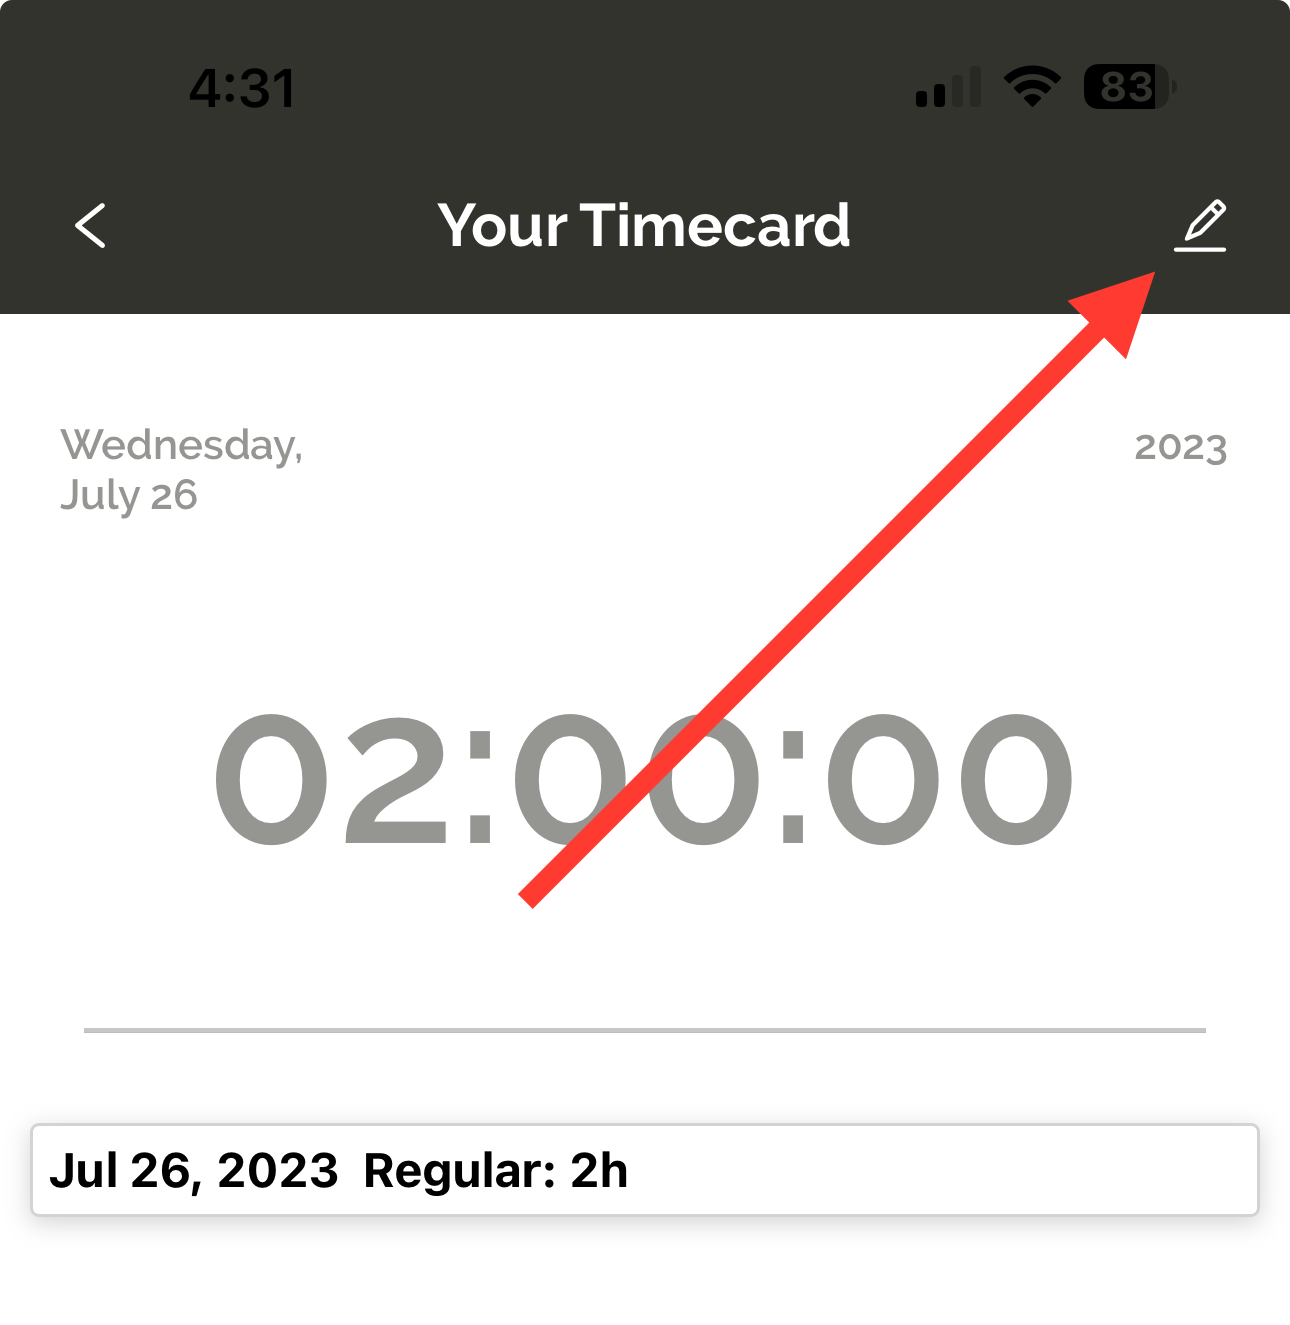
Tap a day to view the details of the time card. If you need to make an edit to any of the entries in the time card, tap the 'Edit' icon in the top right.
Note: You can only edit your time card if the time card is in the current pay period and if your company admin has given the user permission to do so.
This will take you to the daily summary for the time card. Tap on the specific time entry you'd like to edit, click 'Add Entry' to add a new entry to the day, or the delete icon next to any of the entries to remove it.
Submitting time cards
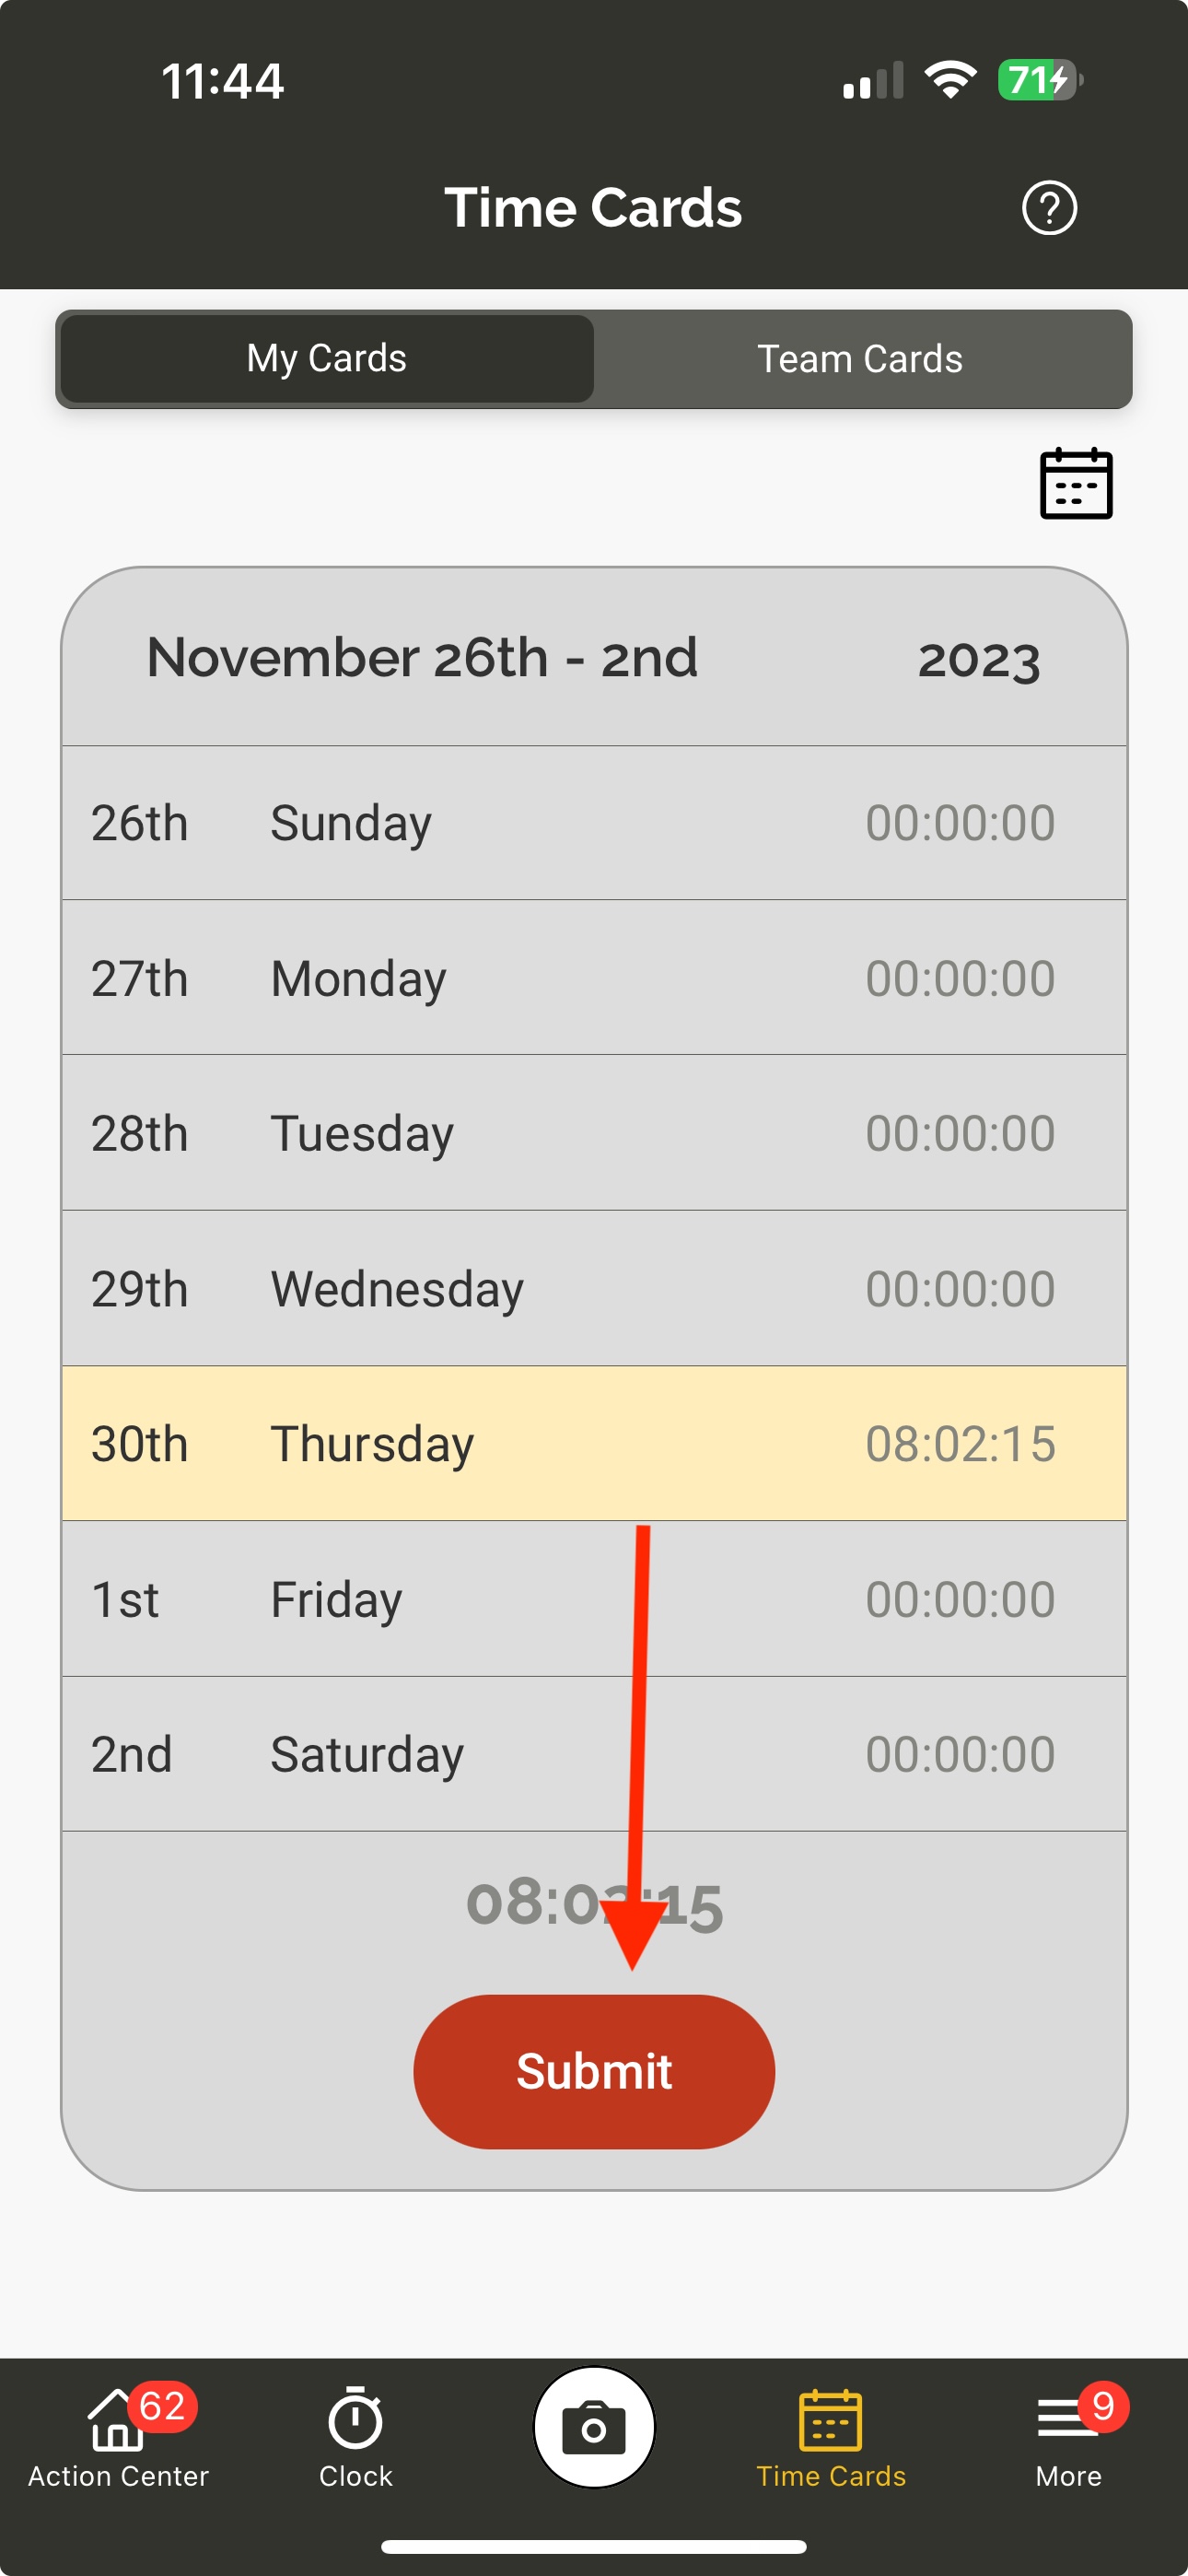
When viewing the Time Cards page, the entries which are ready to be submitted will be highlighted in yellow and the 'Submit' button will be activated at the bottom of the time card.
Note: Tapping 'Submit' will submit all your outstanding time cards together so make sure all your time card edits are fully completed for the week before tapping Submit.
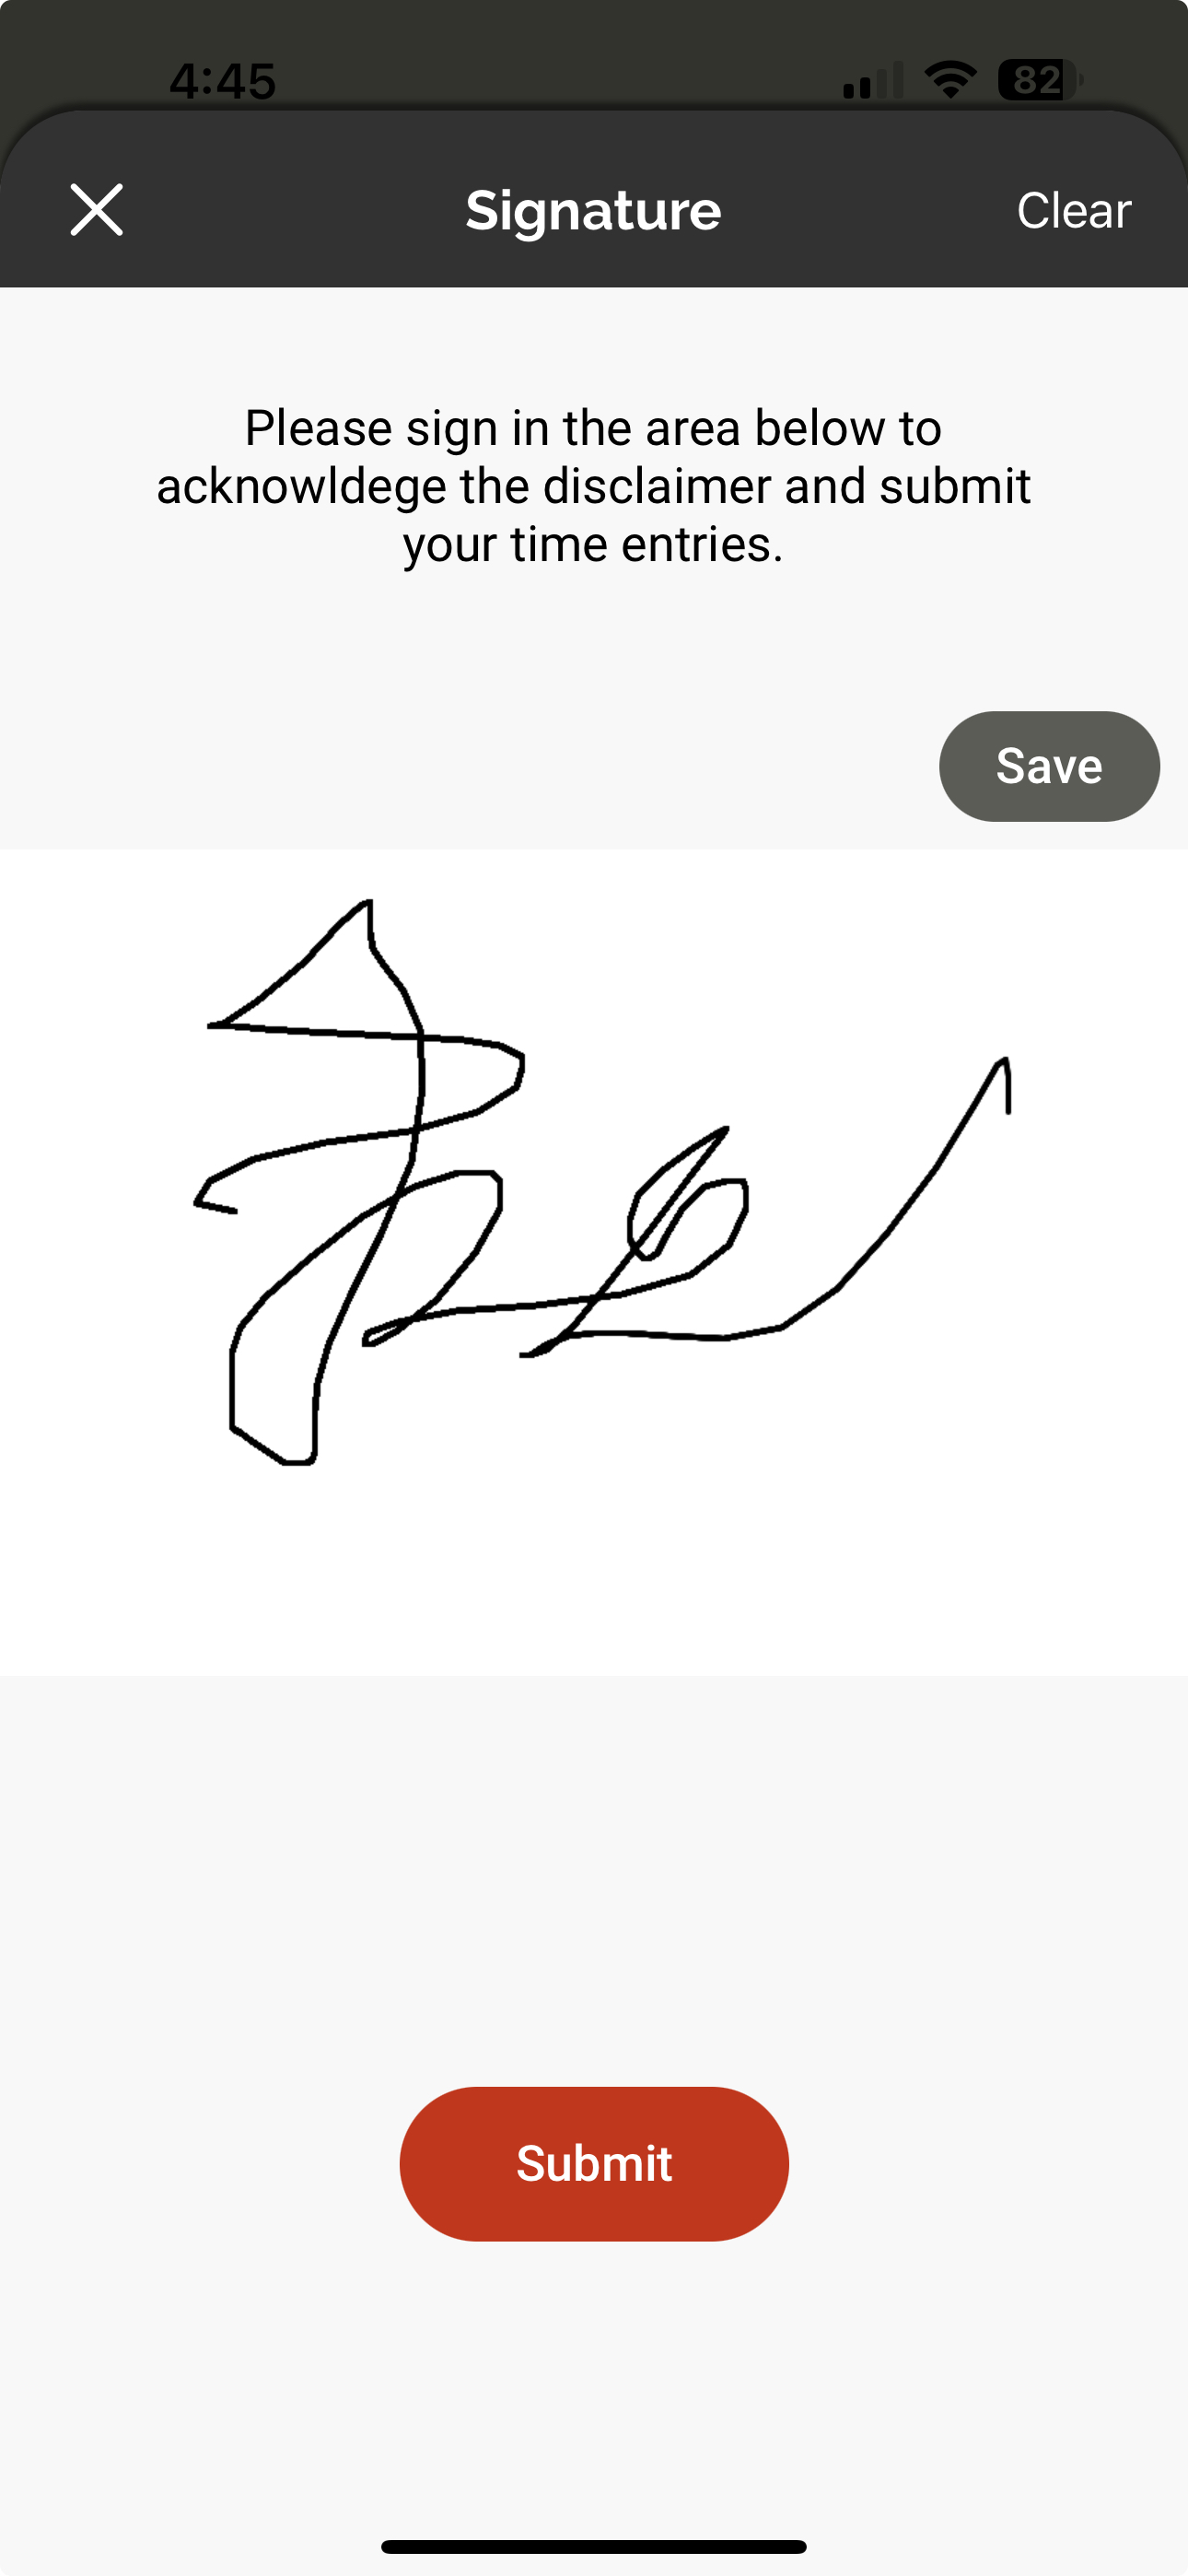
Depending on your company's settings, you may be asked to add a signature upon time card submission. To add your signature, simply use your finger to start writing your signature in the empty white box and tap 'Submit' to submit the time cards with your signature attached. You can tap the 'Save' button if you'd like the app to save a copy of your signature moving forward.