
Tracking costs and progress updates
Optional Configurations
Although the following configurations are completely optional and not required in order to track costs and progress updates for a project in Ontraccr, we highly recommend implementing these features in order to maximize the value of the real-time cost and progress tracking functionality:
- We recommend setting up cost codes and/or budget tracking for the project before tracking costs.
- In your company's time tracking settings, we recommend at least requiring project selection so that labour hours can be properly tracked against the project. Additionally, if you've implemented cost codes, we also recommend requiring cost code selection to ensure that labour hours are further categorized across the set of cost codes and cost categories.
Using the 'Progress' page
After a project is created in Ontraccr, the project profile will have a 'Progress' tab, which is where you can track both your team’s progress towards project completion as well as your actual costs against your estimates throughout the project lifecycle.

Here you can find an overview of project's cost consumption and a breakdown of all the cost codes for the project across the three main cost categories.
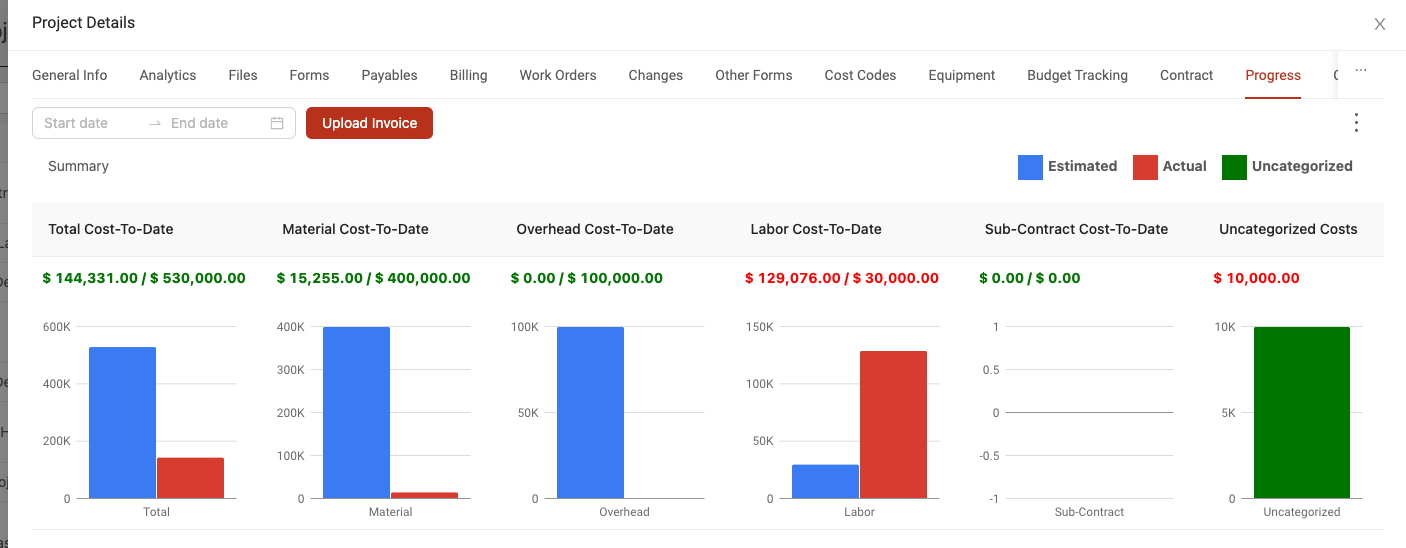
Summary
The top of the progress page will show you a high-level visual breakdown/summary of costs (and estimates) across the following cost categories:
- Total Cost-To-Date
- Shows a total of all tracked costs for the project across every cost category.
- Material Cost-To-Date
- Shows a total of all tracked material costs compared to original estimates for the project.
- Overhead Cost-To-Date
- Shows a total of all tracked overhead costs compared to original estimates for the project.
- Labour Cost-To-Date
- Shows a total of all tracked labour costs compared to original estimates for the project.
- Sub-Contract Cost-To-Date
- Shows a total of all tracked sub-contract costs for the project.
- Uncategorized Costs
- Shows a total of any other costs for the project, which are not associated to any of the other cost categories.
Material costs, consumption, and progress
The 'Material Cost Codes' section will show you the full list of material cost codes you've added to the project. Here's an example of what the material cost code will look like:

Material cost codes will show a number of fields as follows:
- Name
- Shows the name of the cost code.
- Code
- Shows the cost code number.
- Estimated Cost
- Shows the estimated cost of the cost code from the project's budget tracking page.
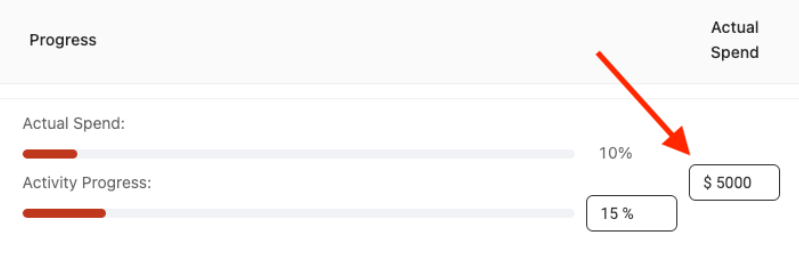
- Progress
- Actual Spend
- This bar represents the percentage of actual spend against the estimated cost for the cost code.
- Activity Progress
- This bar represents the progress of the actual activity for the material cost code. In other words, for the activity related to the material cost code, how much of the work is done?
- Actual Spend
- Actual Spend
- Shows the actual cost spend of the material cost code.
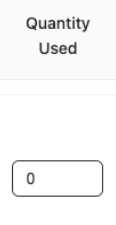
- Quantity Used
- Shows the current quantity of material used for the cost code.
- Committed Cost
- If the cost code is associated to a purchase order form, this field will show the committed cost of the cost code for the purchase order.
The Actual Spend of the cost code can be updated in many ways. First, whenever an invoice is uploaded directly to a cost code, it will update the actual spend figure. Lastly, you can also directly update the actual spend of the cost code by editing the number in the field directly. After updating this, an actual spend update record will be added to the cost code's history log. The Actual Spend will also display as a percentage against the cost code's estimated cost.
The Activity Progress of the cost code represents the progress of the actual activity for the material cost code. To update this, simply edit the number in the field directly. After updating this, an activity progress update record will be added to the cost code's history log. Ideally, you want to ensure that the Activity Progress trends closely with the Actual Spend to avoid any cost overruns.

The Quantity Used field shows the current quantity of material used for the cost code. To update this, you can simply edit the number shown in the field. After updating this, a quantity update record will be added to the cost code's history log.
Overhead costs and progress
The 'Overhead Cost Codes' section will show you the full list of overhead cost codes you've added to the project. Here's an example of what the material cost code will look like:
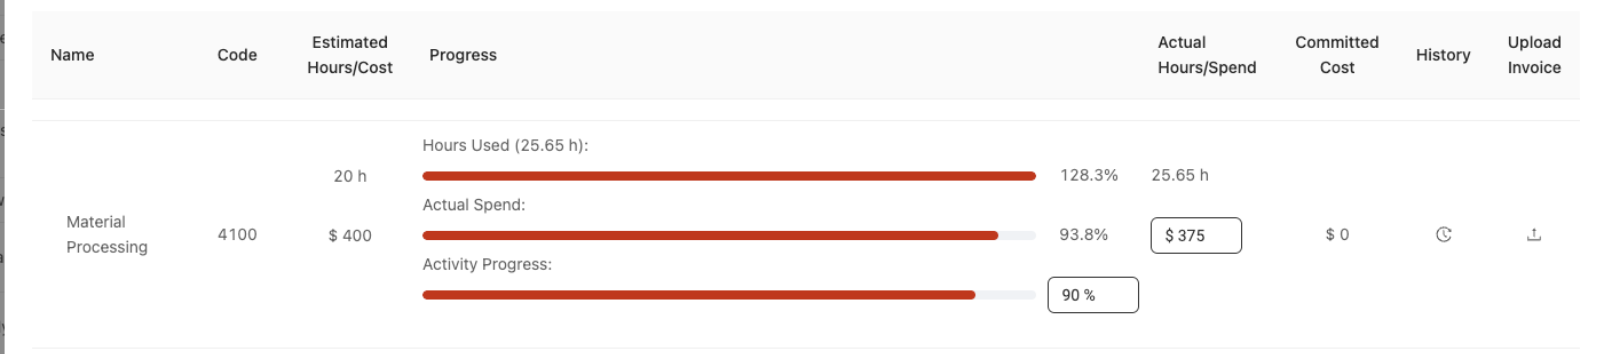
Overhead cost codes will show a number of fields as follows:
- Name
- Shows the name of the cost code.
- Code
- Shows the cost code number.
- Estimated Hours/Cost
- Shows the estimated hours and cost of the cost code from the project's budget tracking page.
- Progress
- Hours Used
- Shows the number of hours tracked against the cost code so far.
- Actual Spend
- This bar represents the percentage of actual spend against the estimated cost for the cost code.
- Activity Progress
- This bar represents the progress of the actual activity for the overhead cost code. In other words, for the activity related to the overhead cost code, how much of the work is done?
- Hours Used
- Actual Hours/Spend
- Shows the actual hours and cost spend of the overhead cost code.
- Committed Cost
- If the cost code is associated to a purchase order form, this field will show the committed cost of the cost code for the purchase order.
The Hours Used will display any of the hours tracked against the cost code using Ontraccr. This is fully automated and is based on the time tracking data Ontraccr has collected from users. So whenever a user adds a time entry for the project and the specific cost code, the hours are then associated to the cost code in the project's progress page. The Hours Used will also display as a percentage against the cost code's estimated hours.

The Actual Spend of the overhead cost code can be updated in many ways. First, for any hours tracked against the cost code, Ontraccr will automatically multiply the hours worked by the wage of each individual user to determine the dollar value of the labour hours for the cost code. Additionally, whenever an invoice is uploaded directly to a cost code, it will update the actual spend figure. Lastly, you can directly update the actual spend of the cost code by editing the number in the field directly. After updating this, an actual spend update record will be added to the cost code's history log.

The Activity Progress of the cost code represents the progress of the actual activity for the overhead cost code. To update this, simply edit the number in the field directly. After updating this, an activity progress update record will be added to the cost code's history log. Ideally, you want to ensure that the Activity Progress trends closely with the Actual Spend to avoid any cost overruns.

Labour costs and progress
The 'Unphased Labour Cost Codes' section will show you the full list of unphased labour cost codes you've added to the project, whereas any phased labour cost codes will be shown under the 'Phases' section underneath. Here's an example of what the labour cost code will look like:
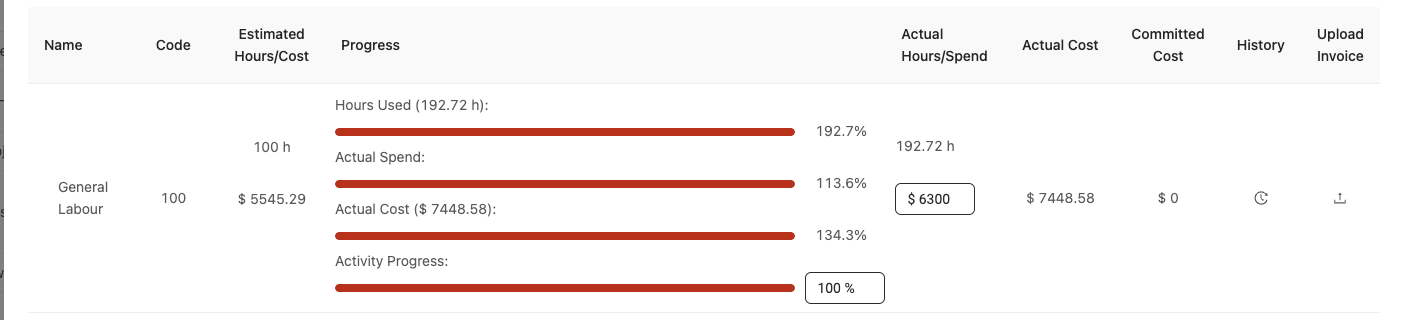
Overhead cost codes will show a number of fields as follows:
- Name
- Shows the name of the cost code.
- Code
- Shows the cost code number.
- Estimated Hours/Cost
- Shows the estimated hours and cost of the cost code from the project's budget tracking page.
- Progress
- Hours Used
- Shows the number of hours tracked against the cost code so far.
- Actual Spend
- This bar represents the percentage of actual spend against the estimated cost for the cost code. This covers any additional spending related to the cost code outside of the automatically-calculated 'Actual Cost' field below (other than spend related to automated time tracking data or direct invoice uploads)
- Actual Cost
- This bar shows the total costs for the cost code, which is the sum of all automated time tracking, invoice upload, and manually entered actual spend data.
- Activity Progress
- This bar represents the progress of the actual activity for the labour cost code. In other words, for the activity related to the labour cost code, how much of the work is done?
- Hours Used
- Actual Cost
- This shows the total costs for the cost code, which is the sum of all automated time tracking, invoice upload, and manually entered actual spend data.
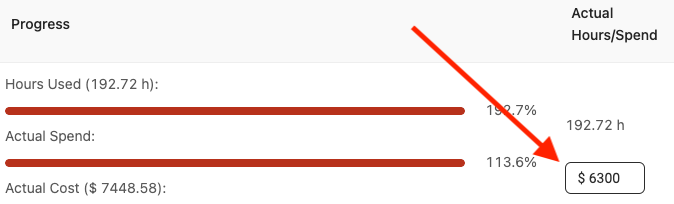
- Actual Hours/Spend
- Shows the actual hours and cost spend of the labour cost code.
- Committed Cost
- If the cost code is associated to a purchase order form, this field will show the committed cost of the cost code for the purchase order.
The Hours Used will display any of the hours tracked against the cost code using Ontraccr. This is fully automated and is based on the time tracking data Ontraccr has collected from users. So whenever a user adds a time entry for the project and the specific cost code, the hours are then associated to the cost code in the project's progress page. The Hours Used will also display as a percentage against the cost code's estimated hours.

The Actual Spend of the overhead cost code can be updated in many ways. First, for any hours tracked against the cost code, Ontraccr will automatically multiply the hours worked by the wage of each individual user to determine the dollar value of the labour hours for the cost code. Additionally, whenever an invoice is uploaded directly to a cost code, it will update the actual spend figure. Lastly, you can directly update the actual spend of the cost code by editing the number in the field directly. After updating this, an actual spend update record will be added to the cost code's history log.
The Activity Progress of the cost code represents the progress of the actual activity for the labour cost code. To update this, simply edit the number in the field directly. After updating this, an activity progress update record will be added to the cost code's history log. Ideally, you want to ensure that the Activity Progress trends closely with the Actual Spend to avoid any cost overruns.

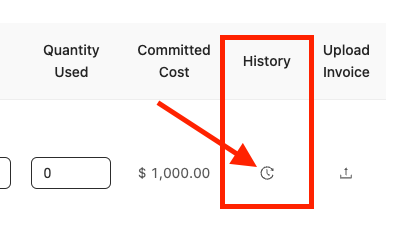
Cost code history log
Next to each cost code, the history button will show you the full history of cost and progress updates so you can always know who updated the progress and when.
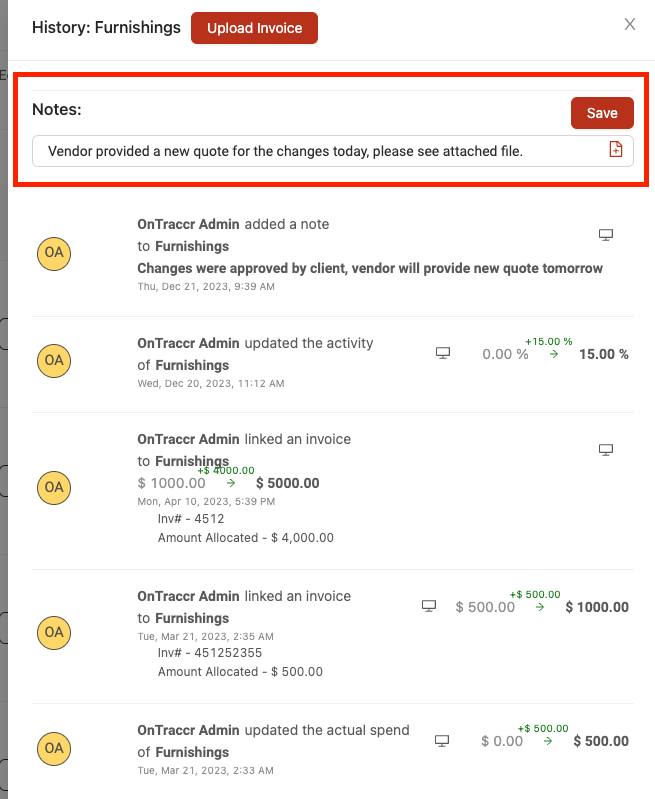
The history log is a detailed record of every significant event related to the cost code. For example, it can show you whenever amounts were changed, hours were logged, invoices were uploaded, etc. You can also add comments directly within the history log and even attach files by using the 'attach' icon.
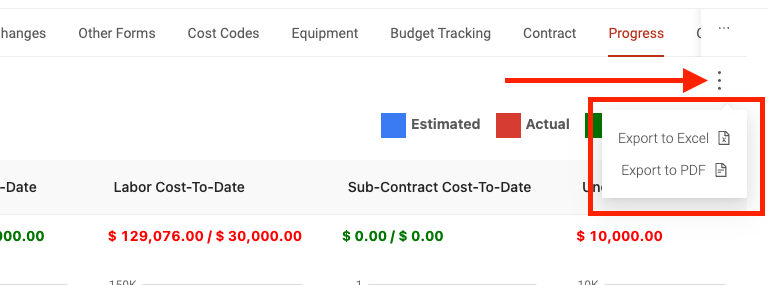
Exporting and filtering the Progress page
The data in the progress page can be exported into an excel or pdf file at any point. To export the progress page, click the 'more' icon in the top right corner of the page and select the export format you'd like.
The progress page can also be filtered by any date range. To filter the data in the progress page, select the 'Start date' and 'End date' for the time period you'd like to see by using the date filter in the top left corner of the page.
