Triggering forms from a board
Prerequisites
In order for users to be able to trigger forms from a board:
- Users must have the 'forms' permission for the board. This essentially means that you can give specific users permission to generate forms for the board instead of allowing all users to do so.
- In order to configure form mapping settings and permissions for the board, admin users must have the 'Manage Boards' role permission.
Triggering forms from a board card
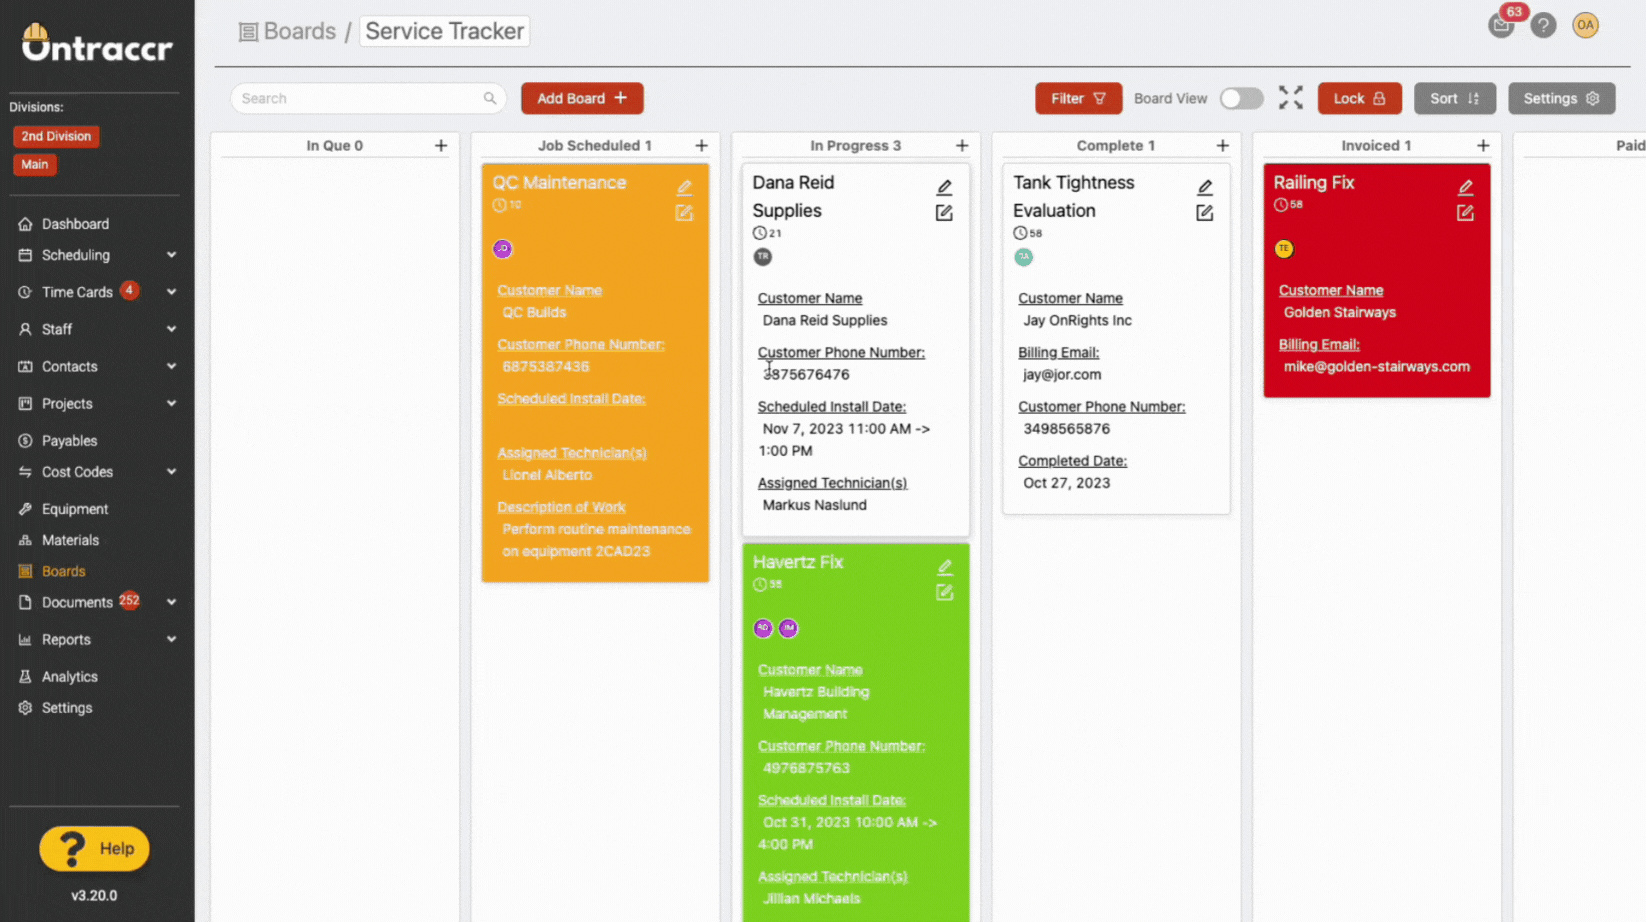
In Ontraccr, forms can be generated and sent directly from a board card. This makes it even easier to quickly send an invoice, work order, purchase orders, or any other document while viewing the information within the board.
Any users with the 'forms' permission will be able to see a form icon next to the card title in the board view or within the card slider itself.
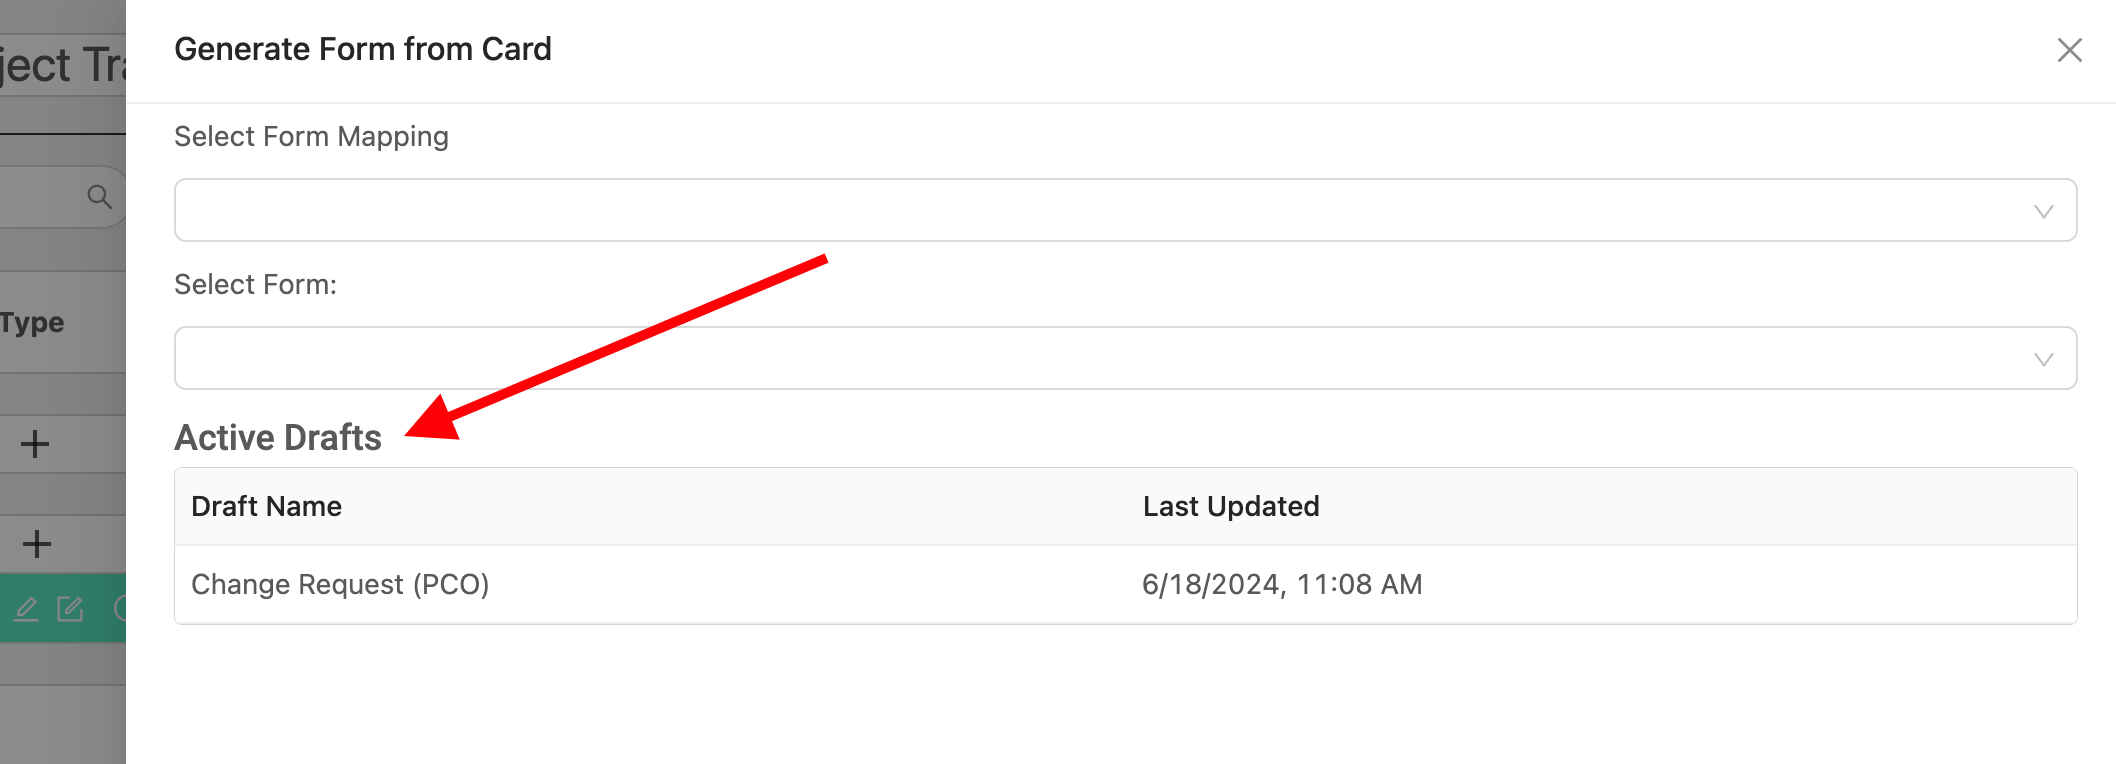
After clicking the form icon to generate a form, a slider will pop up with two drop-down options which ask you which form you'd like to generate. Here you can either select to generate a new form manually (Select Form) or pick from a saved form mapping for the board (Select Form Mapping).

Triggering a form manually
In the slider, the 'Select Form' drop-down option allows you to generate any form manually. Click into this to select the form you'd like to generate.
Once you select the form, you will be presented with the field mapping options. This lets you map information from the board card (the 'source' fields) into the fields of the form (the 'target' fields). This will automatically transfer the information from the card into the form when moving on to the next step. Click 'Continue' once you're finished mapping the fields. Ontraccr will then show you the form with the mapped field information already pre-populated in the form. From here, simply fill in the rest of the form fields as needed and click 'Submit' to submit the form.
Triggering using saved form mappings
Instead of triggering forms manually as described above, which requires you to manually map fields from the card to the form each time, you can also save a form mapping configuration directly to the board to standardize this and save time. This happens through 'Form Mappings'.
Configuring forms mappings
To configure a form mapping for the board, open the 'Forms' tab in the board's settings slider. This is where you can add as many form mapping to the board as you'd like and edit or delete them easily.
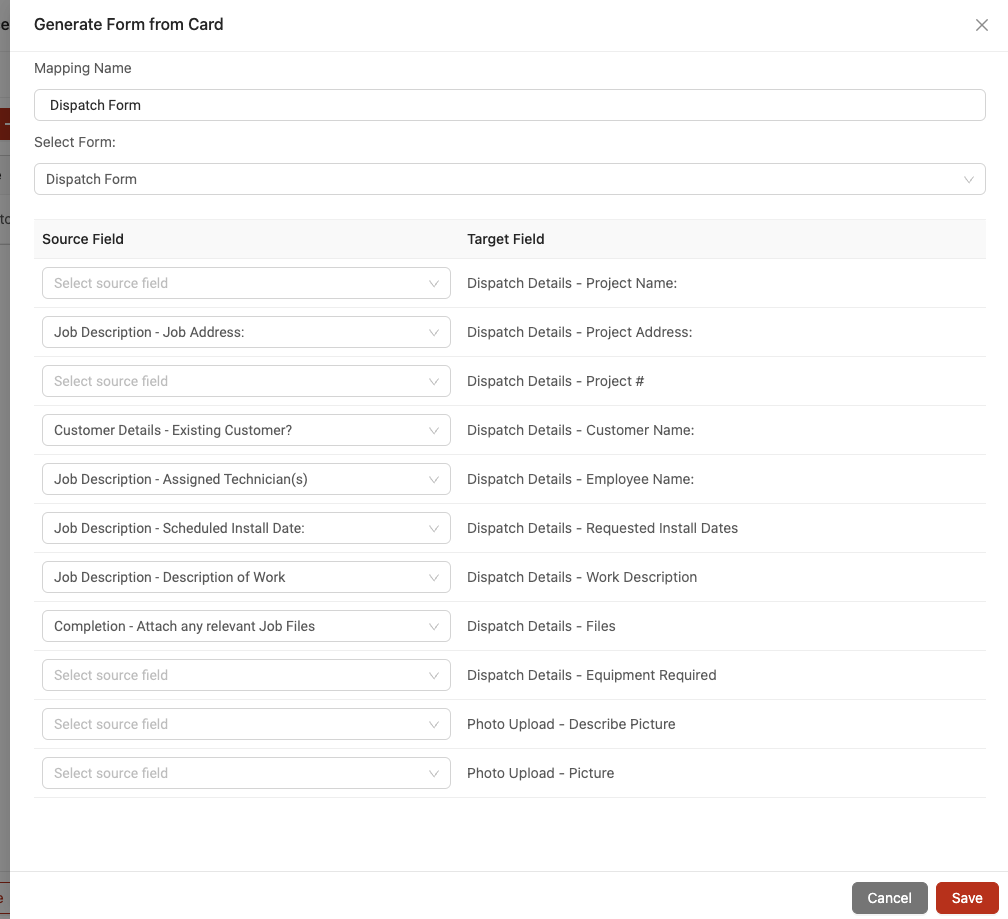
Click 'Add' to create a new form mapping for the board. Give the form mapping a name in the Mapping Name field, this is how the form mapping profile will be identified when triggering the form from a card. Select the form you'd like to map using the 'Select Form' drop-down.
From here, map information from the board card (the 'source' fields) into the fields of the form (the 'target' fields). This will automatically transfer the information from the card into the form when triggering the form. Once finished, click 'Save' in the slider and 'Submit' in the board settings slider to save the form mapping for the board.
Triggering a form using a form mapping
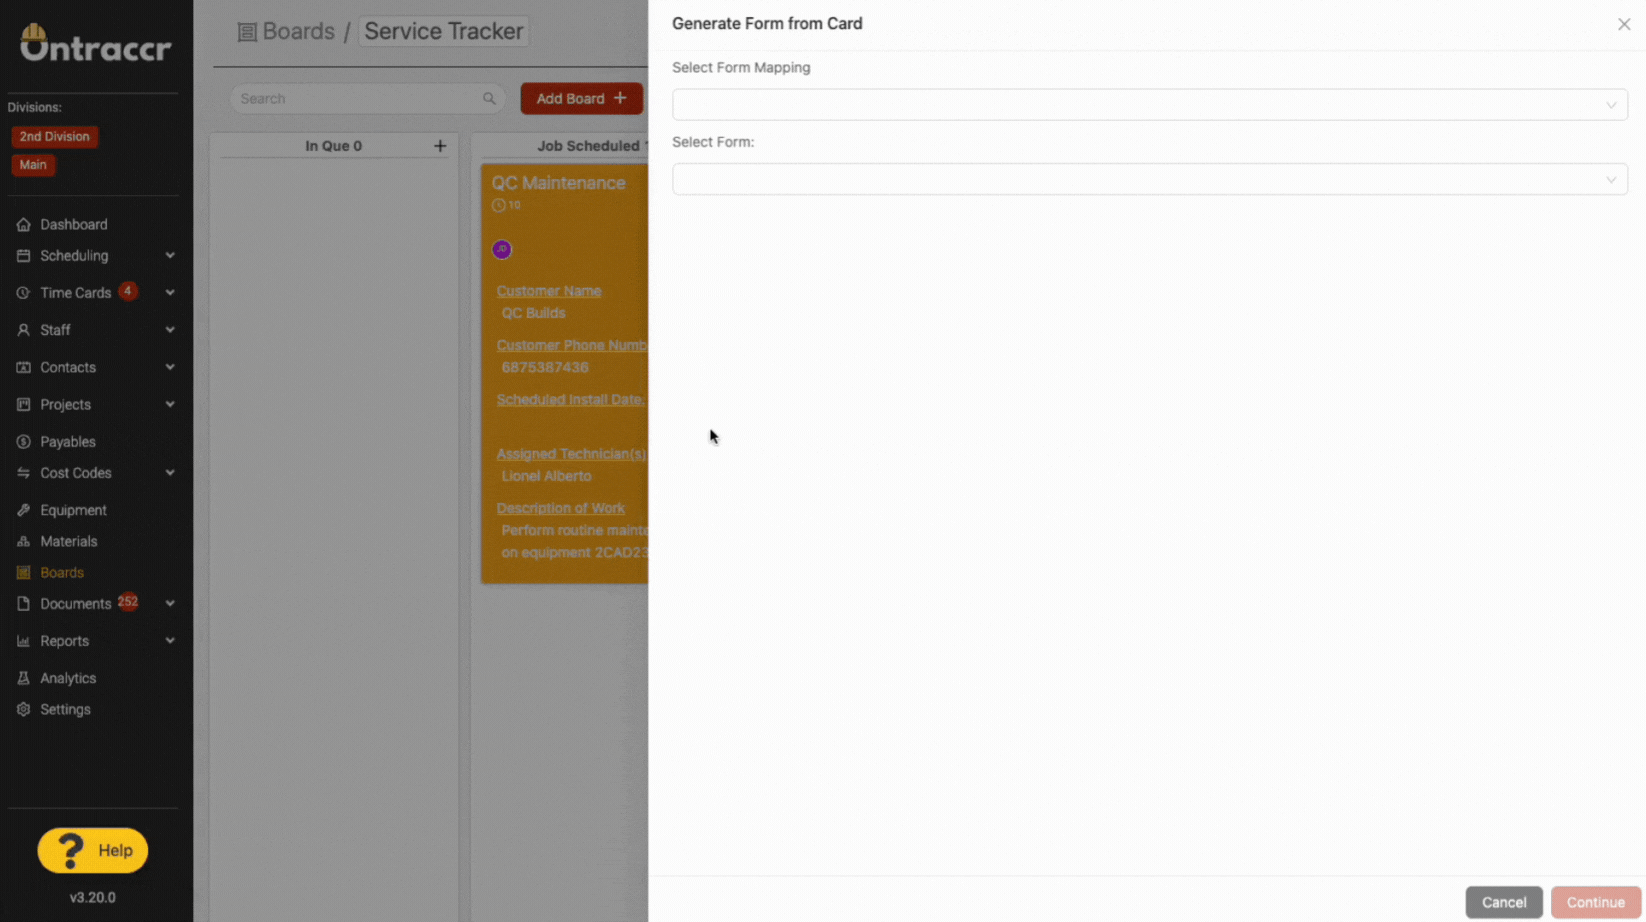
After clicking the form icon on a card, in the generate form slider, the 'Select Form Mapping' drop-down option allows you to generate any form using a pre-configured form mapping. Click into this to select from any of the saved form mappings you'd like to use.
Once you select the form mapping, the slider will show you the pre-configured field mappings from the form mapping profile. This still gives you a chance to edit any of the mappings before clicking 'Continue' to begin completing the form.
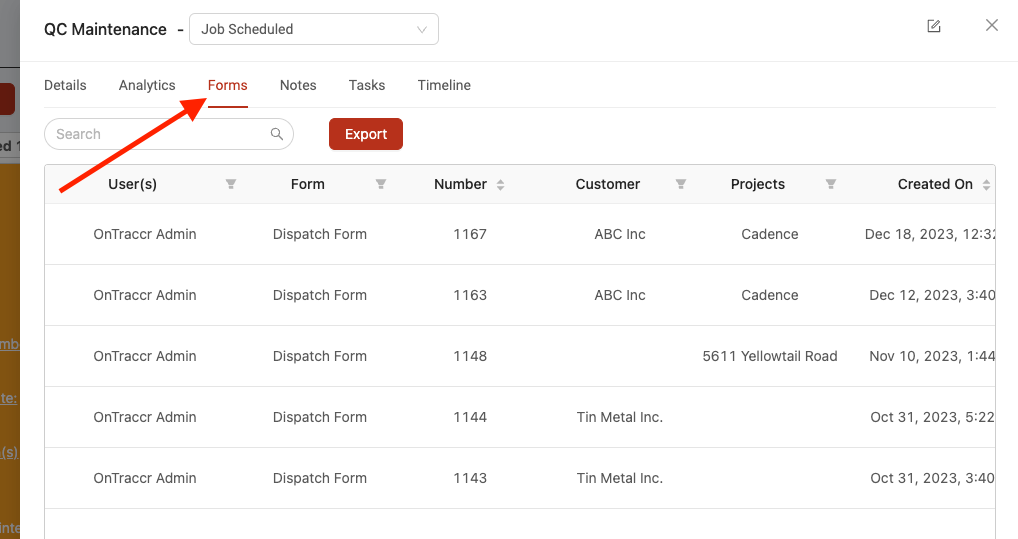
Viewing submitted form data for a card
After submitting any forms from a card, the card's profile will display an interactive form log in the 'Forms' tab. This page will show you any forms that were generated from the card directly as well as any 'downstream' forms (other forms that were triggered in the workflow as a result of the original form generated from the card).
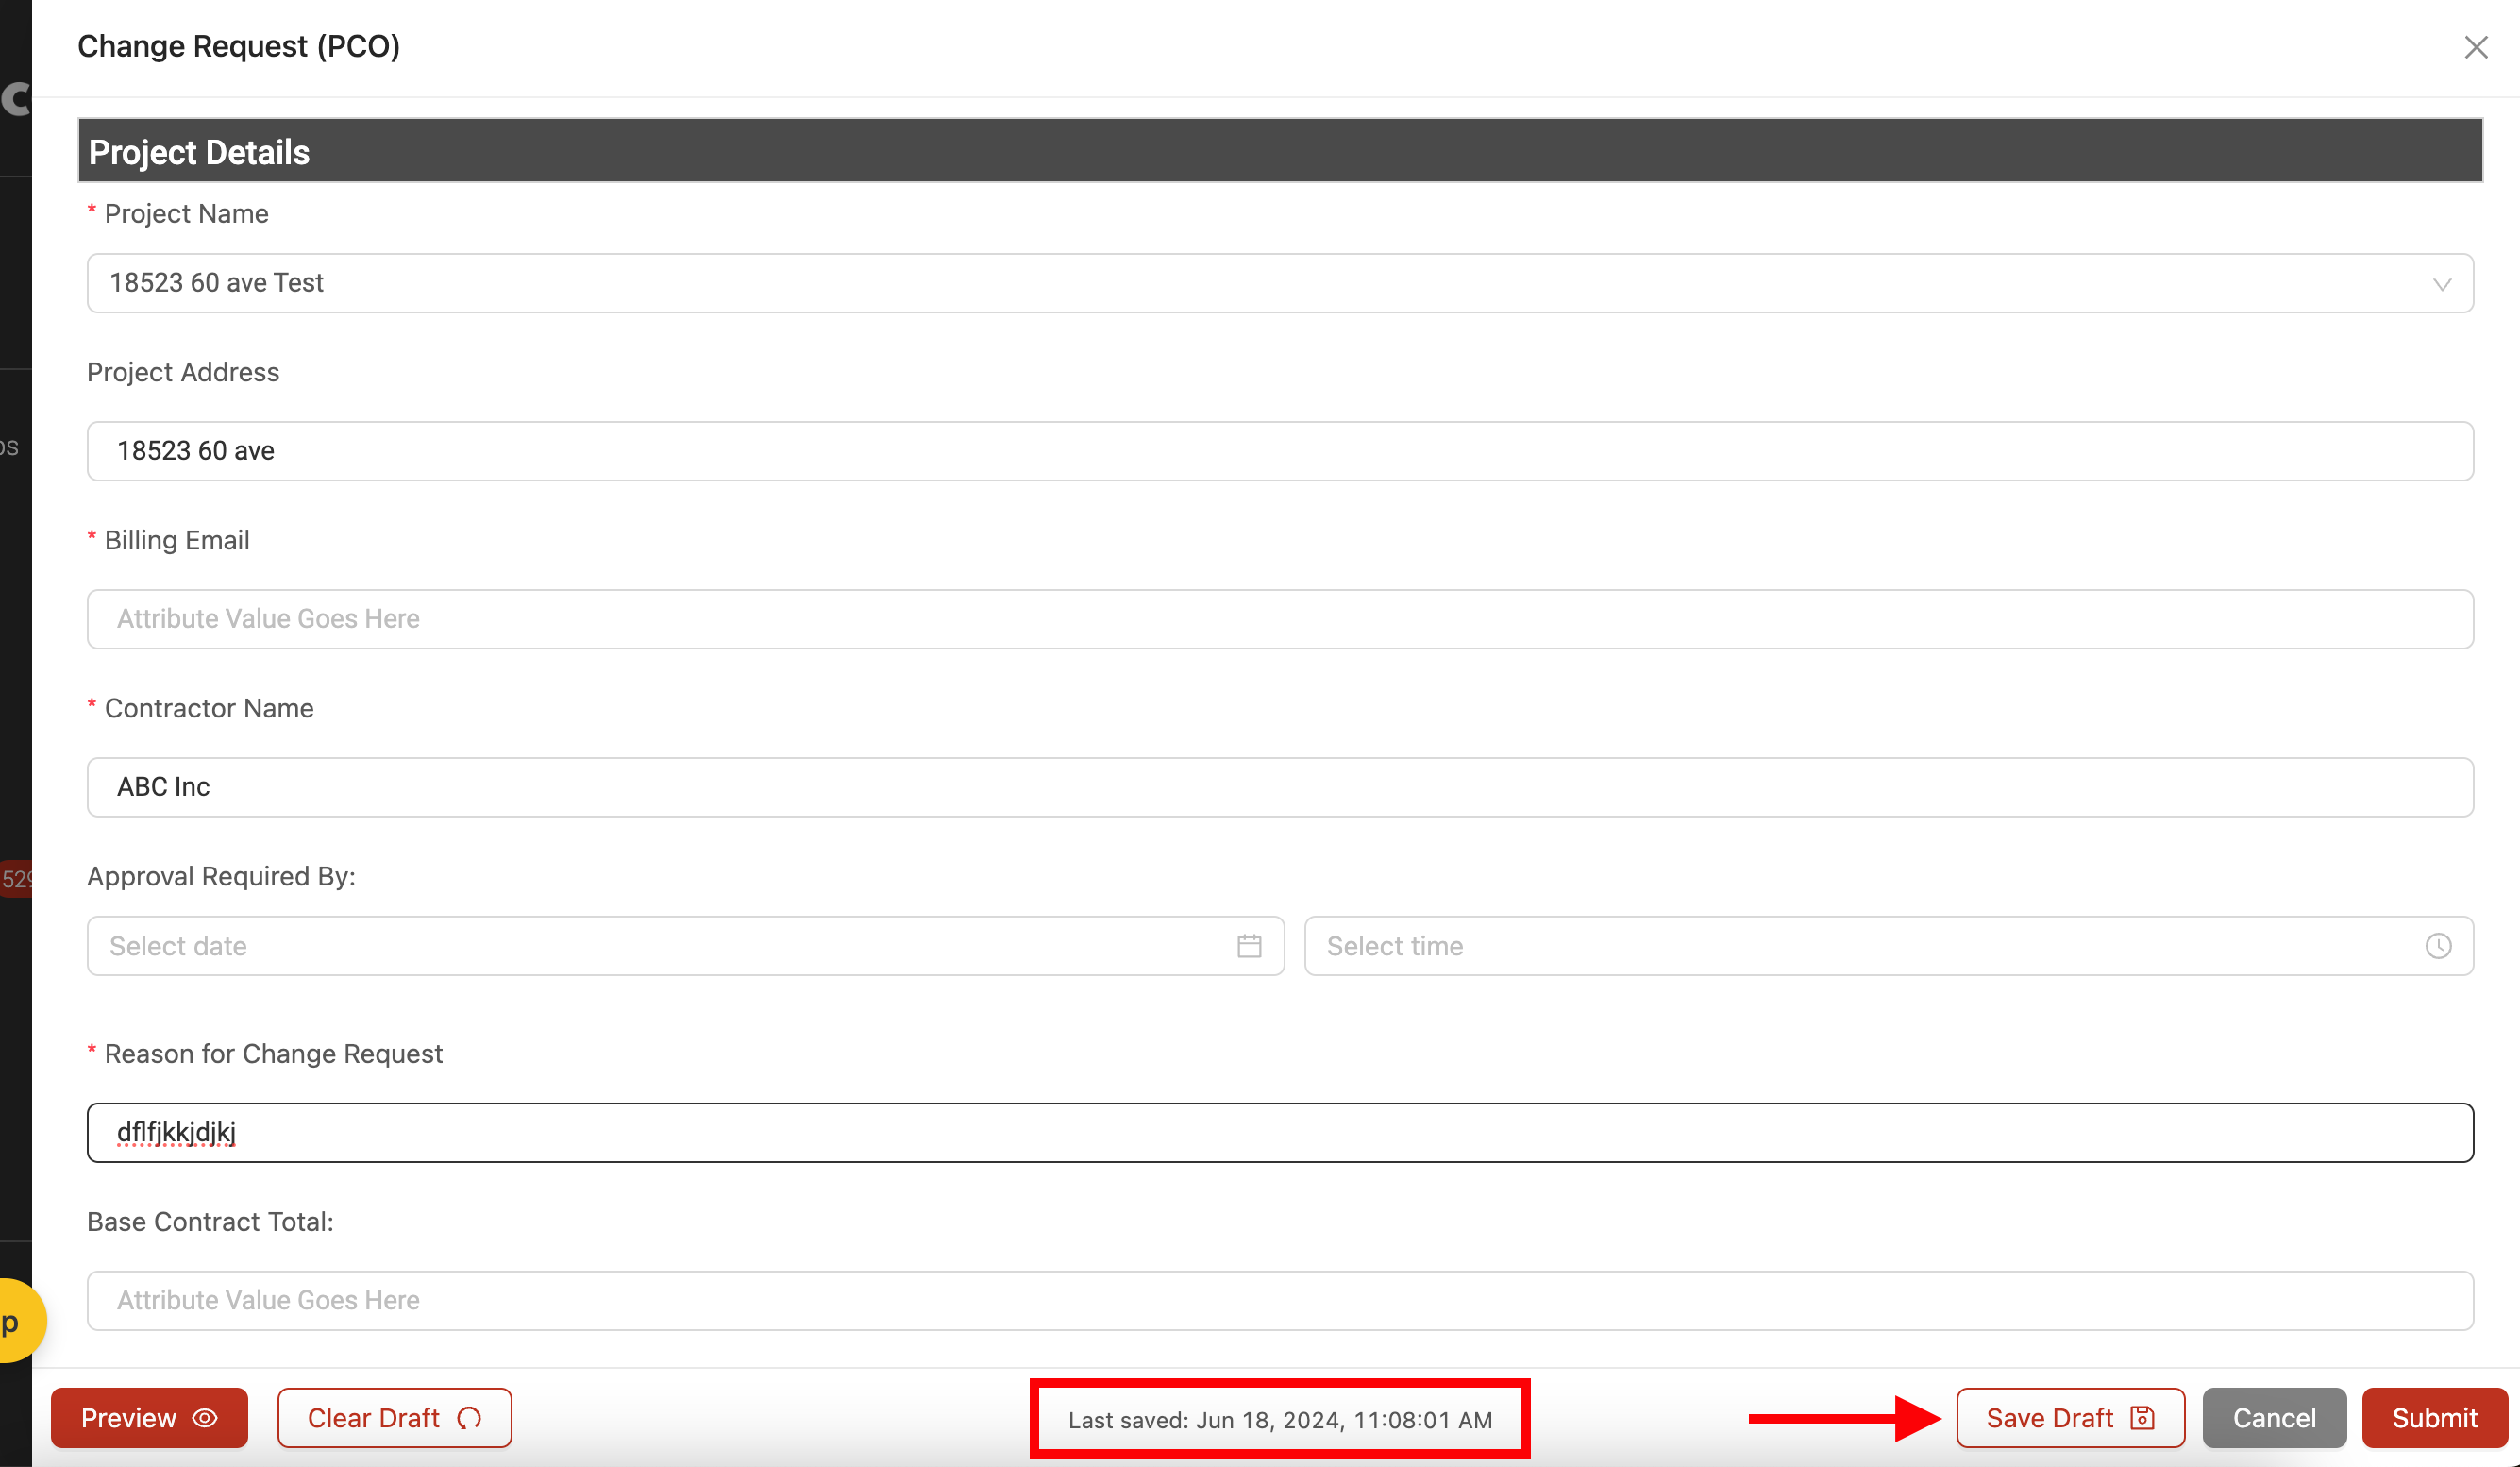
Saving and accessing drafts of a triggered form
When generating a form from a board card, a draft of the form can also be saved manually and will also be auto-saved as you work on it.
Board form drafts will then be saved in two places:
1. When opening the card's form slider, the slider will show a new 'Active Drafts' section where you can click to open any draft for the form.
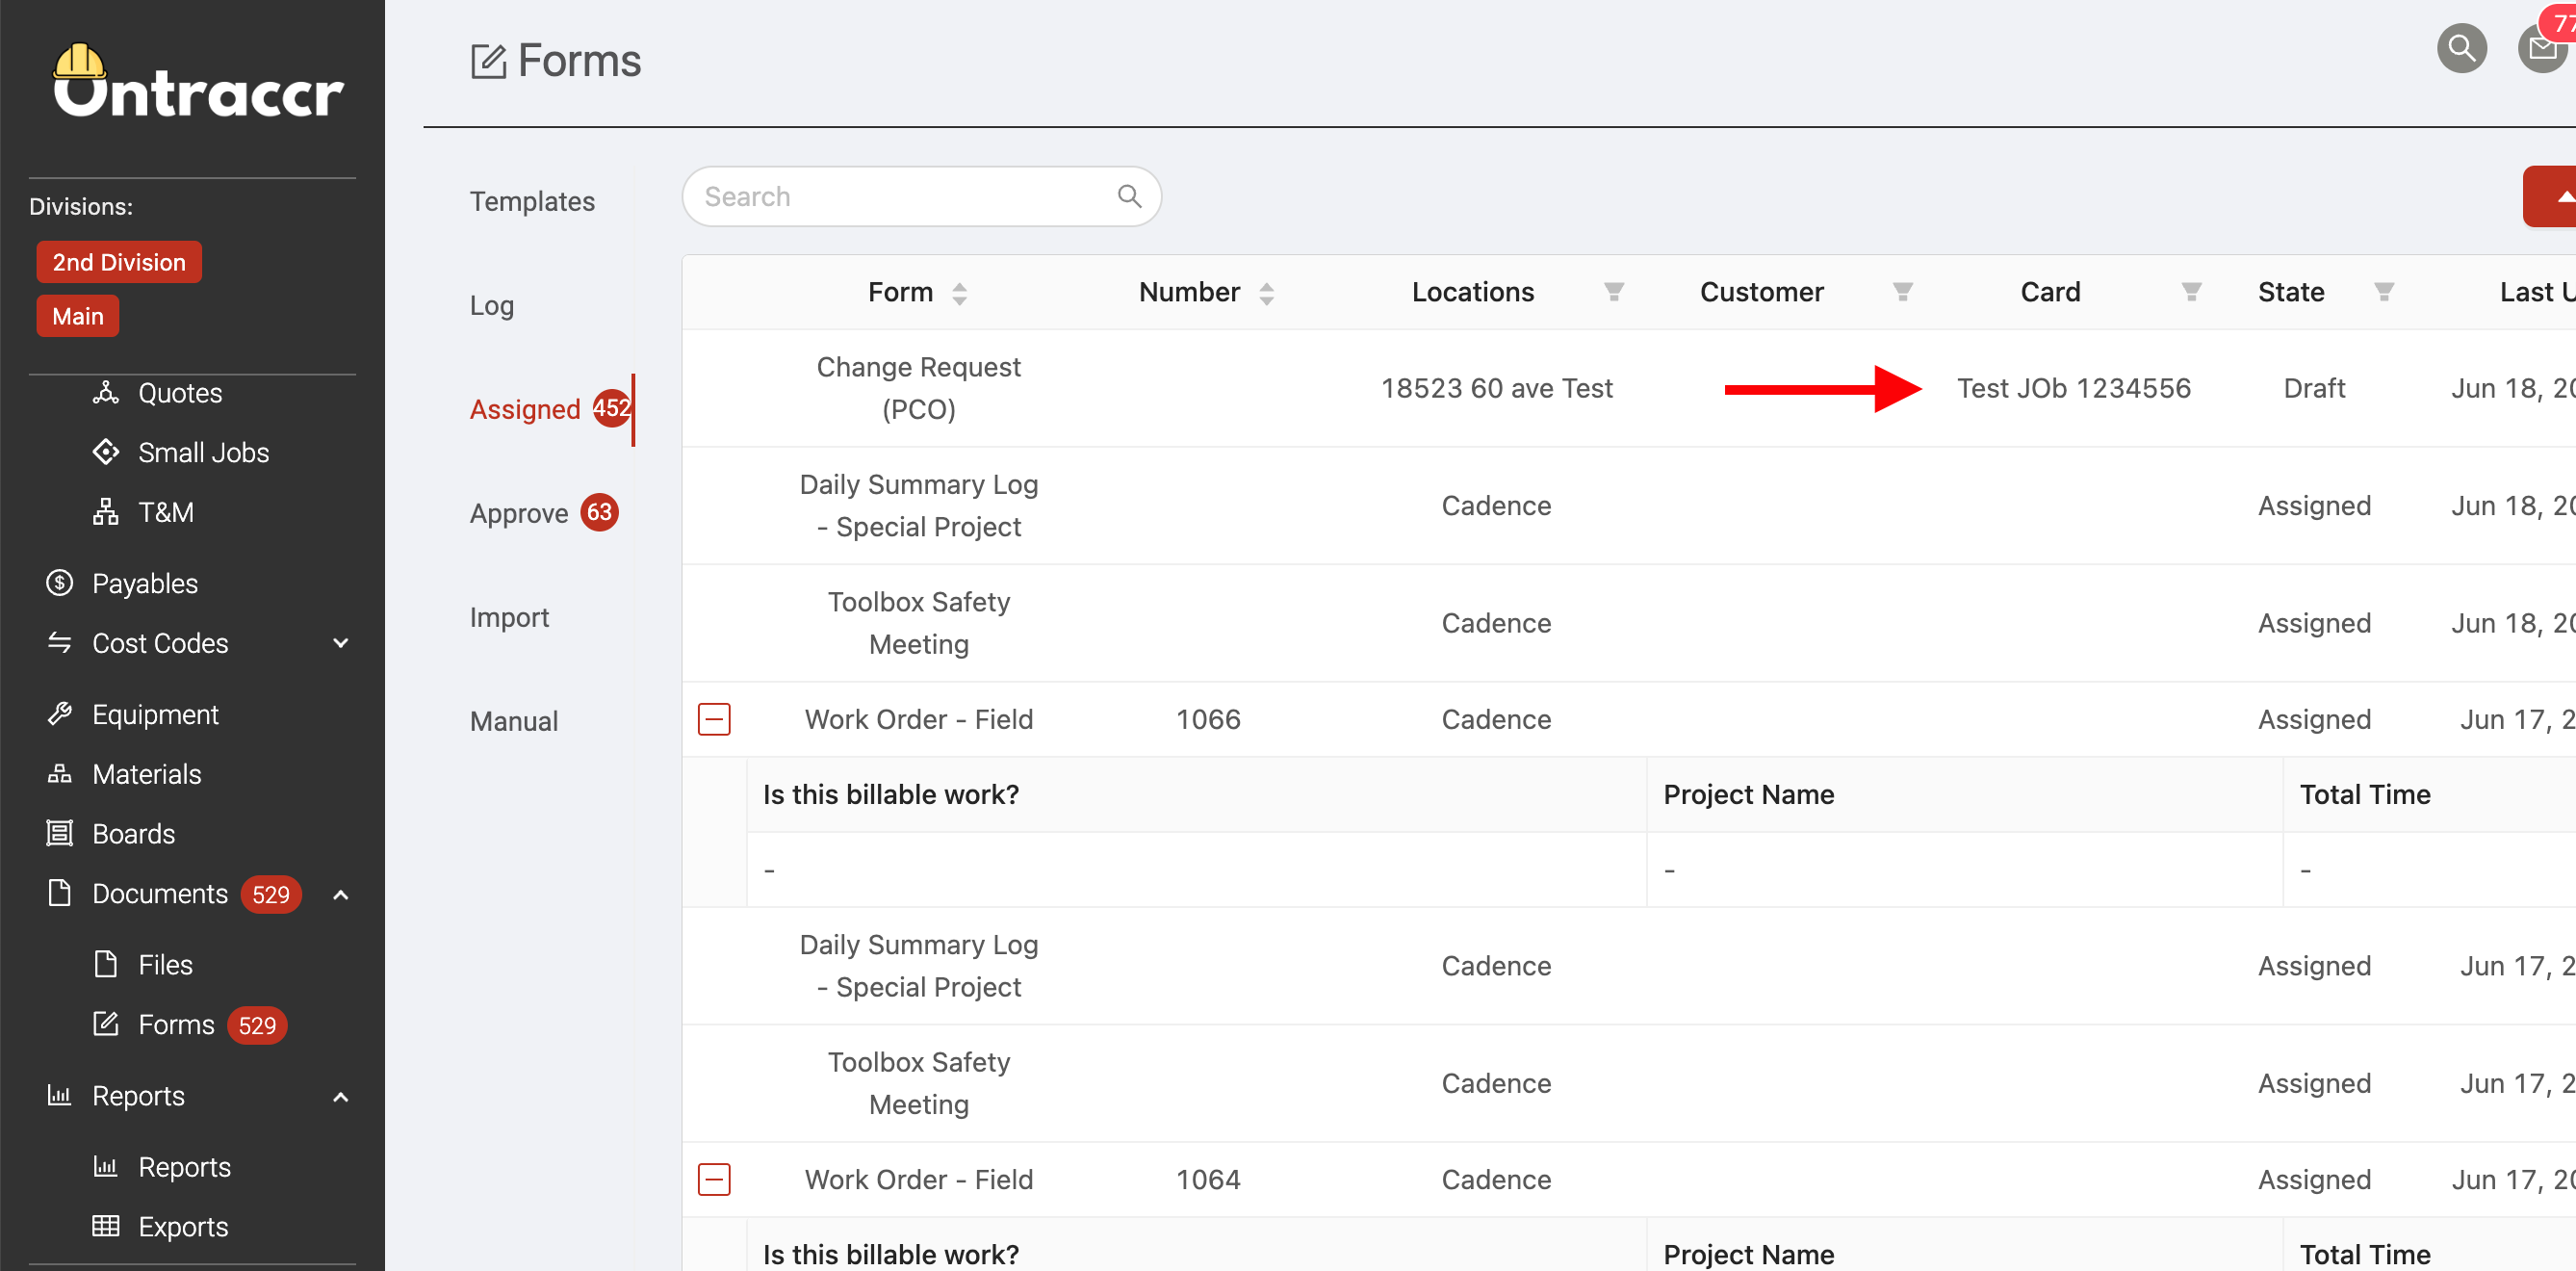
2. In the Documents > Forms > Assigned page, you'll see a draft listed for the specific card as well.